12
ASSEMBLY INSTRUCTIONS
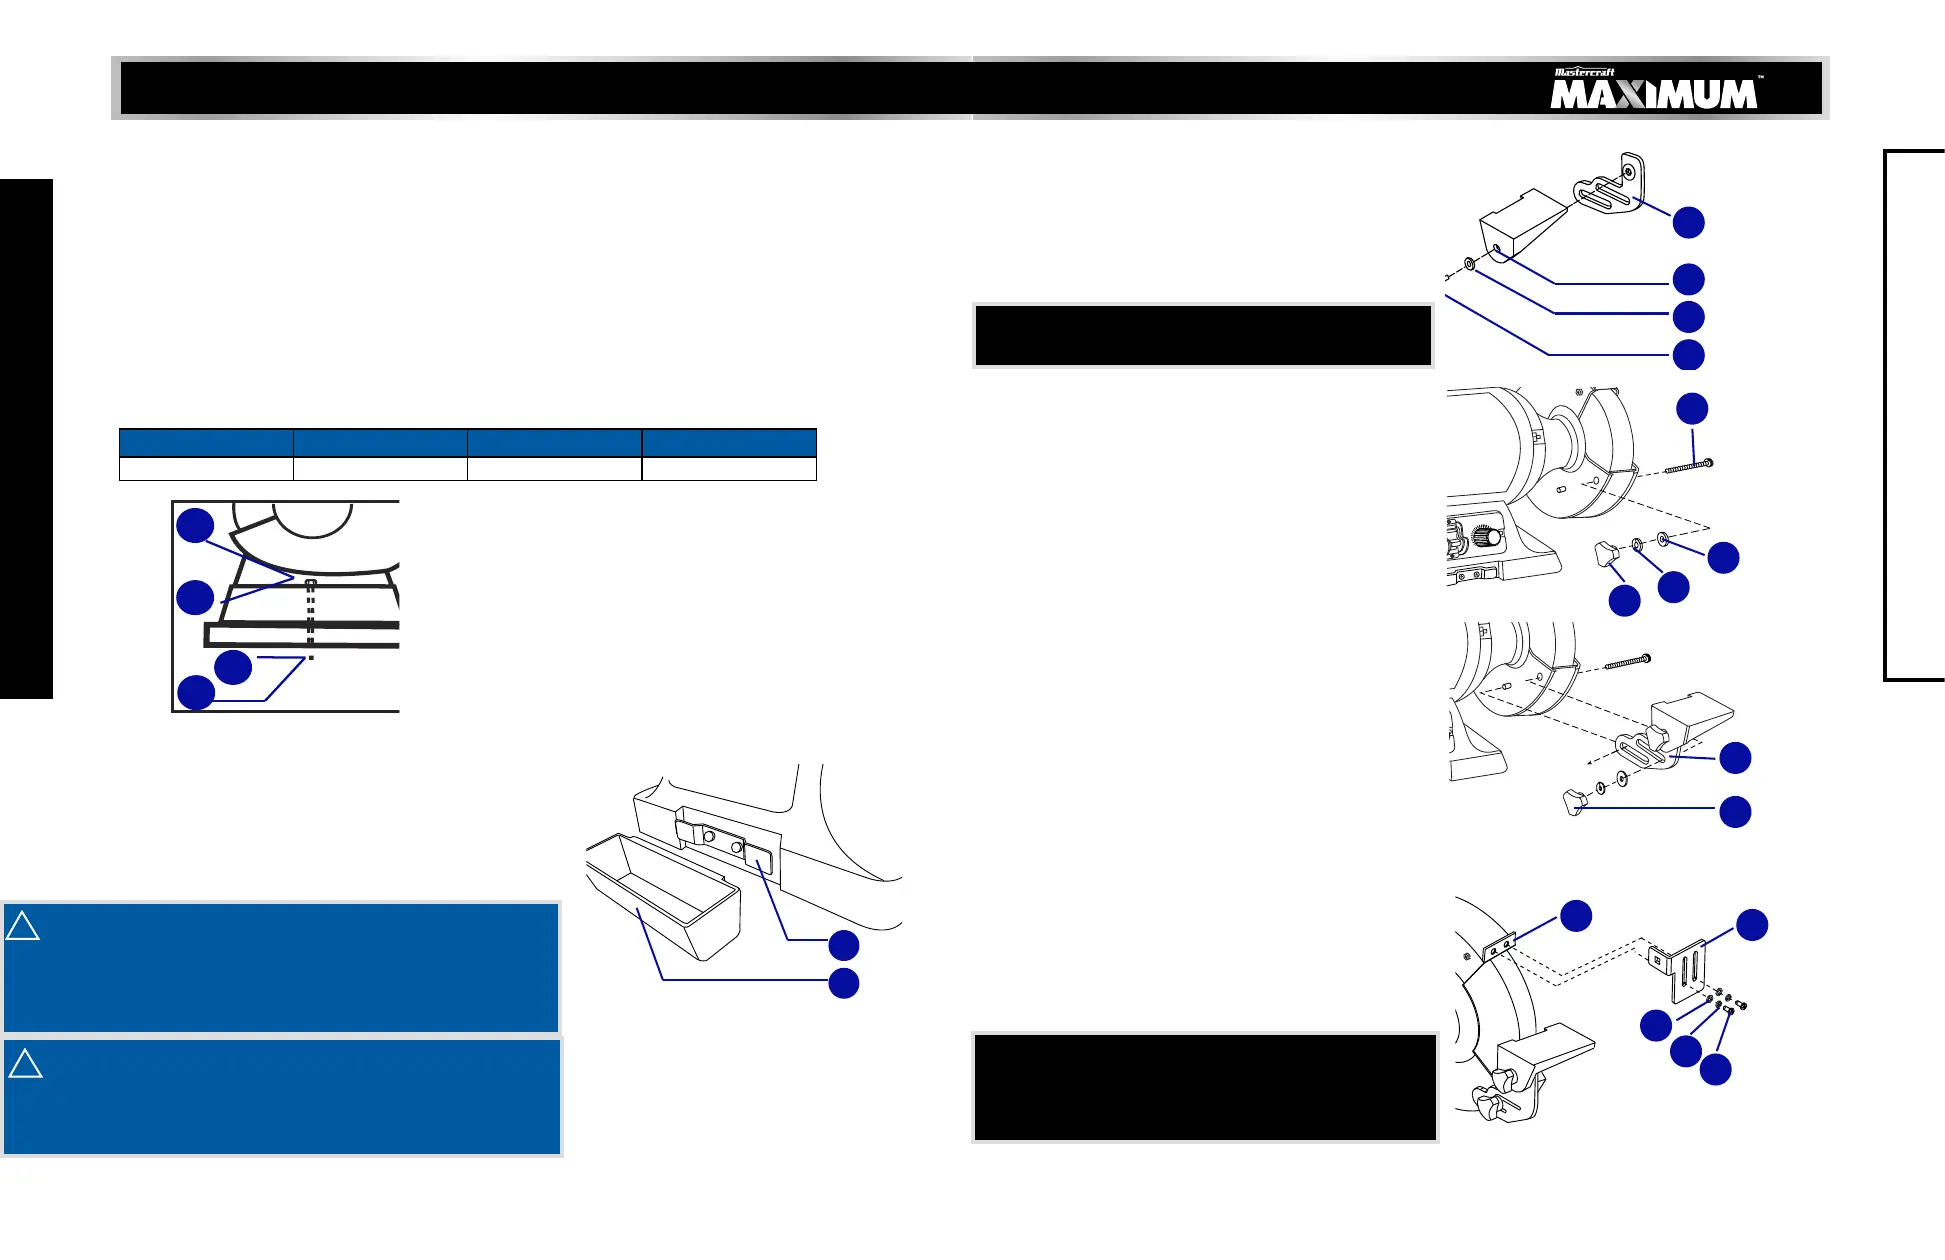
Mounting the Grinder to the Workbench
Before attempting to use this grinder, it must be properly mounted to a
workbench or grinding stand.
!
!
CAUTION:
• Position the grinder on the workbench.
• Mark the workbench through the two mounting holes located in the
grinder base.
• Drill holes in the workbench at the marks.
• Using two long bolts, washers, lock-washers and nuts, as shown (not
supplied), secure the grinder to the workbench.
1 2 3 4
Bolt Washer Washer Nut
Not included
INSTALLING THE COOLANT TRAY
Hang the coolant tray (1) on the clips (2).
1
2
model no. 055-3503-6 | contact us 1-800-689-9928
13
ASSEMBLY INSTRUCTION
INSTALLING TOOL RESTS
Insert the lock knob (1) through the flat
washer (2) and the right side tool rest (3)
to the right side tool rest mounting bracket
(4) as shown.
1
2
3
4
Remove the knob (1), lock washer (2) and
flat washer (3) from the carriage bolt (4) on
the lower portion of the wheel guard.
N
OF
F
L
H
1
2
3
4
Attach the tool rest assembly (2) to the
grinder as shown.
Replace the washers and the lock knob (1).
Repeat the procedure for the left side tool
rest.
1
2
1. Attach the right spark guard (1) to the
extended pad (2) of guard by using the
bolts (3), spring washers (4) and flat
washers (5).
2. Repeat for the left spark guard.
INSTALLING THE SPARK GUARDS
NOTE:
As the wheel wears down, the spark
guards must be re-adjusted to maintain
a 1/16"(1.6 mm) distance.
1
2
3
4
5
Bench grinders vibrate. Grinder movement during high-
speed rotation may cause injury or damage to the
workpiece or operator. Mount the grinder securely to a
sturdy workbench or grinding stand.
CAUTION!
To avoid injury, make sure all parts are
assembled and adjusted properly before plugging the
grinder into a power outlet and turning it on.
NOTE:
The grooved tool rest mounts on the
left side of grinder.
 Loading...