2017 OWNERS MANUAL / 362
when charging a battery may cause an electrical charge or even
an explosion of the battery, which could result in death or serious
injury.
MasterCraft recommends the use of a spiral-cell type battery, such
as the Optima brand. These batteries exceed other batteries in
holding and extending a charge.
INSPECT THE THROTTLE AND
SHIFT CABLES FOR KINKS,
WEAR AND INTERFERENCE
Some engine parts become very hot during operation. This inspec-
tion must be completed while the engine is cool to prevent burns
to your skin. Perform this task before starting the boat.
Step 1
Ensure the engine is OFF, the engine safety starting switch is dis-
connected and the throttle/shift control lever is in neutral.
Step 2
Open the engine compartment and locate the throttle and shift
cables. Follow each cable back under the floorboards and feel for
Loosen and remove the positive terminal connection. Remove
battery hold-downs and remove the battery from the boat. Clean
corrosion from the battery posts with a battery terminal cleaner.
Clean the battery with a water-and-baking-soda solution. Use care
to avoid allowing the solution to enter the battery vents. Rinse the
battery with fresh water.
Battery electrolyte fluid is dangerous. It contains sulfuric acid,
which is poisonous, corrosive and caustic. If electrolyte fluid is
spilled or placed on any part of the human body, immediately flush
the area with large amounts of clean water and immediately seek
medical attention.
Use a battery terminal cleaning brush to remove corrosion from
the inside of the battery terminals. Clean the terminals with a wa-
ter-and- baking-soda solution and rinse with fresh water.
Check the battery box that normally holds the battery in place to de-
termine whether there is evidence of battery fluid inside it. Battery
fluids are corrosive and can cause permanent damage to the bat-
tery box. If fluid is evident, wash out the box with the water-and-bak-
ing-soda solution that is used in cleaning the terminals. Rinse with
fresh water and dry with a cloth.
Reconnect the positive terminal first, then the negative. Tighten the
terminals. Coat both terminals completely with a thin covering of
marine dielectric grease. Be sure that the rubber boot covers the
positive terminal completely.
NOTE: The boat’s engine is designed to work with the standard
electronics installed in the boat. Adding other electrical
components or accessories can change the way the fuel injection
controls the engine or the overall electrical system functions.
Before adding electrical equipment, consult an authorized
MasterCraft dealer’s service department. Otherwise, the engine
may not perform properly.
Add-on equipment may adversely aect the alternator output or
overload the electrical system. Such damage may not be covered
by the warranty.
If a replacement battery is required, be certain to select a marine
battery with at least seven-hundred-fifty (750) cold-cranking-amps
at zero degrees (0
o
) Fahrenheit. Before disconnecting the battery,
make sure the ignition key and all accessories are in the OFF
position. Also remember to re-attach the cables in the proper order,
with the positive cable connected to the positive [+] post and the
negative cable connected to the negative [-] post.
When charging, batteries generate small amounts of dangerous
hydrogen gas. This gas is highly explosive. Keep all sparks, flames
and smoking well away from the area. Failure to follow instructions
Inspect the Battery Connections
and Hold-Downs
Because poor connections or hold-downs may result in erroneous
voltmeter readings, MasterCraft recommends doing this before
starting the boat.
Step 1
Ensure the engine is OFF and the engine safety starting switch
disconnected. Be certain that the throttle/shift control lever is
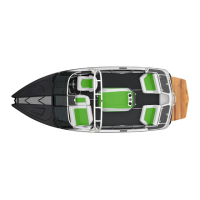
in neutral. Locate the battery. Batteries are placed in a variety of
locations, depending on the model. Check under the observer seat
or behind the rear seat.
Step 2
Check that the battery post connections are clean and tight. If not,
loosen and remove the negative terminal connection first. Be care-
ful not to touch the positive terminal with the wrench.