6
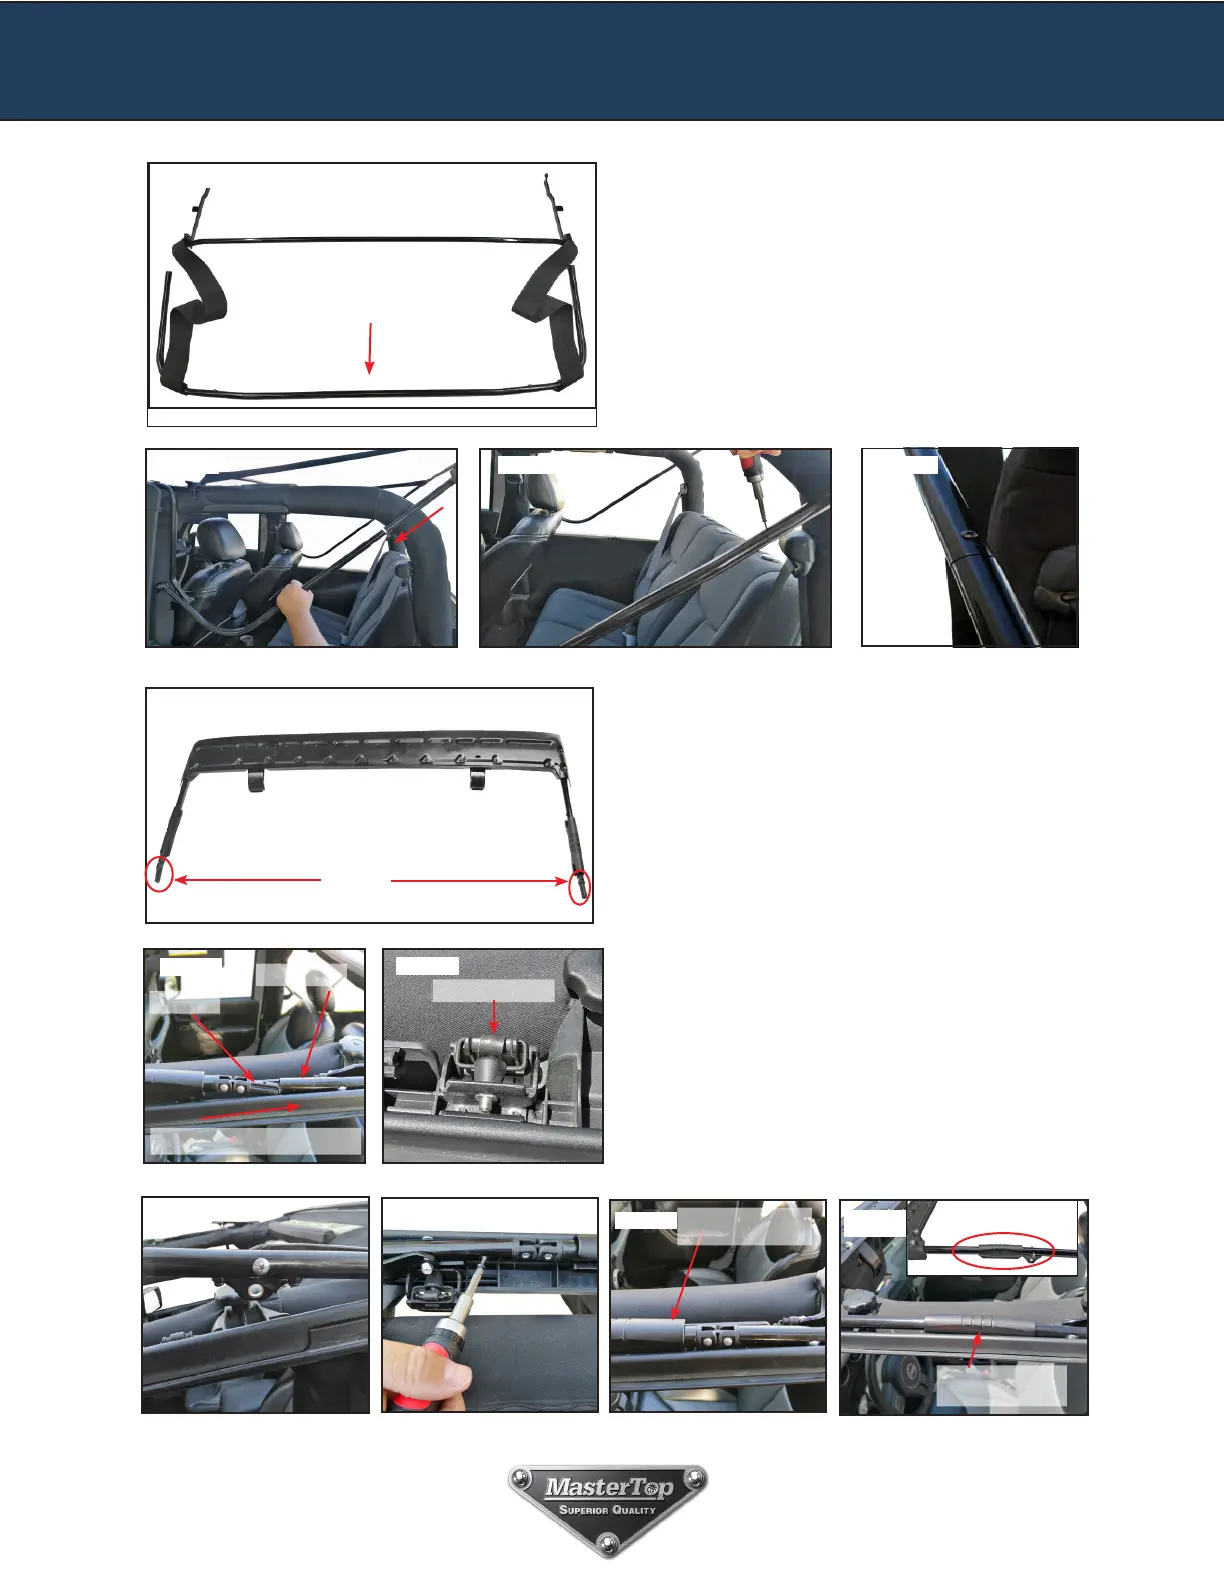
FIG 48
Step 6: Continued: Install Rear Bow Legs to Bow
Mounts and Rear Bow
With the two Rear Bow Legs installed to the Bow
mount Bracket, locate the rear bow called out in FIG
48. On the Bow leg there is a set screw that needs to be
removed. You will use this screw to mount the Bow Legs
to the Rear Bow. With the help of a friend, lift the rear bow
from resting on the roll bar legs and slide it into the rear
bow leg (FIG 49). Once both sides are secure, use
the set screw to mount the rear bow leg and rear bow
(FIG’s 50 & 51)
FIG 51FIG 50FIG 49
Step 7: Install Over Door Bows to Front Header
Assembly
Locate the Fabric/Header (If you installed the soft top
fabric. If fabric is not installed, locate Header assembly) as
shown in FIG 52.
Insert the “knuckle” installed on the Header Assembly into
the Over door Bow (FIG 53). Secure the bows into the door
surround clip placing the round hole into the door surround
clip (FIG 54 & 55). In the driver’s side bows assembly,
there is a screw, installed for shipping. Unscrew it a bit
using a Phillips head screw driver to place this bow and
tighten to the Door Surround as shown in g 55.
Slide the bow sleeve over the knuckles as shown in FIG 56
& 57. Repeat this procedure on the opposite side.
FIG 52
FIG 53
FIG 55
FIG 56
FIG 57
Slide the sleeve over
the knuckle
Header Sleeve Placed
over Header Leg
Over door Bow
Knuckle
Slide Knuckle end into side bow
Knuckle
FIG 54
Door Surround Clip
FIG 55