18
4.8 INSTALLATION STEP-BY-STEP
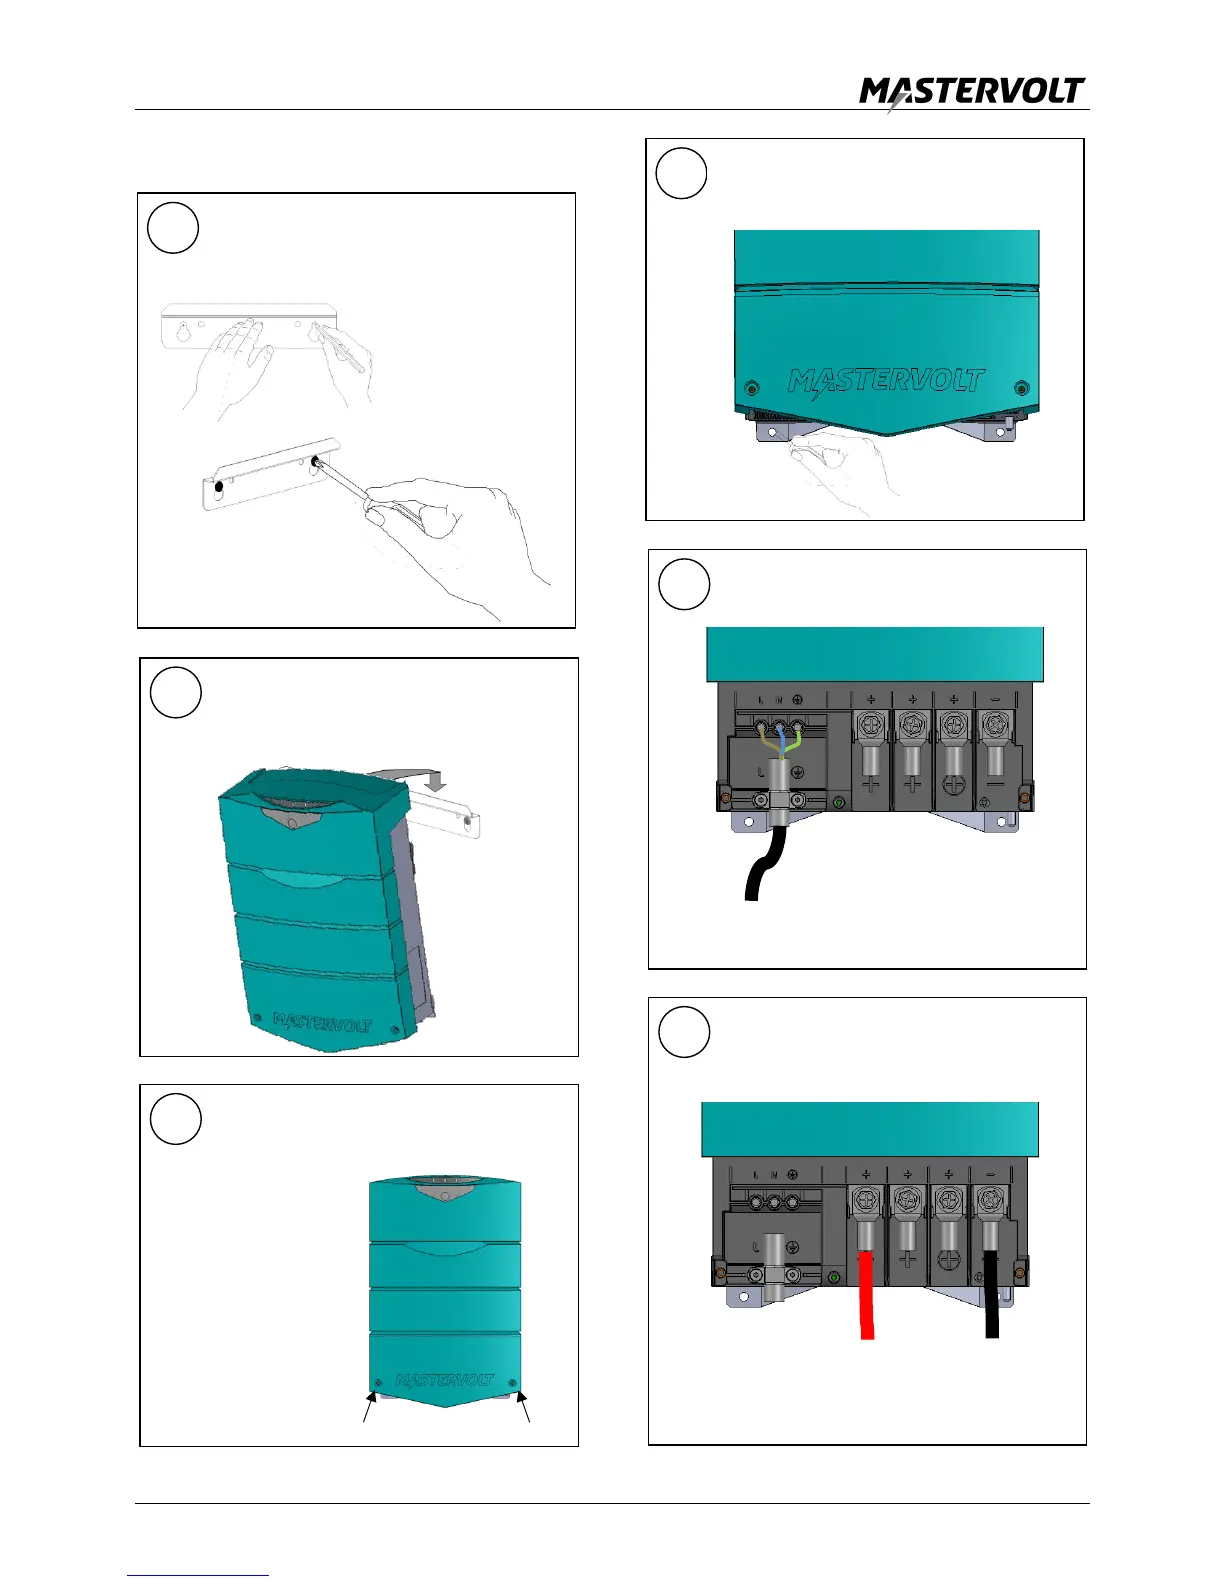
Mark the position of the mounting spots by
using the mounting bracket. Then Fix the
mounting bracket to the wall.
Place the ChargeMaster over the mounting
bracket and then move it downwards until it is
suspended from the mounting bracket.
Open the
connection
compartment by
loosening the two
screws.
Fix the enclosure to the wall by fastening two
screws at the lower side of the enclosure as
well.
Connect the wiring to the screw terminals.
Fasten the cable with the cable clip.
Fit crimp-on ring terminals to the DC-cables.
Connect the DC-cabling of battery bank 1,
positive to +, negative to – .
If needed repeat steps for output 2 and 3.