§3.3 Equipment Connection
Operation Steps:
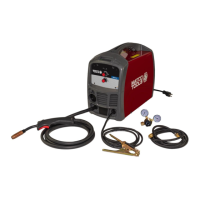
1. Connect the NEMA plug power cord of welding machine to matching electric outlet.
2. Connect input shield gas hose from regulator to input fitting on back of machine.
3. Connect the negative (-) cable clamp to the work piece (base metal).
4. Install spool of welding wire on spool holder with tension spring to hold in place.
5. Confirm drive roll V-groove and torch contact tip size “match” wire diameter on spool.
6. Lift idler roller arm and guide wire over V-groove on drive roll and into torch liner.
7. Secure idler roller arm in place and tighten tensioning spring.
8. Remove gas nozzle and contact tip from torch neck.
9. Set wire speed control to 100%, turn ON machine and, holding torch neck away from
face, push trigger to feed wire into torch cable through torch neck.
10. Turn machine OFF and replace contact tip over wire.
11. Install gas nozzle and clip wire to ¼” from tip.
12. Turn on shield gas valve and set regulator flow rate.
13. Ready to weld.