THANK YOU FOR USING OUR PRODUCTS
§5.2 Troubleshooting
All welding machines have undergone 100% inspection before leaving the factory.
Disconnect power cord from LINE before any trouble shooting and only professional
maintenance personal should perform any action on the machine!
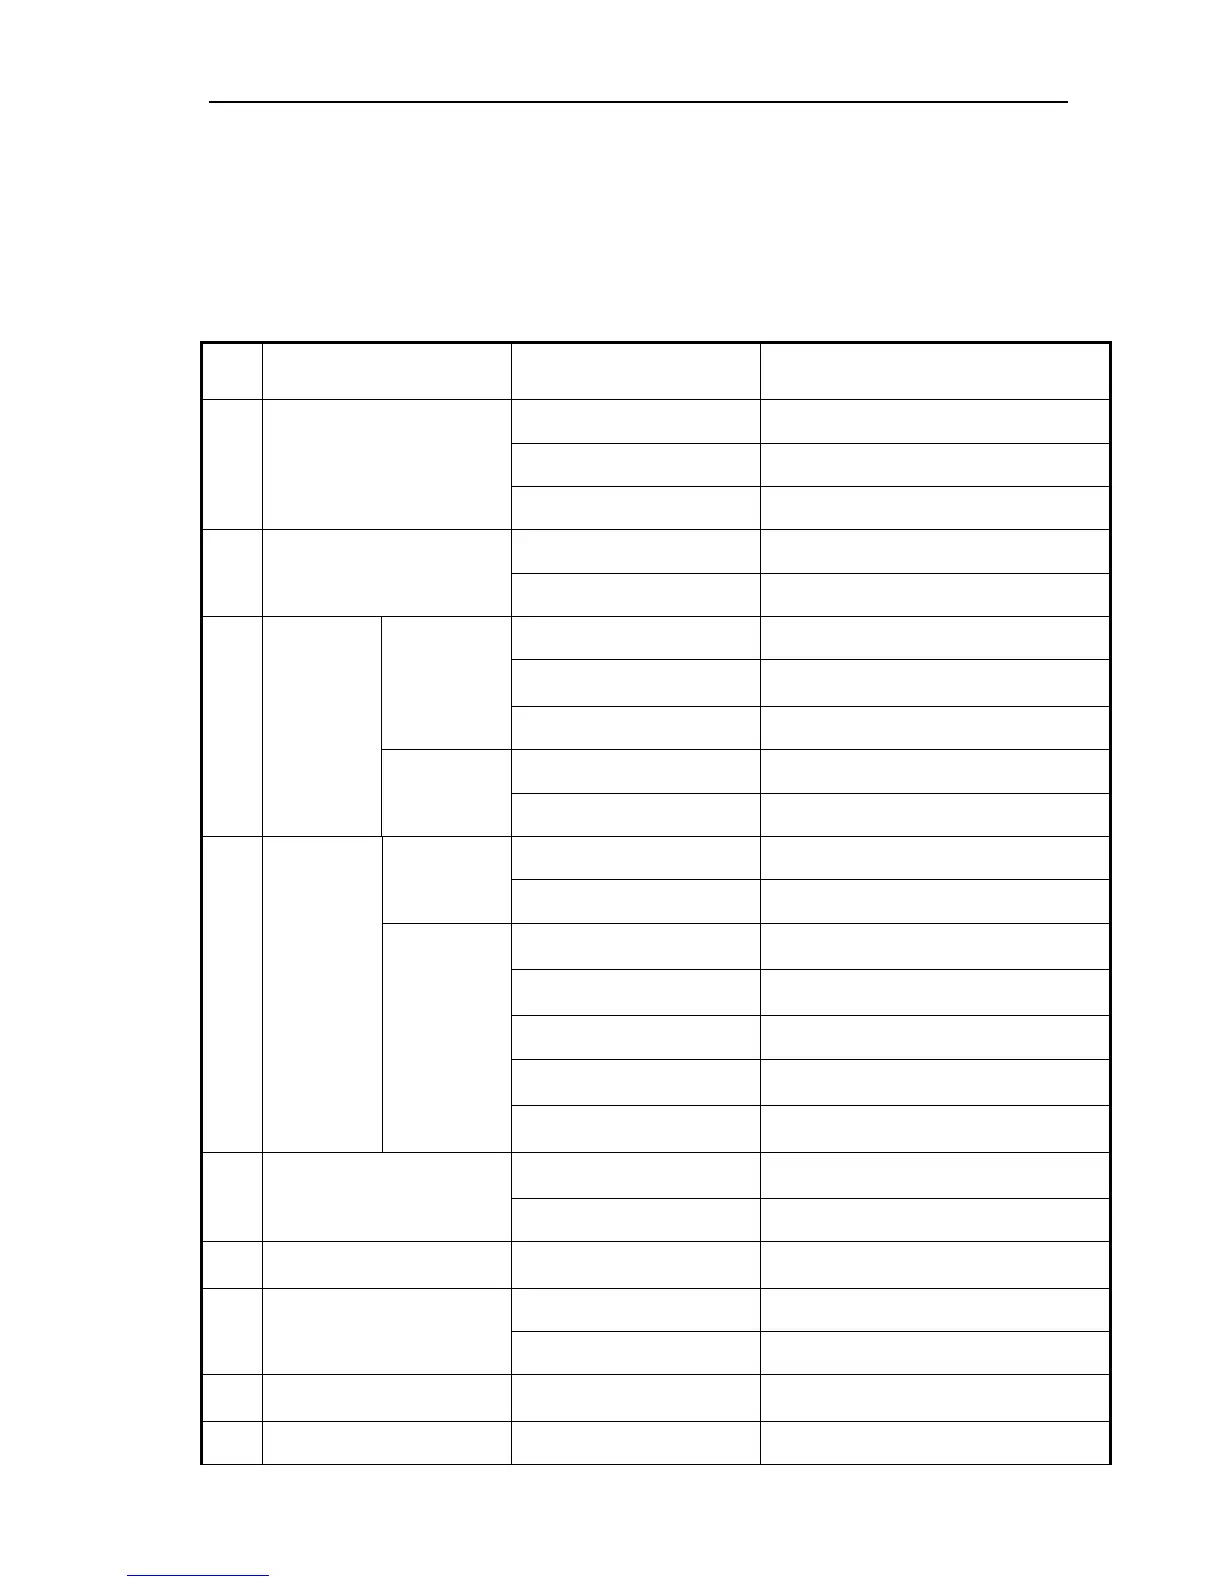
Item Trouble Reasons Solution
1
Power switch “ON” but the
power light not illuminated
Breaker open or damaged Check circuit breaker
Power switch damaged Replace switch
Power cord damaged Replace cord
2
Machine over-
functioning
Fan damaged Clear obstruction or replace
The cable is loosen Secure the cable tightly
3
Depress
trigger
switch, no
output
shielded gas
No output
gas when test
gas
No gas in cylinder or closed Open valve or fill cylinder
Low gas flow or leaks in
hose and fittings
Adjust regulator flow, secure fittings
Gas solenoid valve problem Check and replace if required
Output gas
when test gas
Control switch damaged Repair the switch
Control circuit damaged Check the board
4
Depress
trigger
switch, no
wire feed
Wire feeder
doesn’t turn
Motor damaged Check and replace
Control circuit damaged Check and replace wire feed board
Wire feed
turns but no
wire feed at
nozzle
Welding wire skids over
drive roller wheel
Check tension arm & tighten
Welding wire skids over
drive roller wheel
Confirm roller groove matches wire dia.
Drive roller worn Replace
Wire won’t feed through
gun with tip removed
Replace torch wire conduit liner
Wire won’t feed through
gun with tip installed
Wrong size or worn contact tip, change
5
Output cable is connected
incorrectly or loose terminal
Screw it down or change it
Control circuit damaged Check the circuit
6
Welding stops and over-
temp light illuminates
Machine has reached duty-
cycle limit or internal dust
Stop welding for 10-minutes to allow
cool down. Auto-reset will turn lamp off
7
Welding current is run away
and can be not controlled
The potentiometer damaged Check or change it
The control circuit damaged Check the circuit
8
The crater current can be not
adjusted
The PCB damaged Check it
9 Weld is inconsistent Inadequate or wrong gas Change cylinder to correct