34
END
END
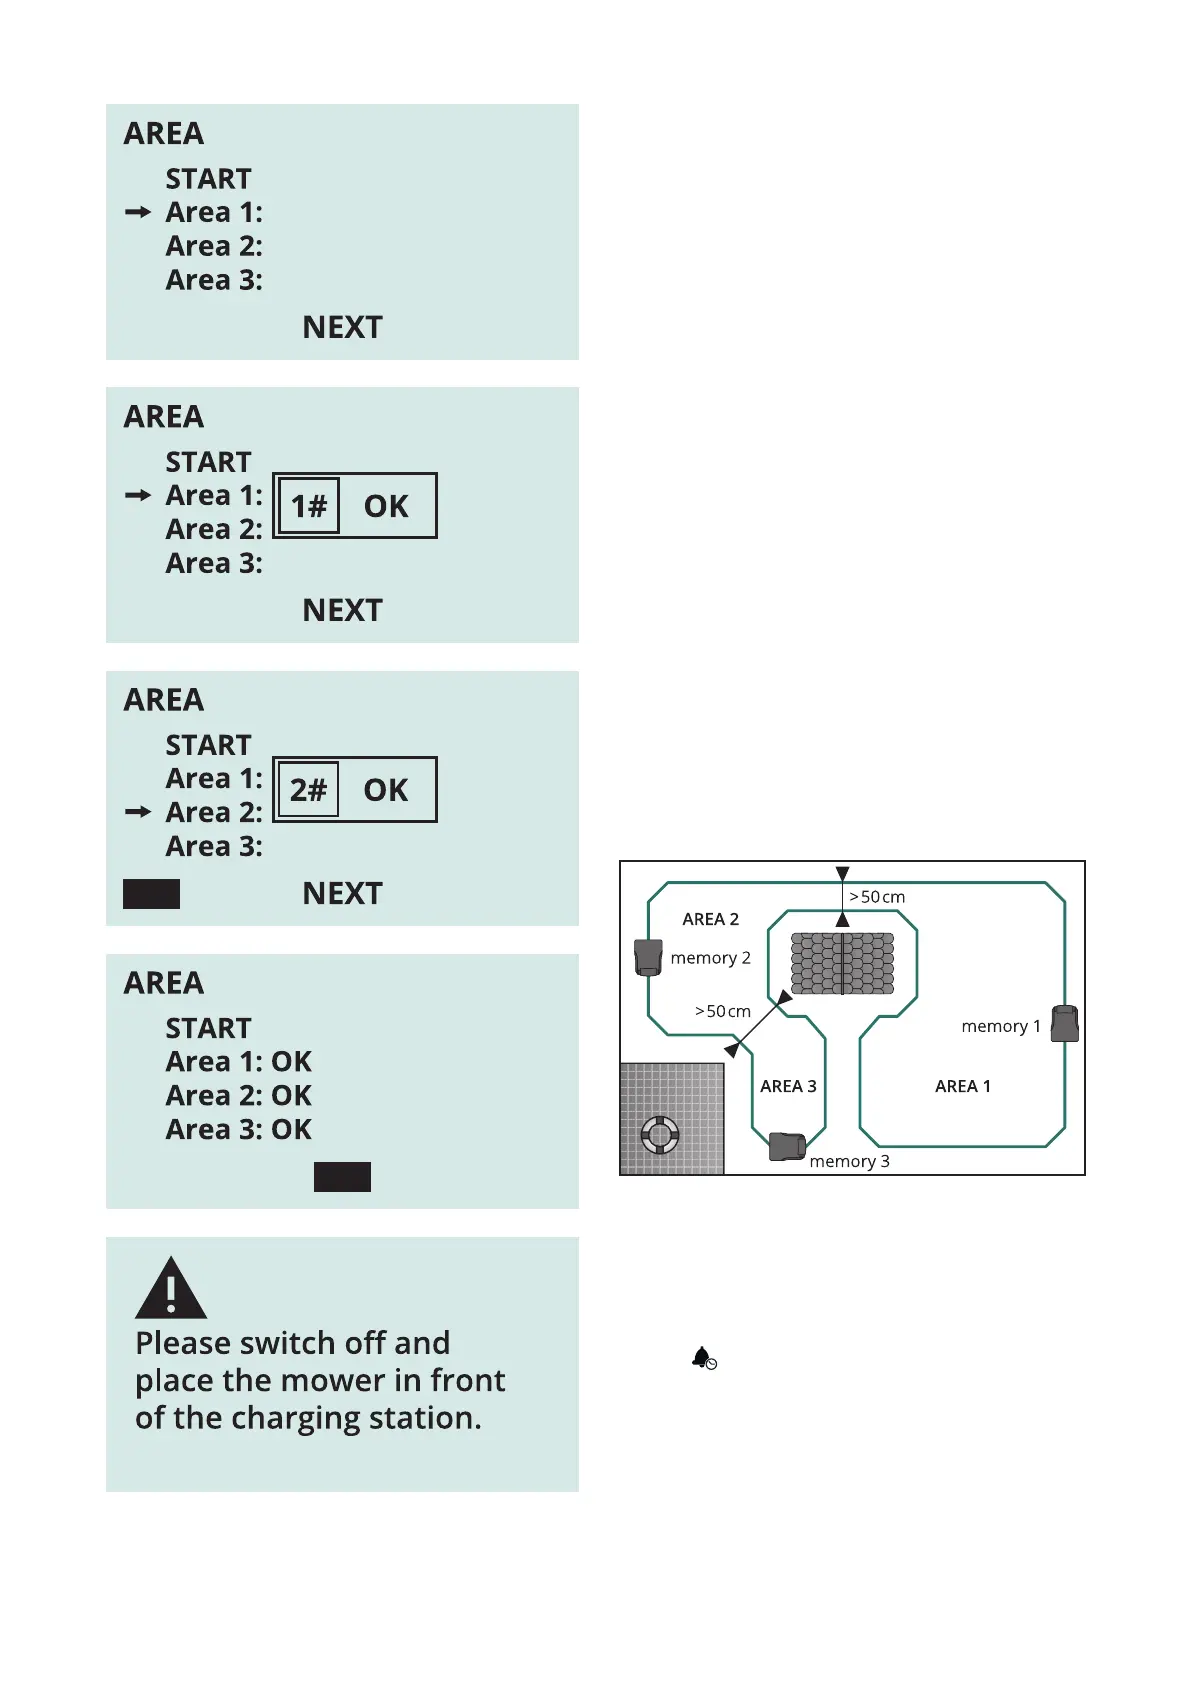
• Please refer to the attached images for Memory
point 1, 2, 3 separately.
Notice
a) It is better to set the memory point in the middle
of the line between two corners
b) The best position of the memory point is on the
fence line which passes the center of a small area.
F7RHQVXUHWKHPRZHUZDONLQJVPRRWKO\WKHPD[
altitude difference between each two small areas
VKRXOGQRWH[FHHG FP 7KH PLQLPXP GLVWDQFH
between two fence line should be more than
50cm.
d) The subarea function enforces the robot mow-
er to mow from one subarea to another, but it
doesn’t mean the robot mower always mow with-
in the subarea, there is possibility that it will go to
the other two.
e) Under subarea function, when battery is low and
robot mower go back to charging station auto-
matically, after charging finished, the mower will
continue mowing by itself from where it stopped.
But if robot mower stopped for mechanical prob-
lem, after fully charged, the mower will not go out
mowing according to the setting, it will start mow-
ing the second day from area one to area three.
SCHEDULE in Area 1,2,3 mode
• Move the mower back to charging station, put the
mower on the fence line and facing the charging
station.
• Select
, press OK to enter into the “SCHEDULE”
interface.Choose “Work mode” and select “Area
1,2,3” mode.
UK
 Loading...