6
5
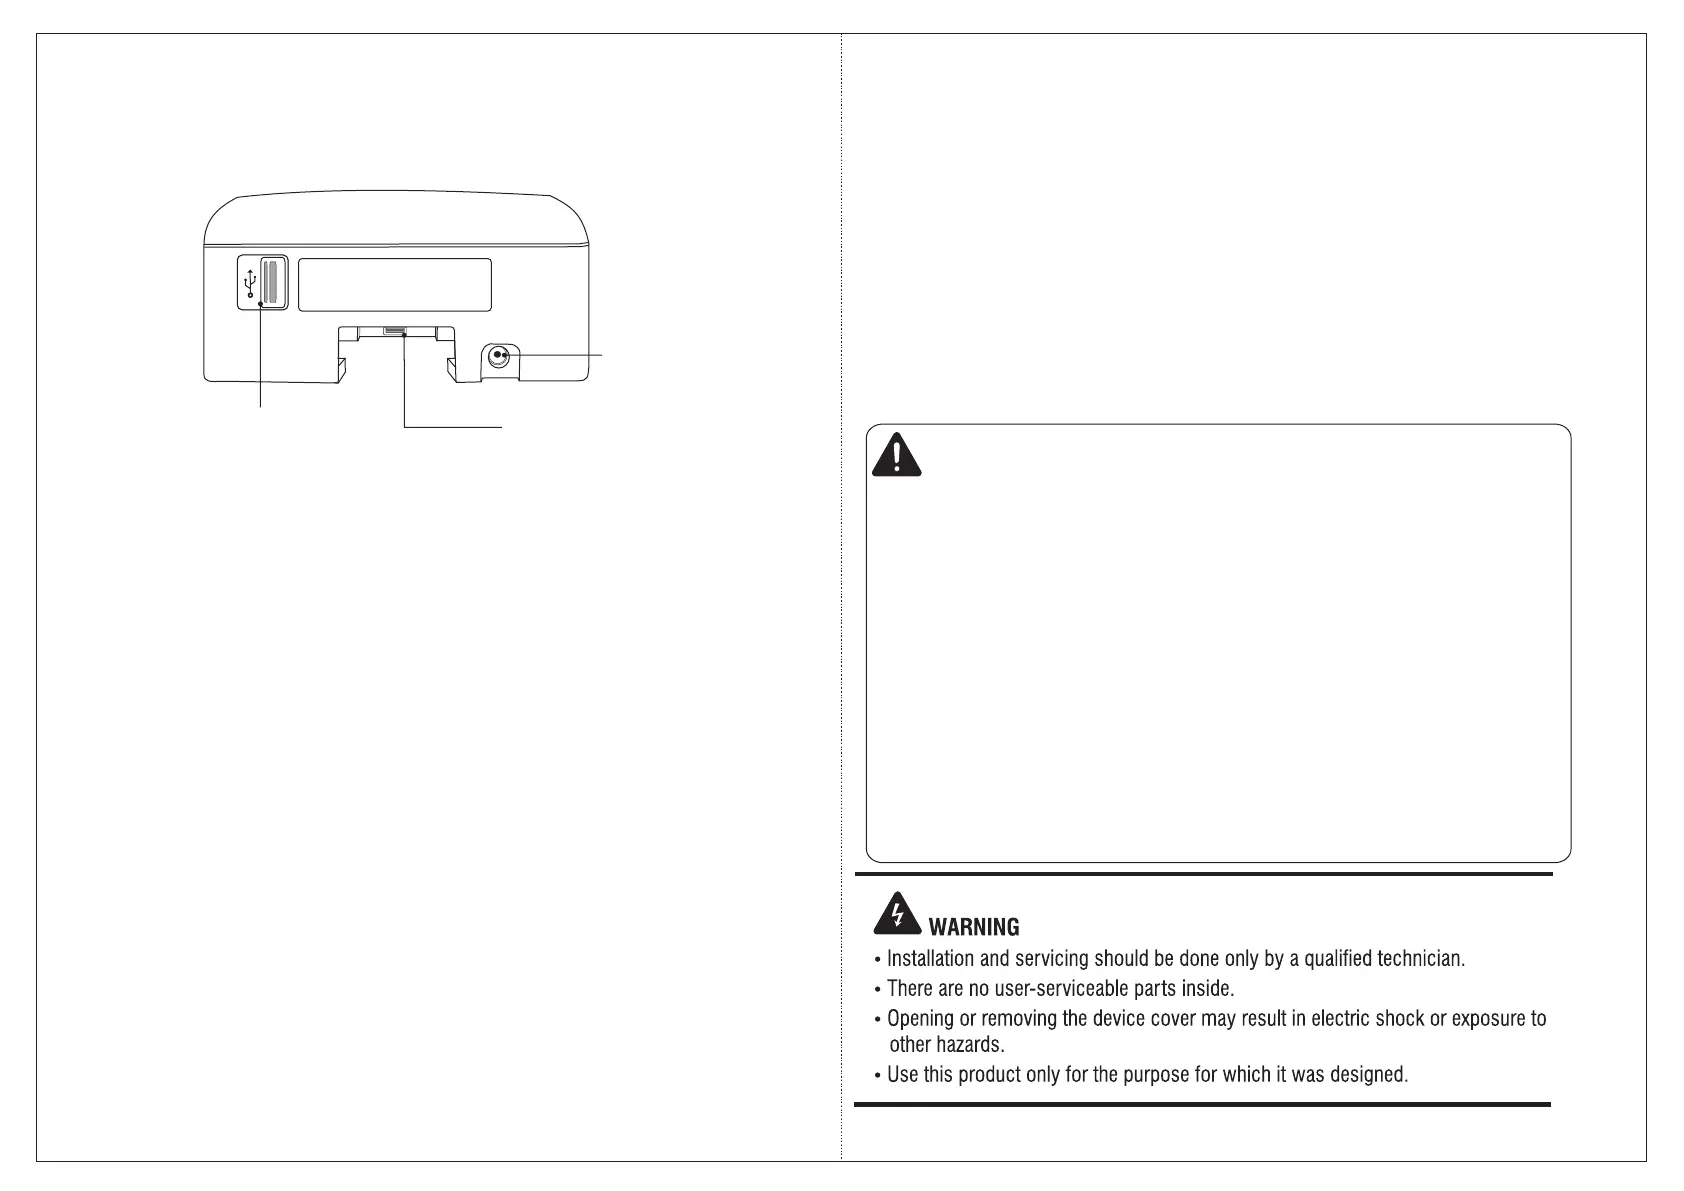
Mounting Screw
USB Port (For Data Transfer,
Firmware upgrade, Configuration
upgrade, downloading event logs)
USB Port for Data Card
COSEC DOOR- Bottom View
What Your Package Contains
Ÿ COSEC DOOR Unit
Ÿ Mounting Plate
Ÿ Power Adapter 12V DC, 2 Amp
Ÿ Four Screws M 7/30
Ÿ Four Screw Grips
Ÿ A Threaded Screw M 3x6
Ÿ Power Supply Cable with DC jack
Ÿ Ethernet Port Cable with RJ45 plug
Ÿ Auxiliary Port Cable
Ÿ Electromagnetic Lock Cable
Ÿ Exit Switch Cable
Things You Will Need
Ÿ A power hand drill
Ÿ A wire stripper
Ÿ A screw driver set
Ÿ Insulation tape
Ÿ
Ÿ Access to the COSEC Server
Ÿ A Stand-alone Computer with a
Web Browser to change the
Network Settings of the Door
Controller.
Preparing for Installation
Step 1: Unpacking the DOOR
Ÿ Unpack COSEC DOOR and check your package contents.
Ÿ Select a Location. It must be a flat surface such as a wall, close to the access
point (door).
Ÿ You can mount the COSEC DOOR directly to the wall or to an electrical box
recessed in the wall (recommended).
Ÿ Recommended height from ground level: 4.5 to 5 feet.
Ÿ CAUTION
ŸDo not install the device:
Ÿ In very hot, cold and humid environment temperatures
Ÿ Near heating/air conditioning equipment
Ÿ In dusty environment
Ÿ In direct sunlight
Ÿ Under direct light of incandescent or halogen lamps
Ÿ Near infra-red radiation emitting equipment
Ÿ Where ferromagnetic field or noise is induced
Ÿ Near volatile inflammable materials or inflammable goods such as drapes
Ÿ Where volatile gas and/or inflammable gas is created