7
• Long hair and loose clothing can be hazardous
when the work piece is rotating. Wear personal
protective gear such as a hair net and tight-tting
work clothes.
• Saw dust and wood chips can be hazardous.
Wear personal protective gear such as safety
goggles and a dust mask.
• The use of incorrect or damaged mains cables
can lead to injuries caused by electricity.
• Even when all safety measures are taken, some
remaining hazards which are not yet evident may
still be present.
• Remaining hazards can be minimized by
following the instructions in ”Safety Precautions,
Proper Use” and in the entire operating manual.
• Do not force the machine unnecessarily:
excessive cutting pressure may lead to rapid
deterioration of the blade and a decrease in
performance in terms of nish and cutting
precision.
• When cutting aluminum and plastics always use
the appropriate clamps: all work pieces must be
clamped down rmly.
• Avoid accidental starts: do not press the start
button while inserting the plug into the socket.
• Always use the tools recommended in this
manual to obtain the best results from your
cutting-o machine.
• Always keep hands away from the work area
when the machine is running; before performing
tasks of any kind release the main switch button
located on the handgrip, thus disconnecting the
machine.
• Always keep hands away from the work area
when the machine is running; before performing
tasks of any kind release the main switch button
located on the handgrip, thus disconnecting the
machine.
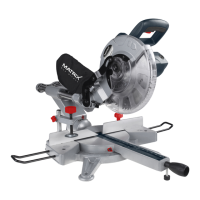
Machine components (Fig. 1)
1. Pullover carriage
2. Upper blade guard
3. Trigger switch
4. Handle
5. Motor
6. Lower blade guard
7. Tungsten carbide tipped blade
8. Fence
9. Extension support
10. Mitre scale
11. Arrester
12. Table insert
13. Turn table
14. Bolt holes
15. Base
16. Clamp
17. Dust bag
18. Handle
19. Table clamping handle
Assembly
WARNING! For your own safety, never
connect the plug to power source outlet until
all assembly steps are completed and you
have read and understood the safety and
operational instructions.
Lift the saw from the packaging and place it on
your work bench.
Installing the Dust Bag (Fig. 2)
• Squeeze the metal collar wings (b) of the dust
bag and place the dust bag neck opening around
the motor area exhaust port (a).
Setting the Tool
Note:
This tool is accurately adjusted before shipping
from the factory. Check the following accuracy
and readjust if necessary in order to obtain the
best results in operation.
Setting of the Angular Stops to 90° (Fig. 3)
• Release the angle arrester and move the cutting
head to the very right. Lock the angle arrester (a).
• Utilize the protractor for setting the angle of the
saw blade to 90° to the table. If a calibration is
necessary turn the screw (b) with the provided
Allen key in a way that the saw blade reaches 90°
to the table.
• Set the angel indication (c) to 0° using the screw.

 Loading...