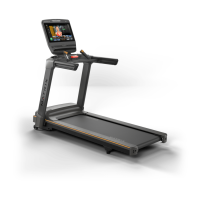
3. Type “3 0 0 1 enter” on the keypad that appears to access Machine Settings menu.
4. Touch on the “Calibration” tab.
5. Touch on “IO” from the menu that drops down.
6. Touch on the “Fan Level” field and enter a fan speed percentage (10%-100%).
Console Recovery
On the UCB, there is a button marked “Recovery”. Anecdotally, this is equivalent to Generations 7xe/7xi
“Android Recovery”. Do not use this function unless directed to by Customer Technical Support.
Screenshot & Log File collection
Screenshots & Log Files can be used in some situations to troubleshoot or verify faults.
Note – If the console doesn’t recognize the USB Drive, consider that the USB port may also be
faulty, or the console is ‘frozen’. Troubleshoot as appropriate.
If the user-accessible USB port isn’t working properly, there are spare USB ports directly on the
UCB. They can be used to collect logs or screenshots as noted below.
To capture logs to a USB drive:
1. Prepare a USB drive.
2. Insert the USB in the console USB port.
3. Touch and hold on the Matrix logo, top center of the display to access the Product Dashboard.
4. Touch on the “Save Logs” button in the Product Dashboard.
5. After a few seconds, the console may beep to signal transfer is complete.
• If there is an LED on the USB drive, it will blink while data is transferred and either stay
lit or turn off when complete.
• Wait 30 seconds before removing USB drive, if there are no lights.
The log files and screenshot will be saved to the USB drive.
To capture a screenshot and collect logs to USB automatically:
1. Prepare a USB drive.
2. Create a blank folder on the root of the USB drive called “jht_debug.txt”.
• When the console finds this folder, it will automatically capture the screenshot and log
files.
3. On the screen you wish to capture, insert the USB drive into the console USB port.
4. After a few seconds, the console may beep to signal transfer is complete.
• If there is an LED on the USB drive, it will blink while data is transferred and either stay
lit or turn off when complete.