10.4.2. Choose the bike number you wish to set up the wheel circumference and
distance unit for.
Briey press the left button (BPL) to change from BK 1, to BK 2 to BK H (for home trainer).
Briey press the right button (BPR) to validate your selection and switch to the wheel
circumference set up screen. The rst wheel circumference of the selected bike ashes.
10.4.3. Set up the wheel circumference of the selected bike.
Briey press the left button (BPL) to set up the rst digit of the chosen bike wheel circumference.
Briey press the right button (BPR) to validate your choice and move to the next digit.
Repeat those steps to the 4
th
digit. Validating the 4
th
digit by a brief press on the right button
(BPR) will move you to the distance unit setting screen. The distance unit display ashes.
10.4.4. Select the distance unit of the selected bike.
Briey press the left button to select kilometres (KM) or Miles (Mi).
Briey press the right button (BPR) to validate your selection and exit the wheel circumference
and distance unit set up menu. You will automatically return to the last active display.
Choosing the distance unit (Km or Mi) automatically updates the elevation (m or ft) and
temperature unit (°C or °F) according to the metric or imperial measurement standard.
To set up the wheel circumference and distance unit for a 2
nd
bike sensor or the home trainer
sensor, proceed again to the operations described above, selecting the correct bike number.
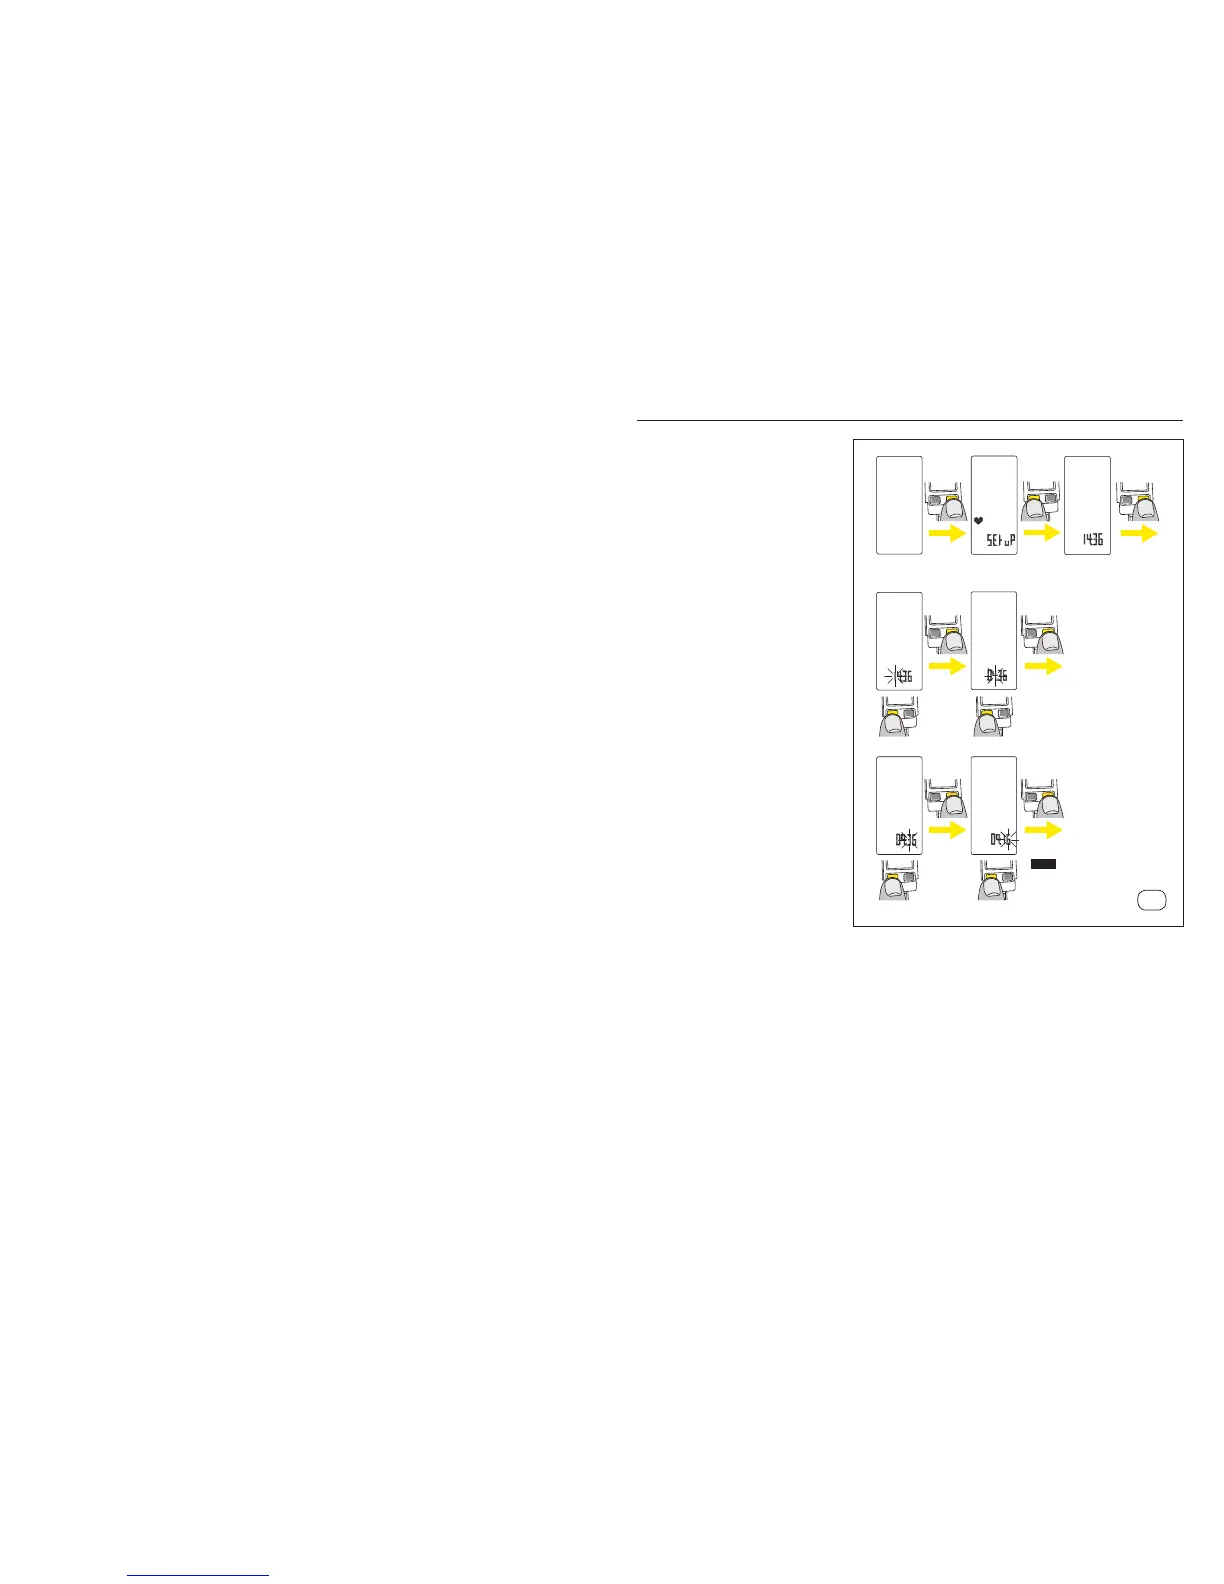
10.5. Clock set up
Enter the Clock set up menu:
From any active display, press and
hold the right button (BPR) for 6
seconds.
– On Wintech USB Ultimate, briey
press the left button (BPL) 4
times to move to the clock set
up section. The current clock is
displayed on the screen.
– On Wintech USB Alti and
Wintech USB HR, briey press
the left button (BPL) 3 times to
move to the clock set up section.
The current clock is displayed on
the screen.
– On Wintech USB, briey press
the left button (BPL) twice to
move to the clock set up section.
The current clock is displayed on
the screen.
Briey press the right button
(BPR) to start the clock settings
operations. The rst hour digit
ashes.
Briey press the left button (BPL)
to adjust the rst hour digit. Briey
press the right button (BPR) to
validate your choice and move to
the next digit.
Repeat those steps to the 2
nd
minute digit. Validating the 2
nd
minute digit by a brief press on the
right button (BPR) will exit the set
up menu and switch back to the
last active screen.
10.5
6 sec.
4 click (Ultimate)
3 click (Alti, HR)
2 click (USB)
1 click
1 click
1 click
1 click
1 click
any
screen
select
select
select
select
EXIT