4
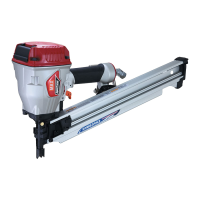
DRIVING DEPTH ADJUSTMENT DIAL (Fig. 1)
Adjust the driving depth by twisting the adjustment dial 0 as in-
dicated below.
TRIGGER LOCK MECHANISM (Fig.13)
This tool has a Trigger Lock. The trigger should be locked at all
times until you intend to drive nail into the work surface. Push and
rotate the Trigger LOCK Dial 1 clockwise from LOCK to UN-
LOCK position immediately before driving nails. When fastening
is complete, push and rotate switch counterclockwise to LOCK
position.
CONTACT TIP (SN883-100CH/34(CE)) (Fig.14,15)
Attach the Contact Tip 1 on the tip of Contact Arm 2, when driv-
ing nails to a soft material.
The Contact Tip can be kept on the Contact Tip holder 3 when
not using.
REMOVING JAMMED NAILS (Fig.16,17,18,19)
• ALWAYS disconnect the air supply.
• Wear gloves when removing jams; do not use bare hands
• Confirm that you have removed all nails from nose of tool
before reconnecting to air supply.
1 Disconnect the air supply.
2 Push down the Pusher Lever 1 and release the strip nails
from the Pusher 3.
3 Push the Nail Stopper 2, and remove the strip nails from
inside of the Magazine.
4 Pull and stayed the Pusher 3 with hand.
5 Remove the jammed nail from the Nose using a punch or a
slotted screw driver.
6 Nails are held in the Nose of the tool by magnet 1.
(SN883RH3 only) (Fig.20)
If the collation strip is broken, it is likely that there are nails 2
remaining in the Nose even if you have removed all nails.
Check thoroughly that you have removed all nails before re-
connecting the tool to air supply.