10
4
th
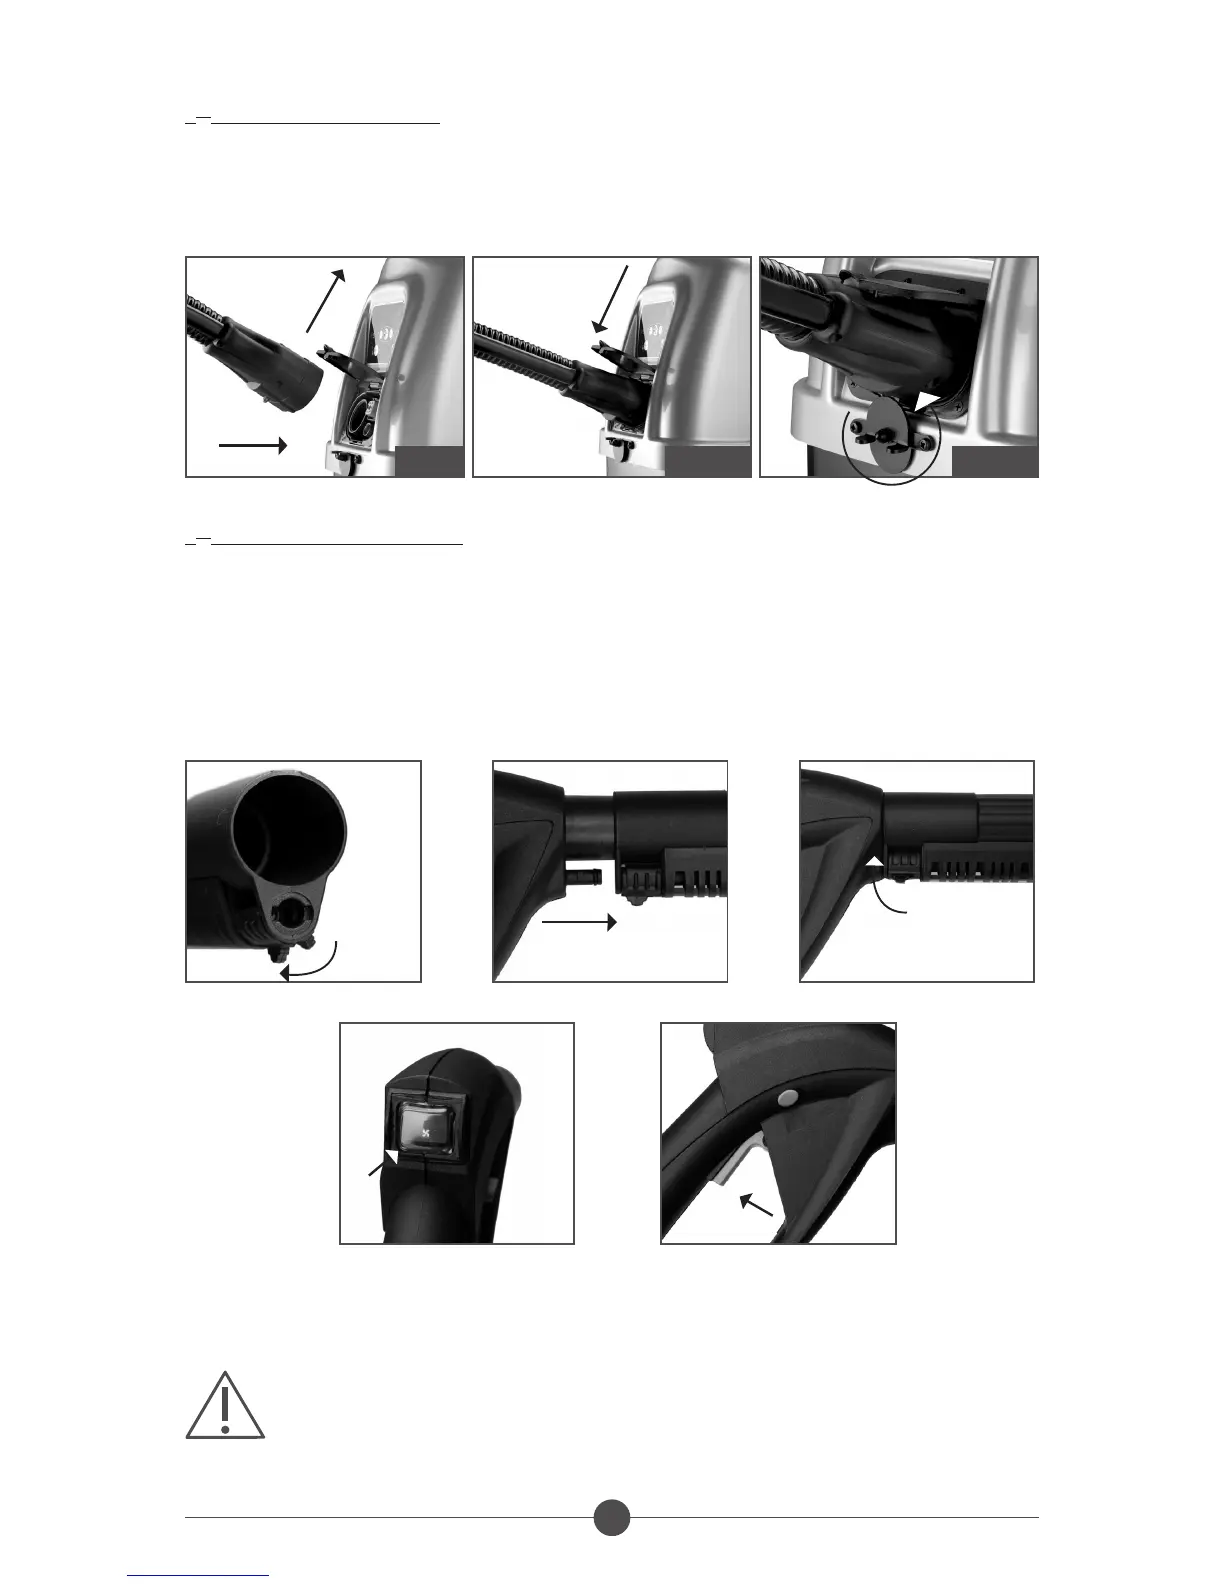
STEP: HOSE CONNECTION
• To connect the hose, move upwards the door covering the plug (fig.8), insert the plug and
close the door by making sure the pawl is into its proper seat (fig.8a).
• Fix the safety hook placed under the plug unit (fig. 8b) by turning it 180°.
5
th
STEP: ACCESSORY STARTING
• All the accessories carry out the double function of suction and steam. They fit in directly on
the handle or on the extensions.
• Move the ring nut to open position (fig.9).
• Fit in the extension hose or the accessory (fig.10).
• Move the ring nut to close position (fig.11).
• Press the push button located on the ergonomic handle to turn the suction on and off (fig.12).
• Keep pressed the push button located under the handle to deliver the steam and release it to
interrupt the delivery (fig.13).
NOTE: some water may create in the hose. It may come out during the first seconds of use.
WARNING: do not use steam on electric fixtures which are on or energized!
FIG.10FIG.9 FIG.11
FIG.8aFIG.8 FIG.8b
FIG.13FIG.12