Connecting Microphone
1. Insert the microphone plug into jack on the front panel of the transceiver.
Be sure the tab on the microphone plug is facing the left hand side (Figure 1-2).
2. Mount the microphone on the microphone hanger where it will be
within easy reach of the user.
3. To remove the microphone plug, press the tab on the connector
while pulling the plug out of the transceiver jack.
Supplied Accessories
Carefully unpack the transceiver and check that the items listed below are included in the package.
DC power cable with 15A Fuse ............................................................................................................. 1
Mounting Bracket .................................................................................................................................... 1
Screw set
5 x 16 mm self-tapping screw .......................................................................................................... 4
Hex-headed screw with washer ...................................................................................................... 4
Spring washer ....................................................................................................................................4
Flat washer ...................................................................................................................................... 4
Microphone (with cable) ......................................................................................................................... 1
Microphone hanger (with 4 x16 mm self-tapping screws) .................................................................... 1
User manual ............................................................................................................................................ 1
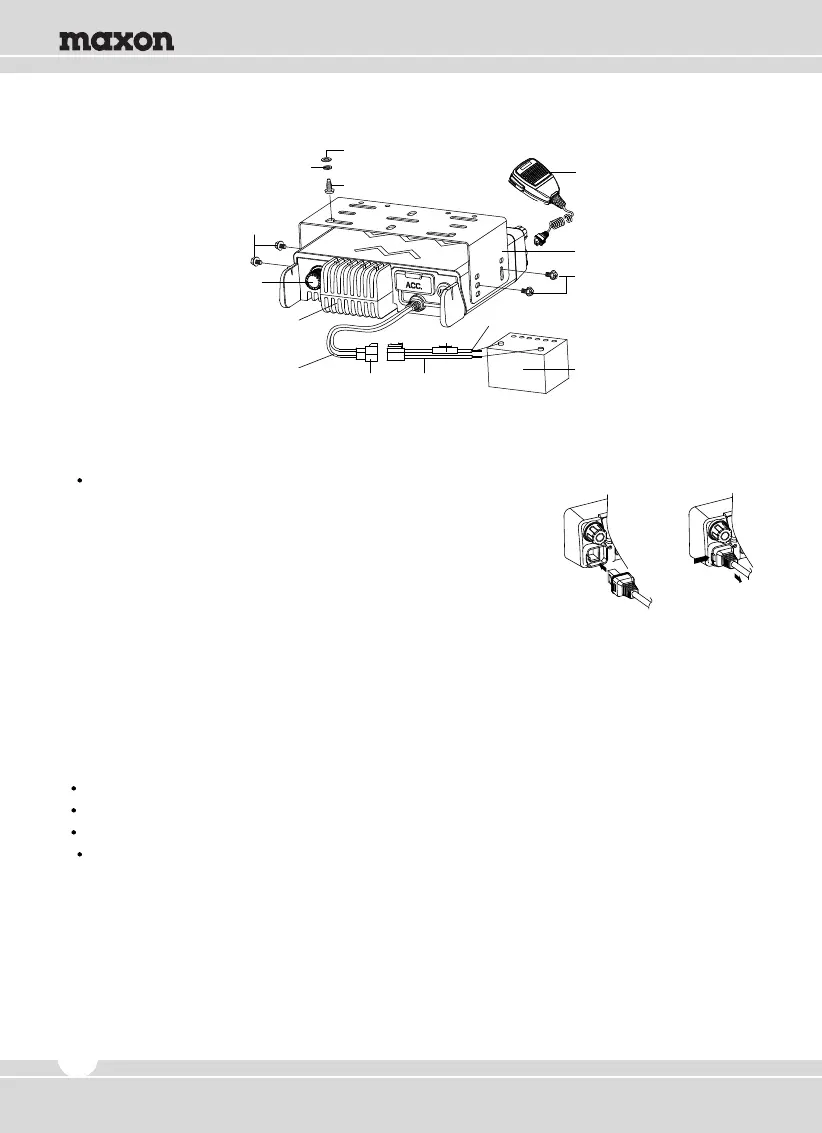
Figure 1-2) Installation and Removing of the Microphone
Microphone
Spring Washer
M4 x 6mm
Hex-headed Screw
Heat Sink
(Aluminum Diecasting)
Antenna Connector
DC Power Cable
Power Input
Connector
Fuse
Red(+) Cable
Black(-) Cable
5x16mm
Self-tapping Screw
Flat Washer
M4 x 6mm
Hex-headed Screw
Mounting Bracket
12V Vehicle Battery
4