1
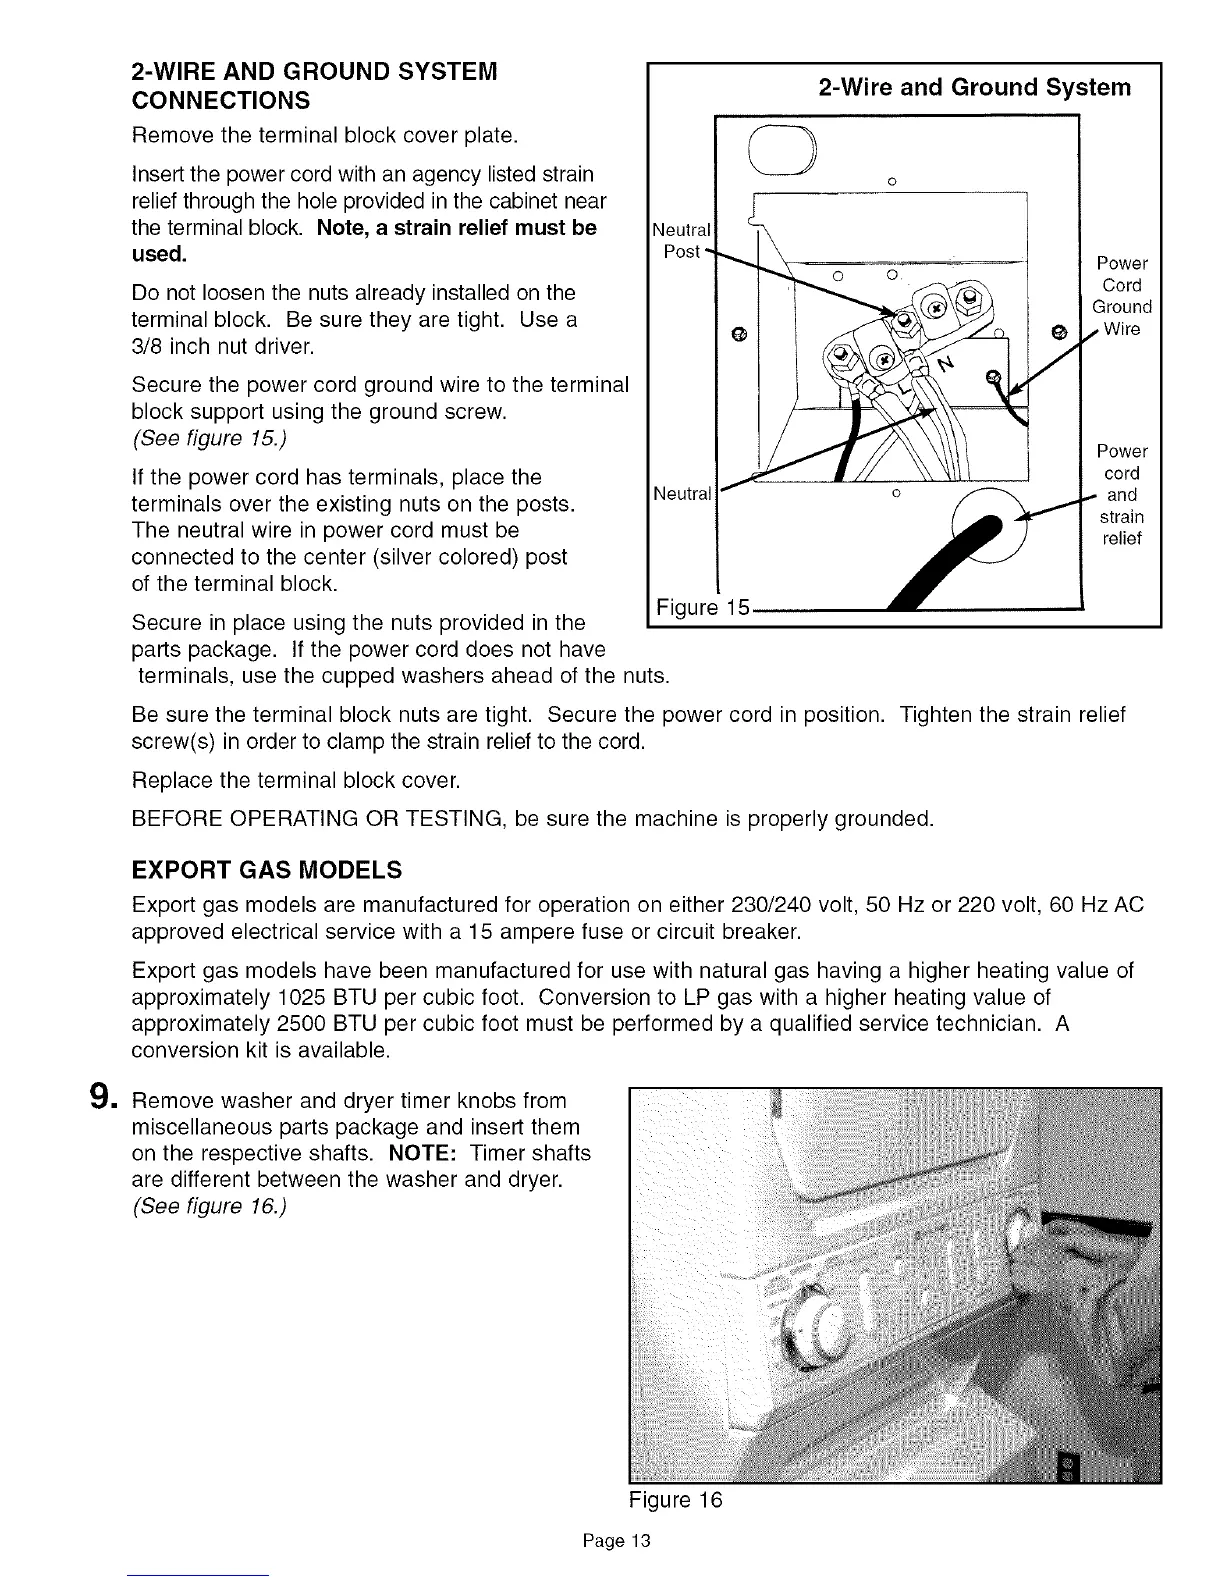
2-WIRE AND GROUND SYSTEM
CONNECTIONS
Remove the terminal block cover plate.
Insert the power cord with an agency listed strain
relief through the hole provided in the cabinet near
the terminal block. Note, a strain relief must be
used.
Do not loosen the nuts already installed on the
terminal block. Be sure they are tight. Use a
3/8 inch nut driver.
Secure the power cord ground wire to the terminal
block support using the ground screw.
(See figure 15.)
If the power cord has terminals, place the
terminals over the existing nuts on the posts.
The neutral wire in power cord must be
connected to the center (silver colored) post
of the terminal block.
Secure in place using the nuts provided in the
parts package. If the power cord does not have
terminals, use the cupped washers ahead of the nuts.
Neutral
Post",,_
Neutral "
Figure
2-Wire and Ground S' 'stem
Power
Cord
Ground
/Wire
Power
cord
strain
relief
Be sure the terminal block nuts are tight. Secure the power cord in position. Tighten the strain relief
screw(s) in order to clamp the strain relief to the cord.
Replace the terminal block cover.
BEFORE OPERATING OR TESTING, be sure the machine is properly grounded.
EXPORT GAS MODELS
Export gas models are manufactured for operation on either 230/240 volt, 50 Hz or 220 volt, 60 Hz AC
approved electrical service with a 15 ampere fuse or circuit breaker.
Export gas models have been manufactured for use with natural gas having a higher heating value of
approximately 1025 BTU per cubic foot. Conversion to LP gas with a higher heating value of
approximately 2500 BTU per cubic foot must be performed by a qualified service technician. A
conversion kit is available.
Remove washer and dryer timer knobs from
miscellaneous parts package and insert them
on the respective shafts. NOTE: Timer shafts
are different between the washer and dryer.
(See figure 16.)
Figure 16
Page 13
 Loading...