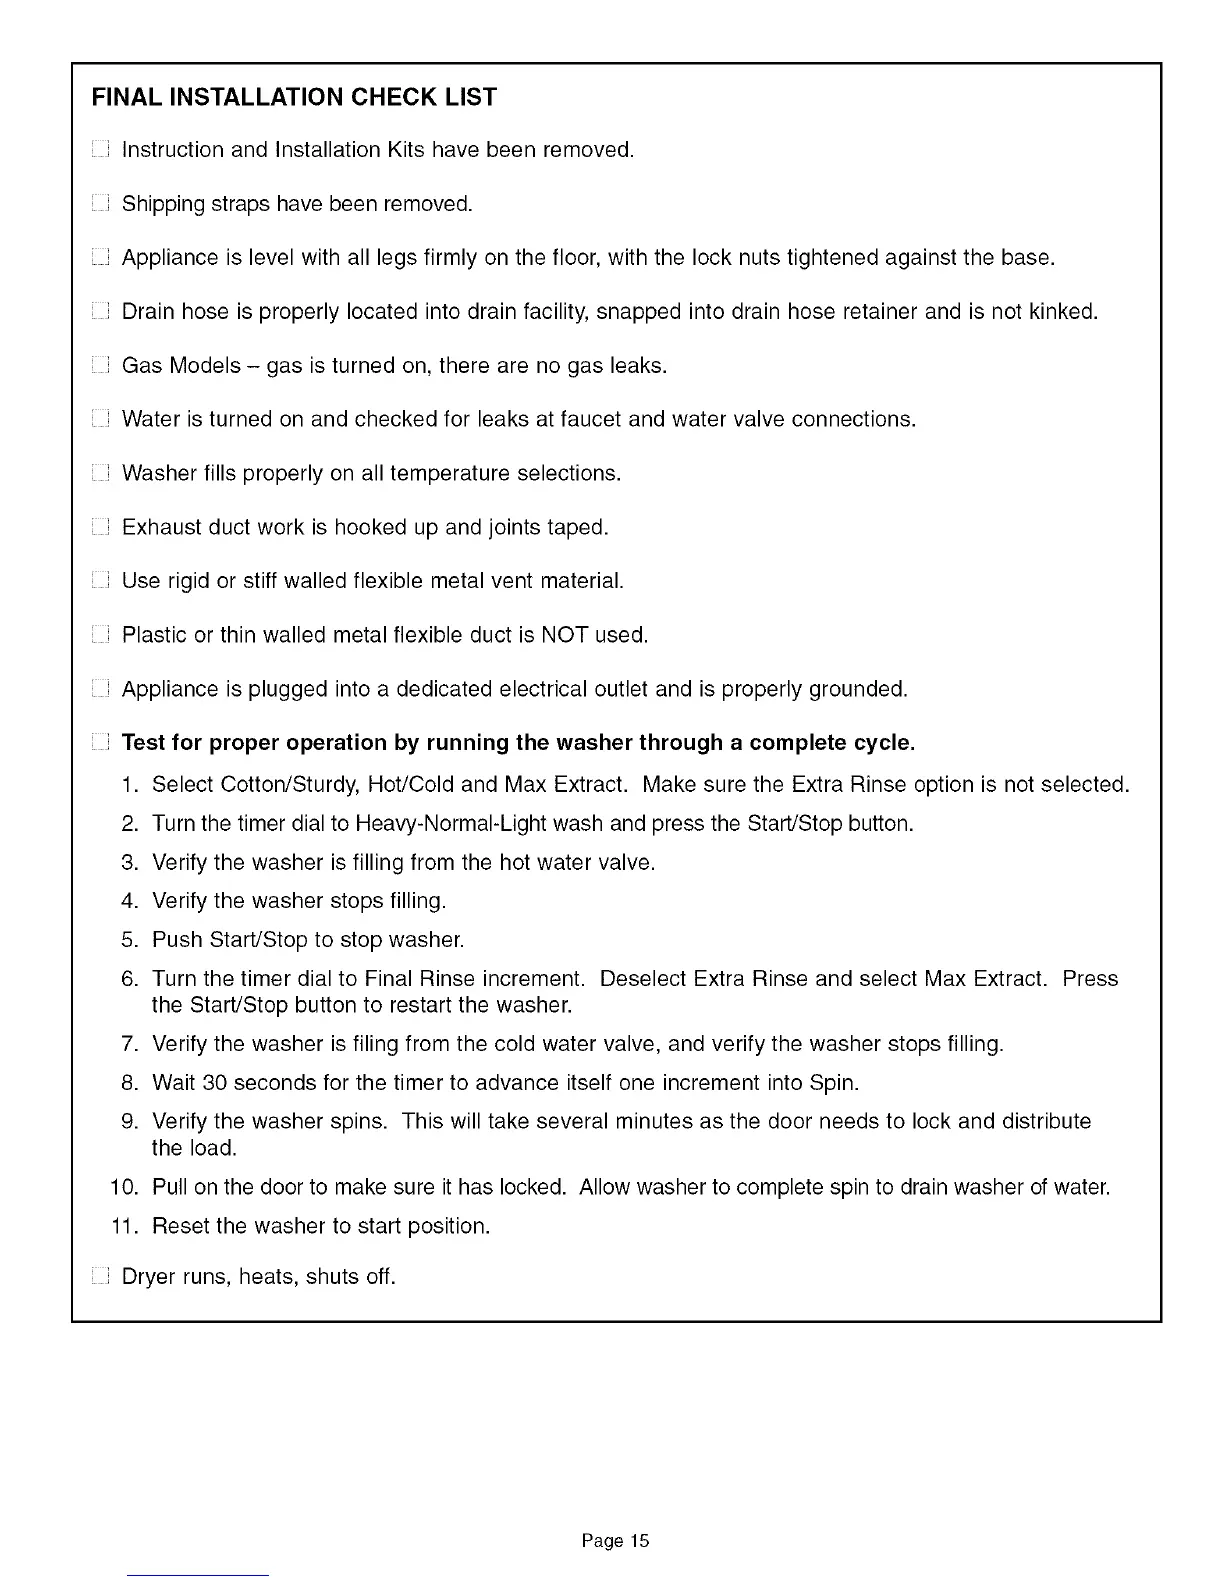
FINAL INSTALLATION CHECK LIST
Instruction and Installation Kits have been removed.
Shipping straps have been removed.
Appliance is level with all legs firmly on the floor, with the lock nuts tightened against the base.
Drain hose is properly located into drain facility, snapped into drain hose retainer and is not kinked.
Gas Models - gas is turned on, there are no gas leaks.
Water is turned on and checked for leaks at faucet and water valve connections.
Washer fills properly on all temperature selections.
Exhaust duct work is hooked up and joints taped.
Use rigid or stiff walled flexible metal vent material.
Plastic or thin walled metal flexible duct is NOT used.
Appliance is plugged into a dedicated electrical outlet and is properly grounded.
Test for proper operation by running the washer through a complete cycle.
1. Select Cotton/Sturdy, Hot/Cold and Max Extract. Make sure the Extra Rinse option is not selected.
2. Turn the timer dial to Heavy-Normal-Light wash and press the Start/Stop button.
3. Verify the washer is filling from the hot water valve.
4. Verify the washer stops filling.
5. Push Start/Stop to stop washer.
6. Turn the timer dial to Final Rinse increment. Deselect Extra Rinse and select Max Extract. Press
the Start/Stop button to restart the washer.
7. Verify the washer is filing from the cold water valve, and verify the washer stops filling.
8. Wait 30 seconds for the timer to advance itself one increment into Spin.
9. Verify the washer spins. This will take several minutes as the door needs to lock and distribute
the load.
Pull on the door to make sure it has locked. Allow washer to complete spin to drain washer of water.
Reset the washer to start position.
10.
11.
Dryer runs, heats, shuts off.
Page 15
 Loading...