S icece erv .............................................................
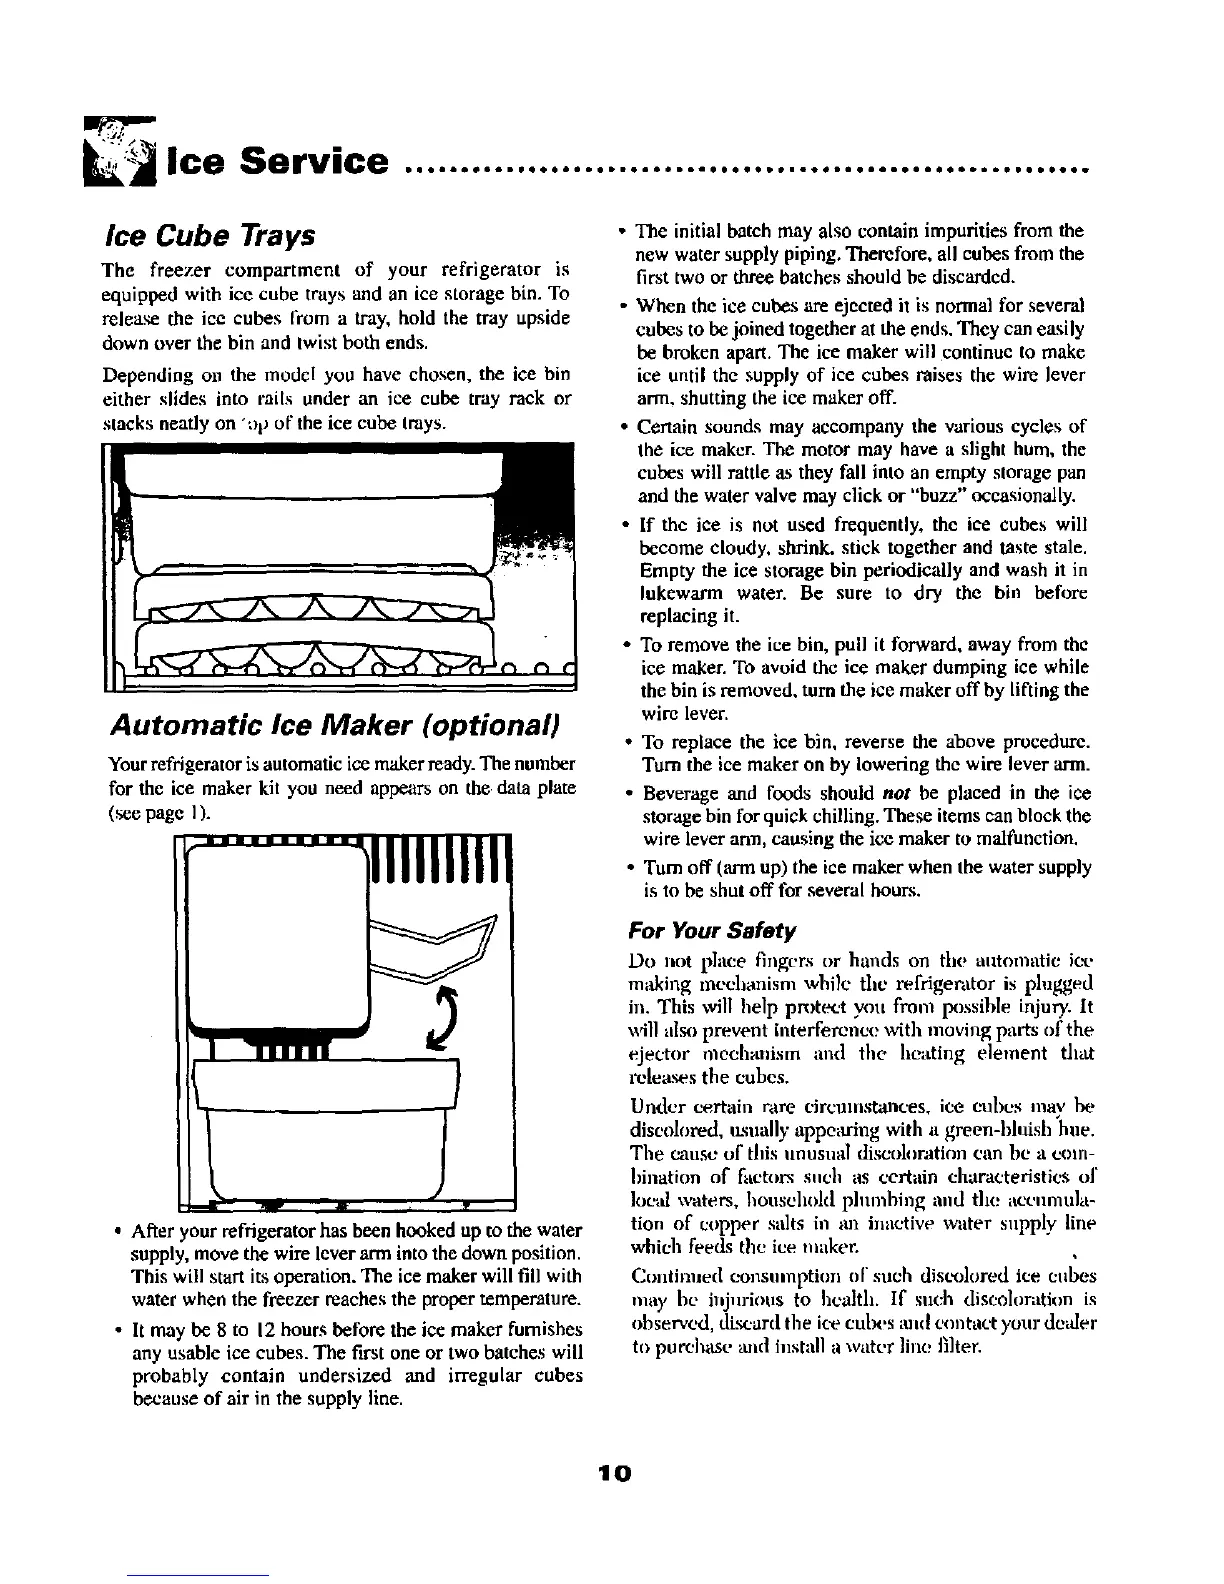
Ice Cube Trays
The freezer compartment of your refrigerator is
equipped with ice cube trays and an ice storage bin. To
release the ice cubes from a tray, hold the tray upside
down over the bin and twist both ends.
Depending o,1 the mode[ you have chosen, the ice bin
either slides into rails under an ice cube tray rack Mr
stacks neatly on "_)pof the ice cube trays.
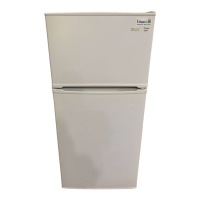
Automatic Ice Maker (optional)
Your refrigerator is automatic ice maker ready. The number
for the ice maker kit you need appears on the data plate
(see page 1).
• After your refrigerator has been hooked up to the water
supply, move the wire lcver arm into the down position.
This will start its operation. The ice maker will fill with
water when the freezer reaches the proper temperature.
• It may be 8 to 12 hours before the ice maker furnishes
any usable ice cubes. The first one or two batches will
probably contain undersized and irregular cubes
because of air in the supply line.
• The initial batch may also contain impurities from the
new water supply piping. Therefore, all cubes from the
first two or three batches should be discarded.
• When the ice cubes are ejected it is normal for several
cubes to be joined together at the ends. They can easily
be broken apart. The ice maker will continue to make
ice until the supply of ice cubes raises the wire lever
arm, shutting the ice maker off.
• Certain sounds may accompany the various cycles of
the ice maker. The motor may have a slight hum, the
cubes will rattle as they fall into an empty storage pan
and the water valve may click or "buzz" occasionally.
• If the ice is not used frequently, the ice cubes will
become cloudy, shrink, stick together and taste stale.
Empty the ice storage bin periodically and wash it in
lukewarm water. Be sure to dry the bin before
replacing it.
• To remove the ice bin, pull it forward, away from the
ice maker. To avoid the ice maker dumping ice while
the bin is removed, turn the ice maker off by lifting the
wire lever.
• To replace the ice bin, reverse the above procedure.
Turn the ice maker on by lowering the wire lever arm.
• Beverage and foods should not be placed in the ice
storage bin for quick chilling. These items can block the
wire lever ann, causing the ice maker to malfunction.
• Turn off (arm up) the ice maker when the water supply
is to be shut off for several hours.
For Your Safety
Do not place fingers or hands on the automatic ice
making med)anism while the refrigenltor is plugged
in. This will help pr_)tect you from l_)ssible injury. It
will al_) prevent interference with moving parts of the
ejec¢or ,nech_mism and the l*e_ding element that
releases the cubes.
Under certain hire circnmstm)ces, ice cubes may be
discolored, ILsually appe_tring with a green-bl,ish hue.
The cause of this unusual discoloration can be a com-
bination of factors snob as cert_dn characteristics of
]oc:d waters, household plmnbing and the accnmu]a-
tion of copper sahs in an inactive water snpply line
which feeds the ice maker.
Cont" a led c'onsl npti(, ol"such diseolored ice cubes
nmy be injurious to hcaltlL If such discoloration is
observed, dL_ard the ice etd)es and contact your dodder
to purchase and install a water line filter
10