33
BioStamp nPoint User Manual
Once an Activity or Survey has been completed, a green block
will appear to the right indicating the number of times that
Activity or Survey has been completed. Once an Activity or
Survey has been completed more than ten times, visualized
by ten green blocks, the number will increase for each further
repetition but the ten blocks will remain.
Note
Remove and Clean Sensors
Remove Sensors from subject after a maximum 24 hours of
wear. Dispose of adhesives, and clean Sensors for subsequent
use (Maintenance page 24).
5
Synchronize Sensor Data
Synchronize data from the Sensors by rst placing the
Sensors on the Link Hub. Place the Sync Phone in the Link
Hub dock. Then log in to the Sync App with your
BioStamp nPoint credentials to begin syncing Sensor data to
the Investigator Portal.
6
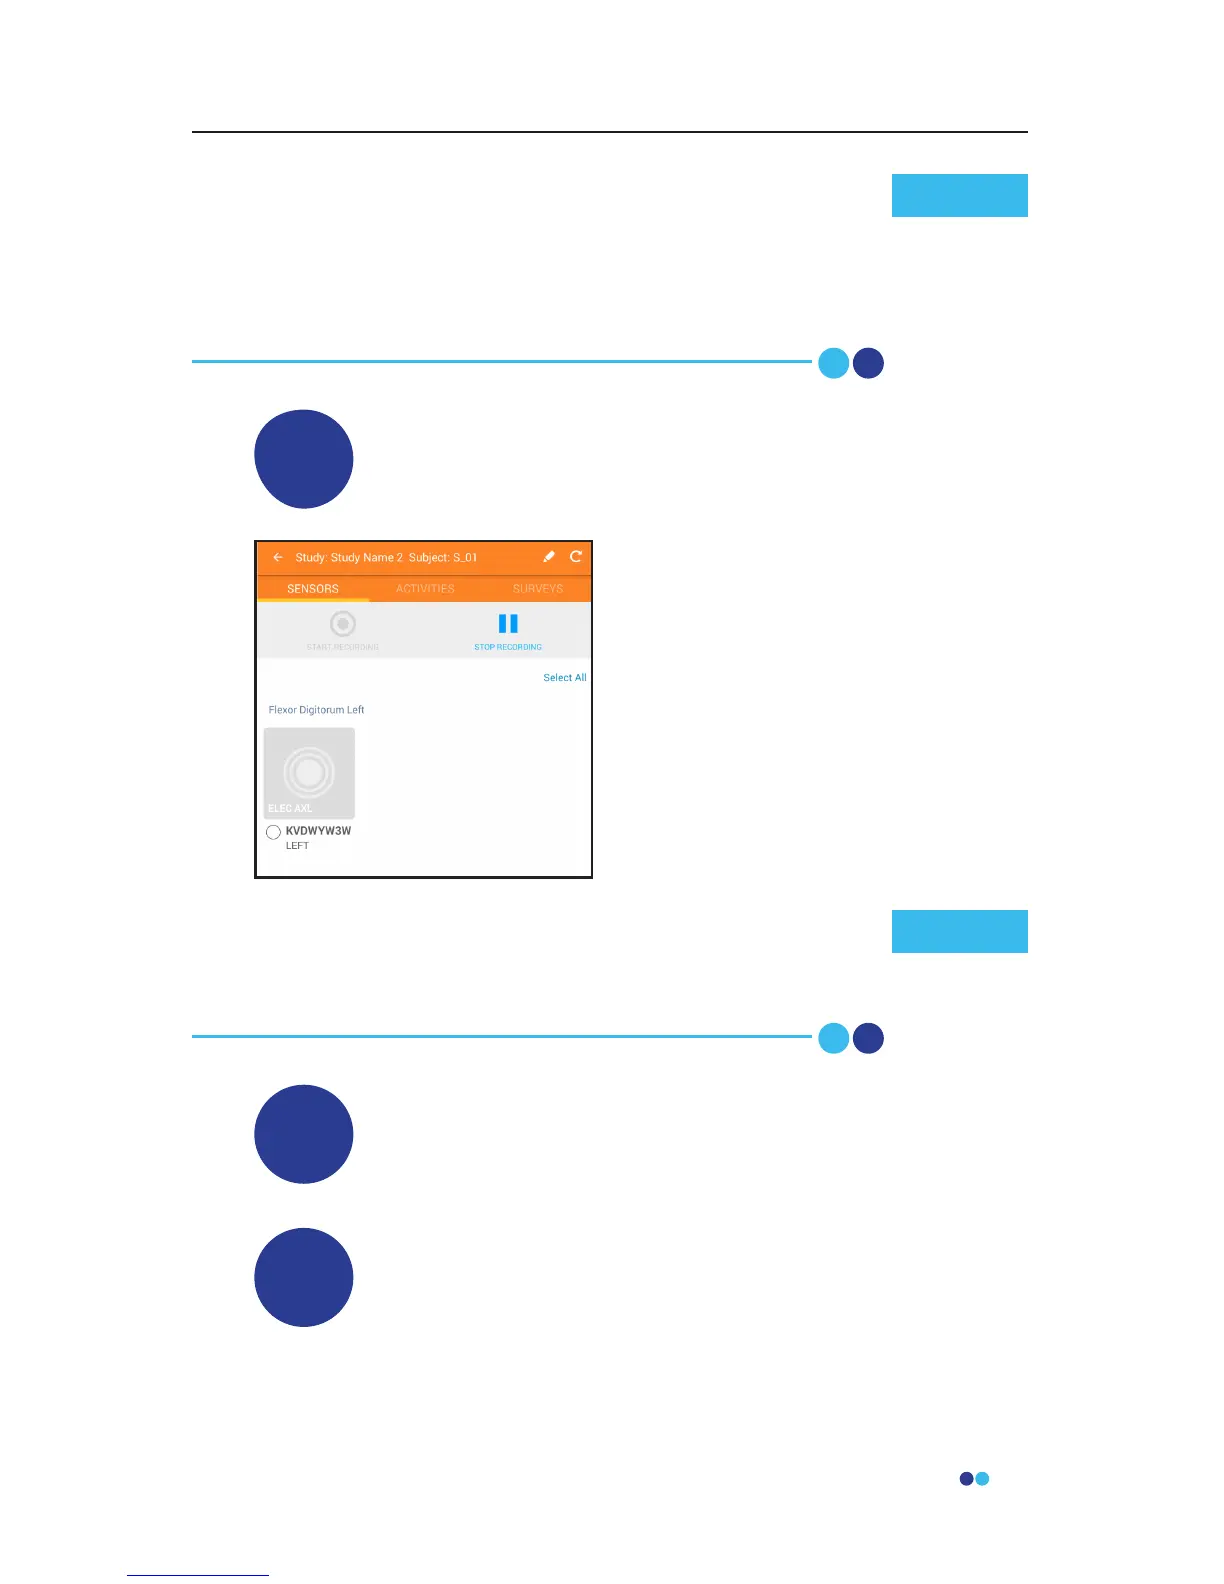
Stop Sensor Recording
4
Navigate to the Sensors tab on the
Investigator App, select the Sensors
that no longer need to record, and
press “stop recording.”
If a Sensor falls o while recording, press “stop recording,”
remove all Sensors, sync data, apply new adhesives and
re-apply Sensors, press “start recording,” and resume study
activities.
Note
 Loading...