6
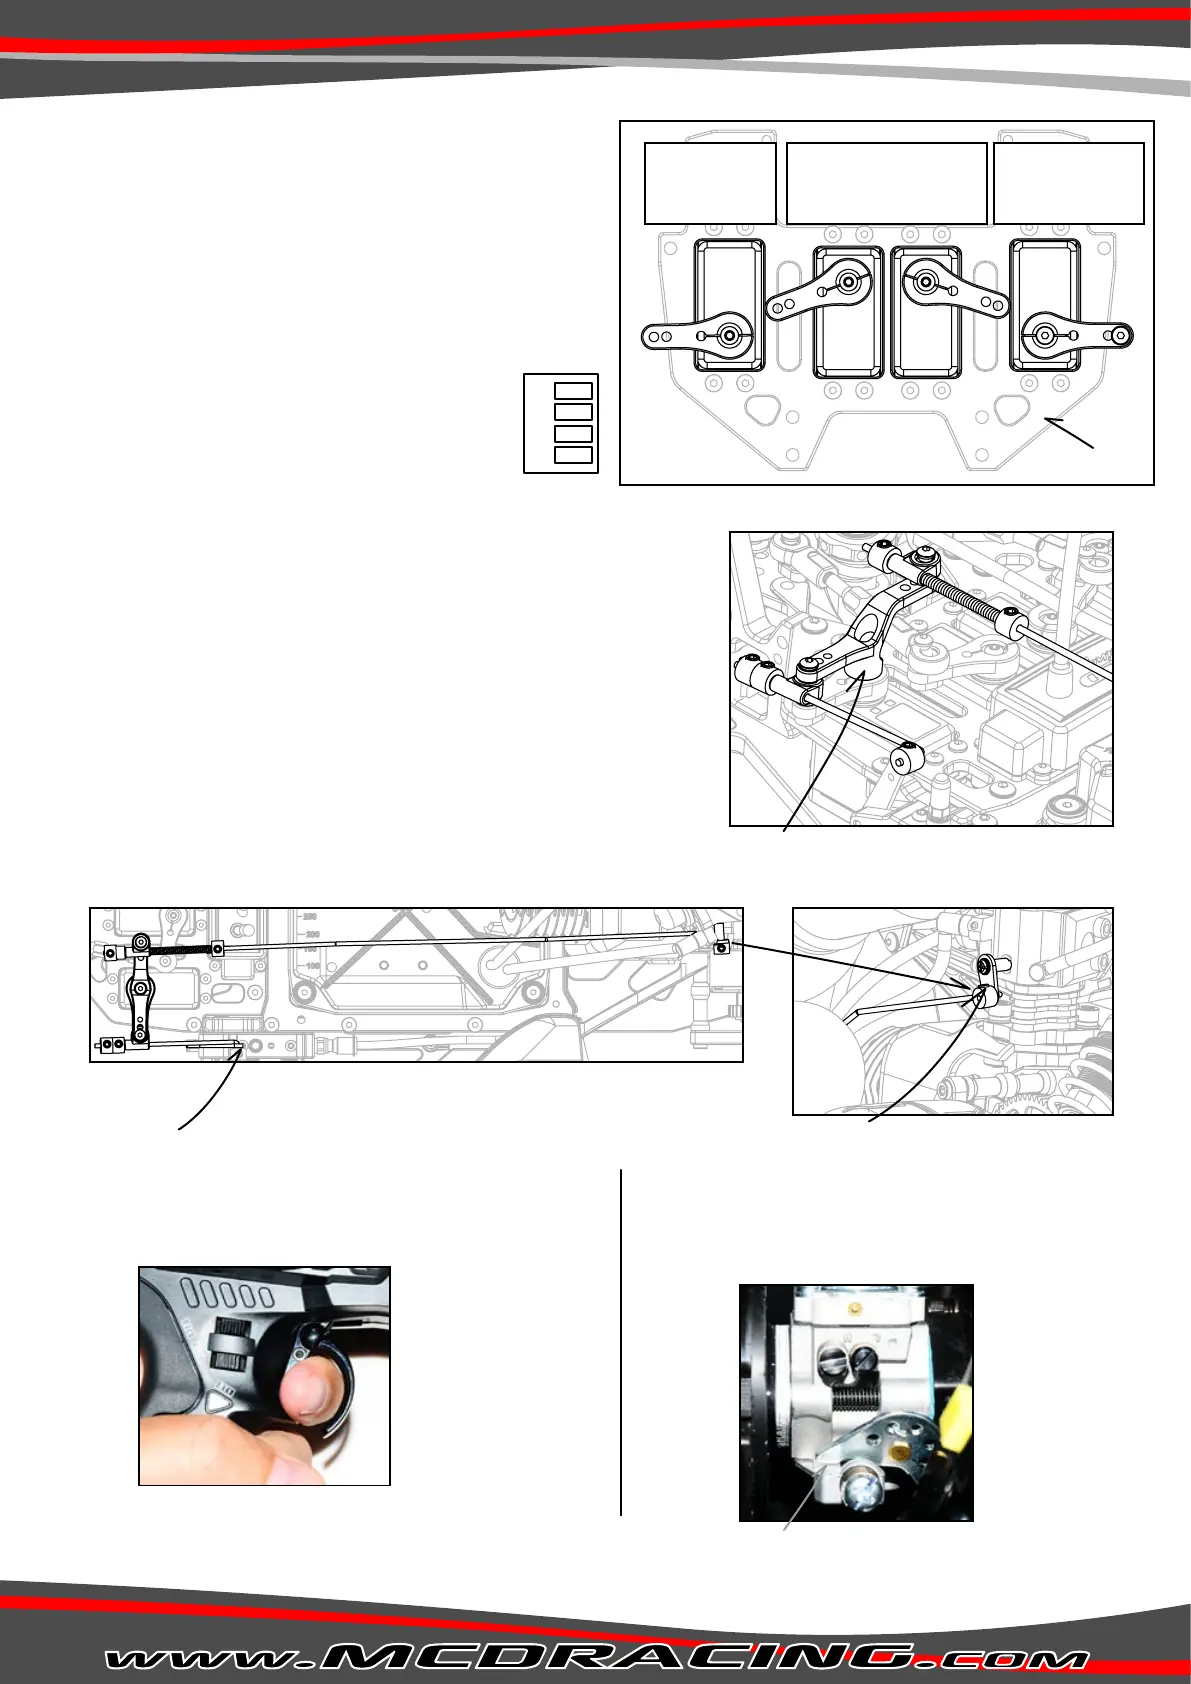
Servo Installation
Installing the throttle & rear brake linkage
10. Hold full throttle on the transmitter then increase throttle
EPA slowly until there is 0,2mm gap left between the
parts shown in Figure F.
11. After this setting leave the throttle to neutral position.
12. The throttle linkage is assembled and alignment is done. Check if the linkage is functioning properly.
1. Turn on your radio.
2. Check if servos are functioning.
3. Be sure the servo turns on correct direction. (Throttle direction: CCW,
Brake direction: CW. Reverse if direction is not correct!)
4. Make sure you adjust neutral position as shown in Figure A.
If necessary correct the neutral position from the sub trim menu on
your transmitter.
5. After completing the previous steps install the throttle and rear brake
linkage on the servo horn as indicated in Figure B.
6. Install the linkage on the rear brake as shown in Figure C.
7. Install the linkage on the carburator. (Figure D)
1. Mount the servos on the servo tray from below as shown on
Figure A.
2. Install the front brake servo horn parallel as shown.
3. Install the steering servos with a slight angle as shown.
The definitive angles will be determined during the steering
installation phase (explained on page 8).
4. Connect the steering servos with a Y cable.
5. Install the rear brake servo horn parallel as shown.
6. Connect the servos to the receiver as indicated
on Figure A.
7. Mix the 3rd and 2nd channel. (Check your radio
booklet for information)
8. Reduce the throttle end point adjustment(EPA) around 50%
from the transmitter.
9. Apply full throttle from the trigger. (Figure E)
Figure C
Figure F
Leave a 0,2 mm gap while on full throttle(12)
Figure E
Figure D
Screw from here
Rear Brake
Receiver
3
2
1
B
Figure A
Servo Tray
Throttle & Rear Brake
Servo horn parallel
Channel 2
Front Brake
Servo horn parallel
Channel 3
Steering
Servo horns with slight angle
Channel 1
Connect with a Y cable
Figure B
Install the throttle & rear brake linkage on the horn.