1 2
DataLogger
®
7 Hardware Components
English
Getting Started
Installing the SIM Card (Optional)
1. Slide the battery compartment lock to the
unlocked position.
2. Remove the compartment door. Remove
the battery. The Micro SIM and SD cards
slots are under the battery. Pull flexible card
holder out of the way.
3. Insert SIM card into the proper slot. Push
flexible card holder back into place.
4. Replace the battery and reattach door
and lock. Activate SIM card per carrier
instructions.
Charging the Battery
Connect the AC adapter to charge the battery.
The LED battery charge indicator blinks red
when the unit is plugged in and the battery is
charging. The LED indicator will be solid red
when the battery is charged (not charging).
Performing the Initial Startup
1. Press the power button to turn on your
device.
2. Follow the on-screen instructions to
complete the setup process.
After the setup is completed, the Home
screen appears. You can now use your
device.
3. The tablet will include a formatted and
installed SD card from McElroy. If a new SD
card is installed, you will need to format the
card to use with the device.
Operating Basics
Waking Up
Your device sleeps after a period of inactivity.
To wake up, press the power button and, at the
lock screen, drag the lock icon to the other side
of the screen.
Shutting Down
To shut down, press and hold the power button
until a menu pops up. Touch Power off and then
OK.
Home Screen
The Home screen is your starting point to access
all the features on your device.
Navigation bar:
opens a screen containing thumbnails of
application you’ve used recently.
opens the Home screen.
goes back to the previous screen.
English
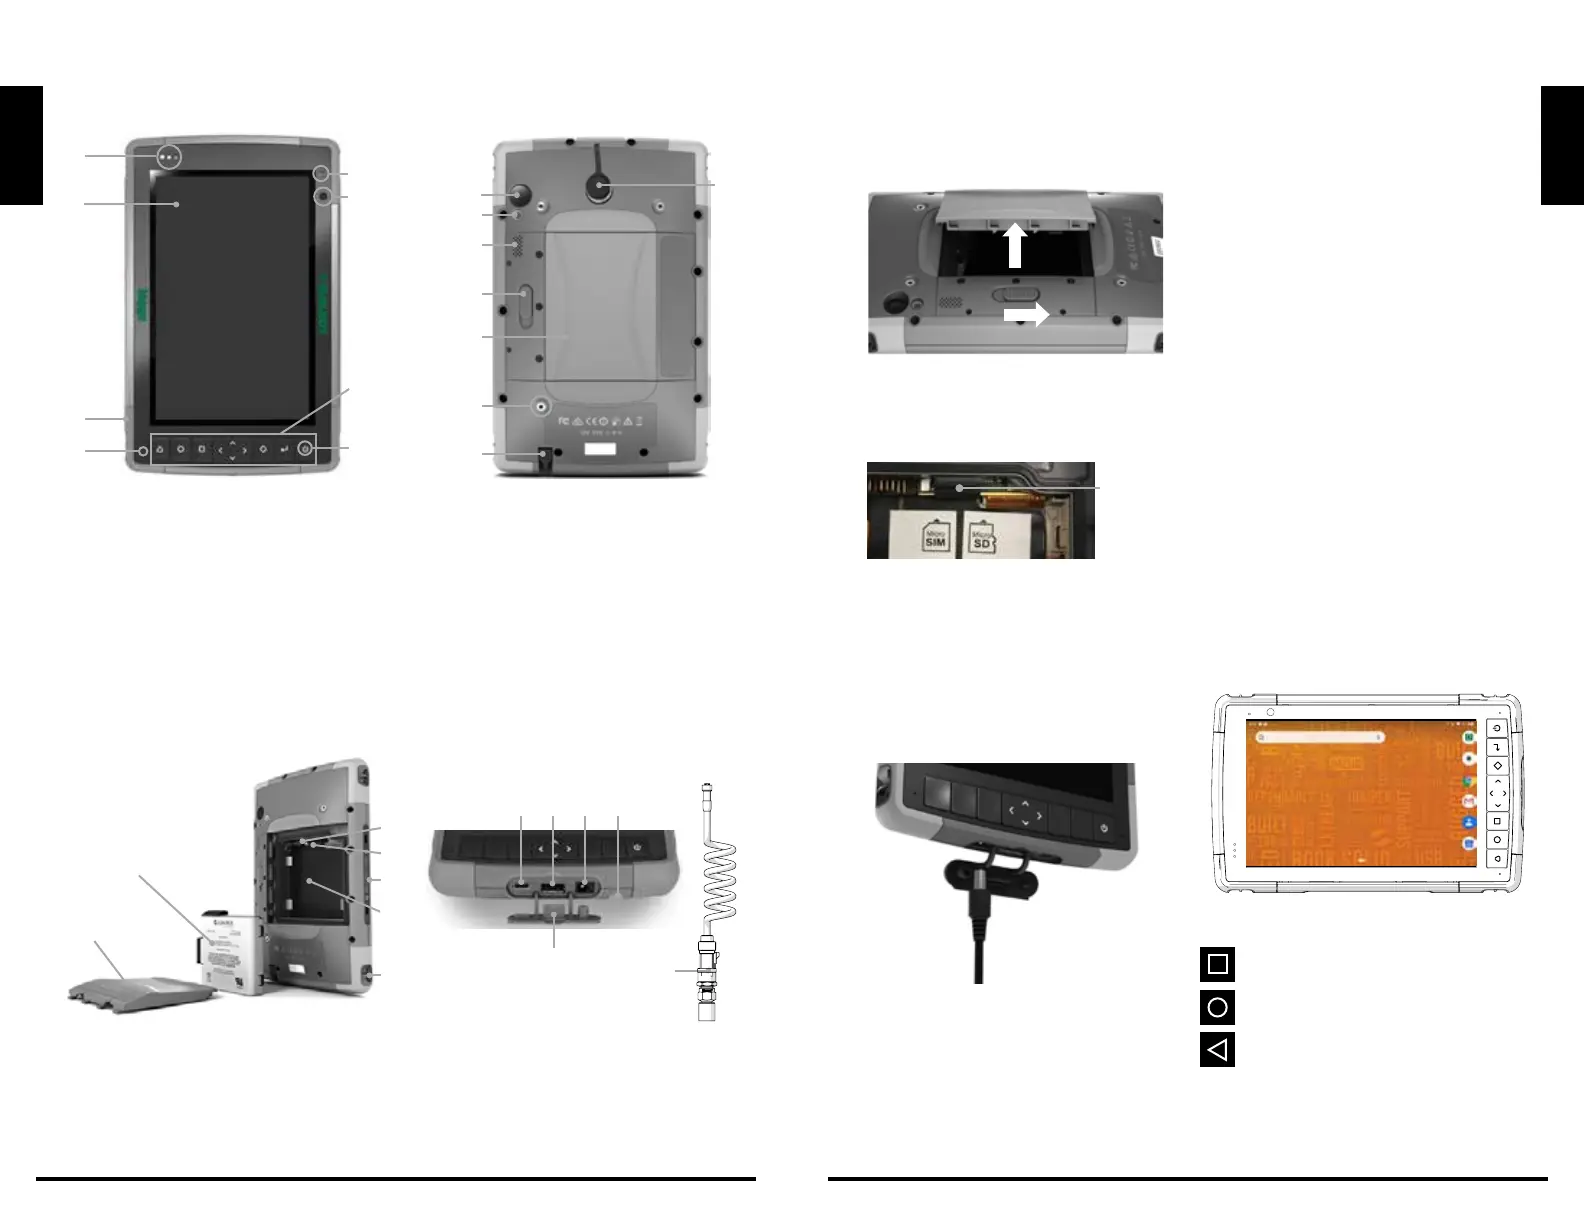
1
2
3
4
8
6
9
5
10
11
12
13
14
15
16
7
Front and Back Features
1 Notification LEDs
2 Touchscreen and Display
3 Protective Over-molded Bumper (all four
edges)
4 Microphone (one on each side)
5 Ambient Light Sensor
6 Front Facing Camera Lens, 2 MP
7 Keypad
8 Power Key
9 Rear Facing Camera Lens, 16 MP
10 Camera Flash
11 Speaker
12 Battery Door Lock
13 Battery Compartment, SIM and SD Card
Slots
14 External Device Attachment Point (1 of 3
on the back)
15 Storage Slot for Fine Tip Stylus
16 Switchcraft Connector Port
1 Battery Pack, Removable
2 Battery Door
3 Micro SIM Card Slot and Micro SD/
SDHC Card Slot (under card retainer)
4 Flexible Card Retainer
5 Battery Compartment
6 Docking Port Connections
7 Hand Strap Attachment Point
8 USB-C, USB 3.1, 5 V 1.5 A Max Output
9 USB 2.0 Host, 5 V 500 mA Max Output
10 12 VDC Power Input Jack
11 Storage Slot for Fine Tip Stylus
12 Connector Port Protector
13 Transducer and Cable
1
3
8 9 10
12
13
11
4
5
7
6
2
Battery Compartment
and Card Slots
Connector
Ports
A
B
Flexible
Card
Holder
 Loading...