25
10. After measuring room location 2 the Front panel
Display indication might be similar to figure 83.
Note: Once RoomPerfect has acheved a Room
Knowledge score of 90% or above, it will ask
if you want to make additional measurements.
Additional measurements will make improv-
ments, however it might take many more
measurements to achieve the higher Room
Knowledge score.
11. If you want to achieve a reading closer to 100%,
select Yes and continue placing the Microphone
in the third room location and proceed. If No was
selected figure 84 will appear.
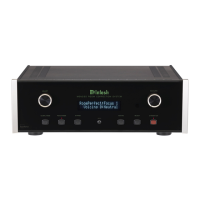
When the MEN220 has finished calculating and ap-
plying filters to the audio signal path, the Front Panel
Display will once again briefly indicate “RoomPerfect
Guided Setup” and then indicate “RoomPerfect:Focus
1, Voicing 0:Netural. Refer to figure 85.
ADDITIONAL FOCUS POSITIONS:
The MEN220 allows for measurement and storage of
seven additional Focus Positions. To add additional
Focus Positions at this time proceed to step 11. If no
additional measurements are to be taken at this time
proceed to “How to Operate the MEN220” starting on
page 28.
11. Perform steps 1 thru 4.
12. Rotate the NAVIGATE Control (or use the direc-
tional ◄ ► Push-buttons on the Remote Control)
to select “RoomPerfect, Add Focus Position”. Refer
to figure 86.
13.Press the SELECT Push-button and the “Place mi-
crophone in new focus position” will appear. Refer
to figure 87.
14. Press the SELECT Push-button and the “Measur-
ing new Focus position...” will appear. Refer to
figure 88.
15. When the measurements are completed “Save as
Focus pos.:, (2-8) 2” will appear. Refer to figure
89.
8. When figure 78 appears relocate the microphone
to another place in the listening room and point it
in a different direction. Then press the SELECT
Push-button. Refer to figure 79.
Note: When the microphone is relocated to ad-
ditional room locations, it is advisable to
place it randomly at various heights off the
floor and pointed in different directions. It is
also advisable the positions be at least 2 feet
(60.69cm) from previous measurement loca-
tions and from the Loudspeakers; and never
behind the Loudspeakers.
9. After Room Position No. 1 has been measured, the
Front Panel Information Display will indicate the
computed Room Knowledge similar to figure 80.
Press the SELECT Push-button and figure 81 will
appear. Place the microphone in another room lo-
cation, then press the SELECT Push-button. Refer
to figure 82.
Figure 78

 Loading...