14
the underlying logic and procedures are the same.
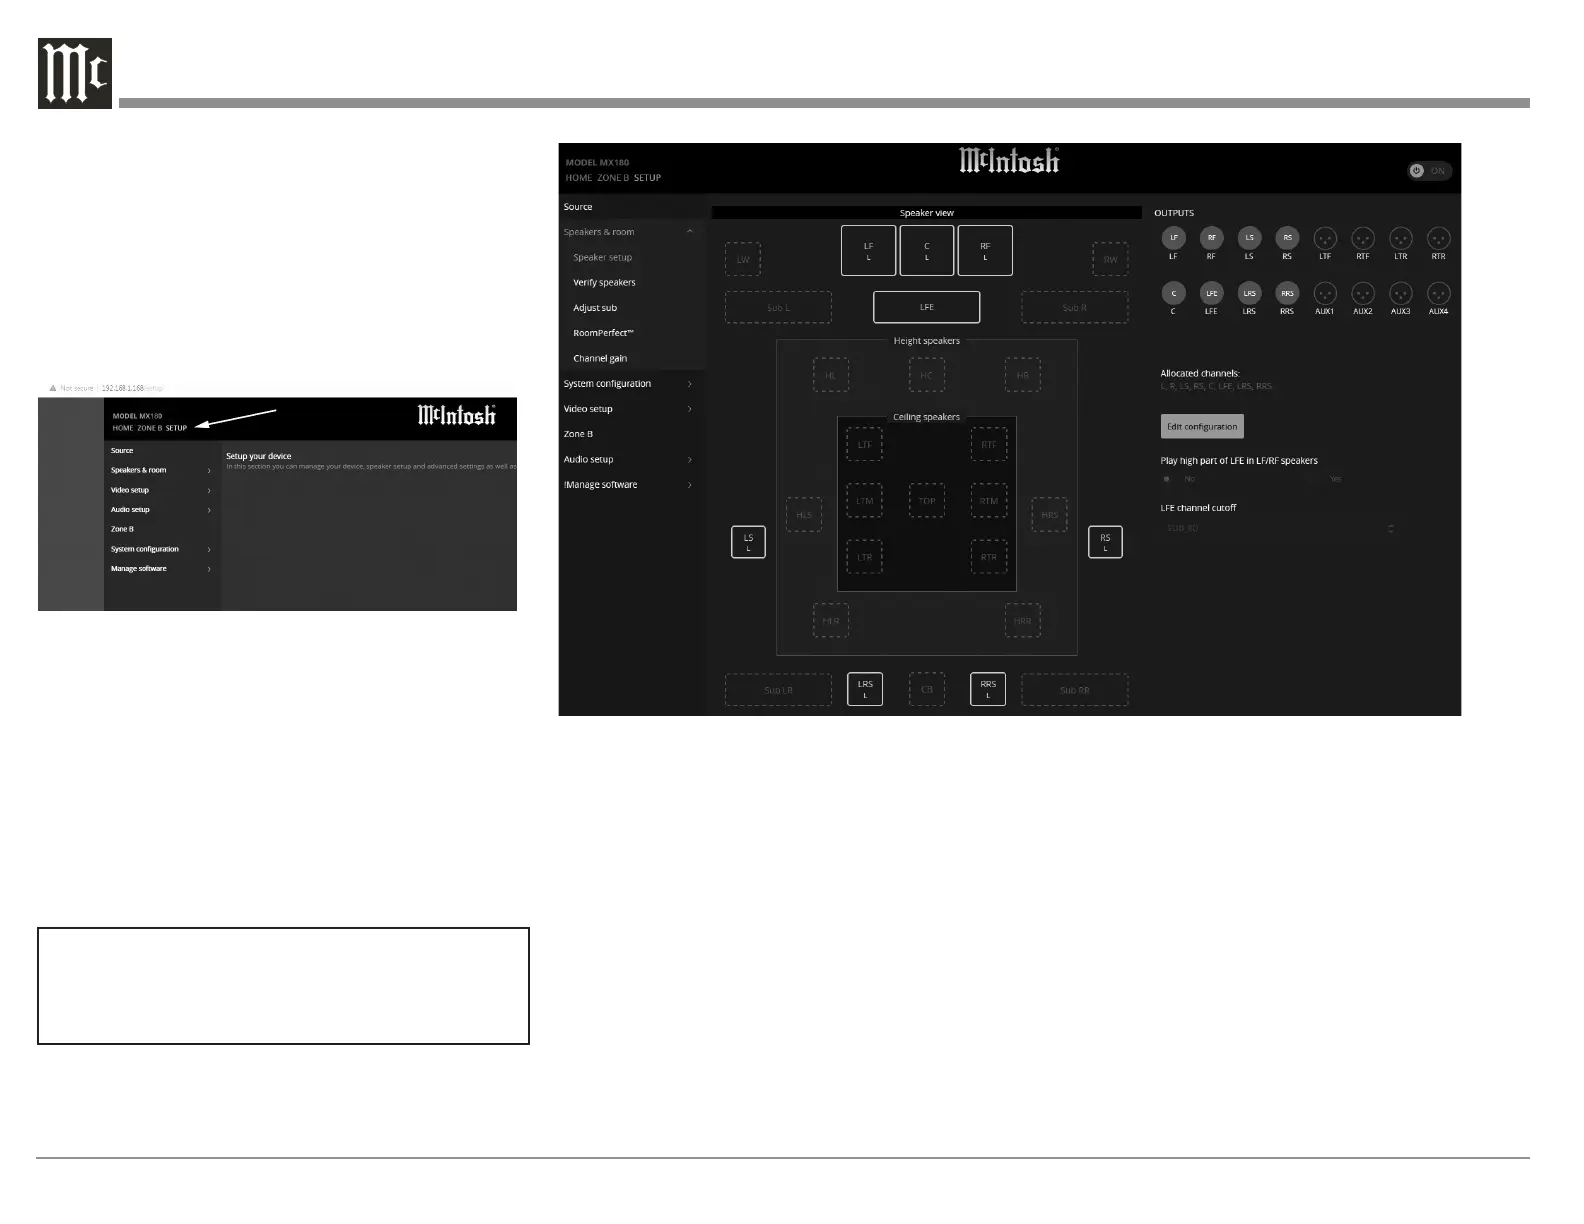
To bring up the interface on your browser, put the IP
address of the MX180 in the address bar. To determine
the IP address, push the DISPLAY MODE button until
the IP address appears in the display.
Choose SETUP from the top left of the screen. The
local version will start in the SETUP menu. (See
Figure 09.)
Setup has the following sub-menus:
• Source
• Speakers & room
• Video setup
• Audio setup
• Zone B
• System conguration
• Manage software
In this manual, sub menus are denoted in the style
“SETUP>Video setup>Video Input” which means
from the “SETUP” menu choose “Video setup”
and then choose “Video Input”.
Speaker Setup
SETUP>Speakers & room>Speaker setup
This is where to tell the MX180 the numbers and
types of speakers in your system. When entering
this menu, you will need to acknowledge that “any
changes to the speaker setup will require rerunning
your RoomPerfect™ measurements.” Choose
“Proceed” to continue.
Select a speaker location starting with the LF (or
RF- they will be the same). Choose the speaker size
according to this guide:
Speaker size:
• NONE- This means the Output is not used
• XXL- Plays a full range signal and can accept
bass re-directed from other channels when in
the LF/RF, LS/RS and LRS/RRS positions
• XL- Full range but bass will not be re-directed
to these speakers
• L- Bass cuto frequency is 40Hz
• M- Bass cuto frequency is 80Hz
• S- Bass cuto frequency is 100Hz
• XS- Bass cuto frequency is 120Hz
• Custom- Bass cuto can be manually set
When choosing a custom cuto frequency, select a
frequency higher than the lowest frequency that
your speaker can play. If redirected bass will be
played by a subwoofer instead of the full range
speaker, choose a cuto lower than the highest
frequency the subwoofer can play.
The Bass cuto frequency option is only available
for the Custom speaker choice. Choose a bass cuto
Figure 09– Choosing SETUP from browser
Figure 10– Speaker setup screen