PANEL INSTALLATION (SOLD SEPARATELY)
Panel installation should be done after piping and wiring.
Refer to panel installation manual for detailed information about installing the panel.
Be sure that the indoor unit and ceiling hole installation size is right before installation.
The drain pipe of indoor unit must have the heat insulation , or it will condense dew, as well as the
connections of the indoor unit.
The declivity of the drain pipe downwards should not be over 1/100, and no winding and bending.
The total length of the drain pipe when pulled out traversely shall not exceed 20m , when the
pipe is over long, a prop stand must be installed every 1.5 to 2m to prevent winding.
Refer to the following figures about the installation of the pipes.
Do not impose any pressure on the connection part of the drainage pipe.
Be sure to seal the connection parts between - and the panel - the
indoor unit ,or even small gaps may cause wind/water leakage or condensing water.
the panel the ceiling
Be sure to follow this Installation Manual during drainage installation,
the drainage pipe must have the heat insulation to prevent condensing.
CAUTION
CAUTION
DRAINAGE PIPE INSTALLATION
!
CAUTION
6
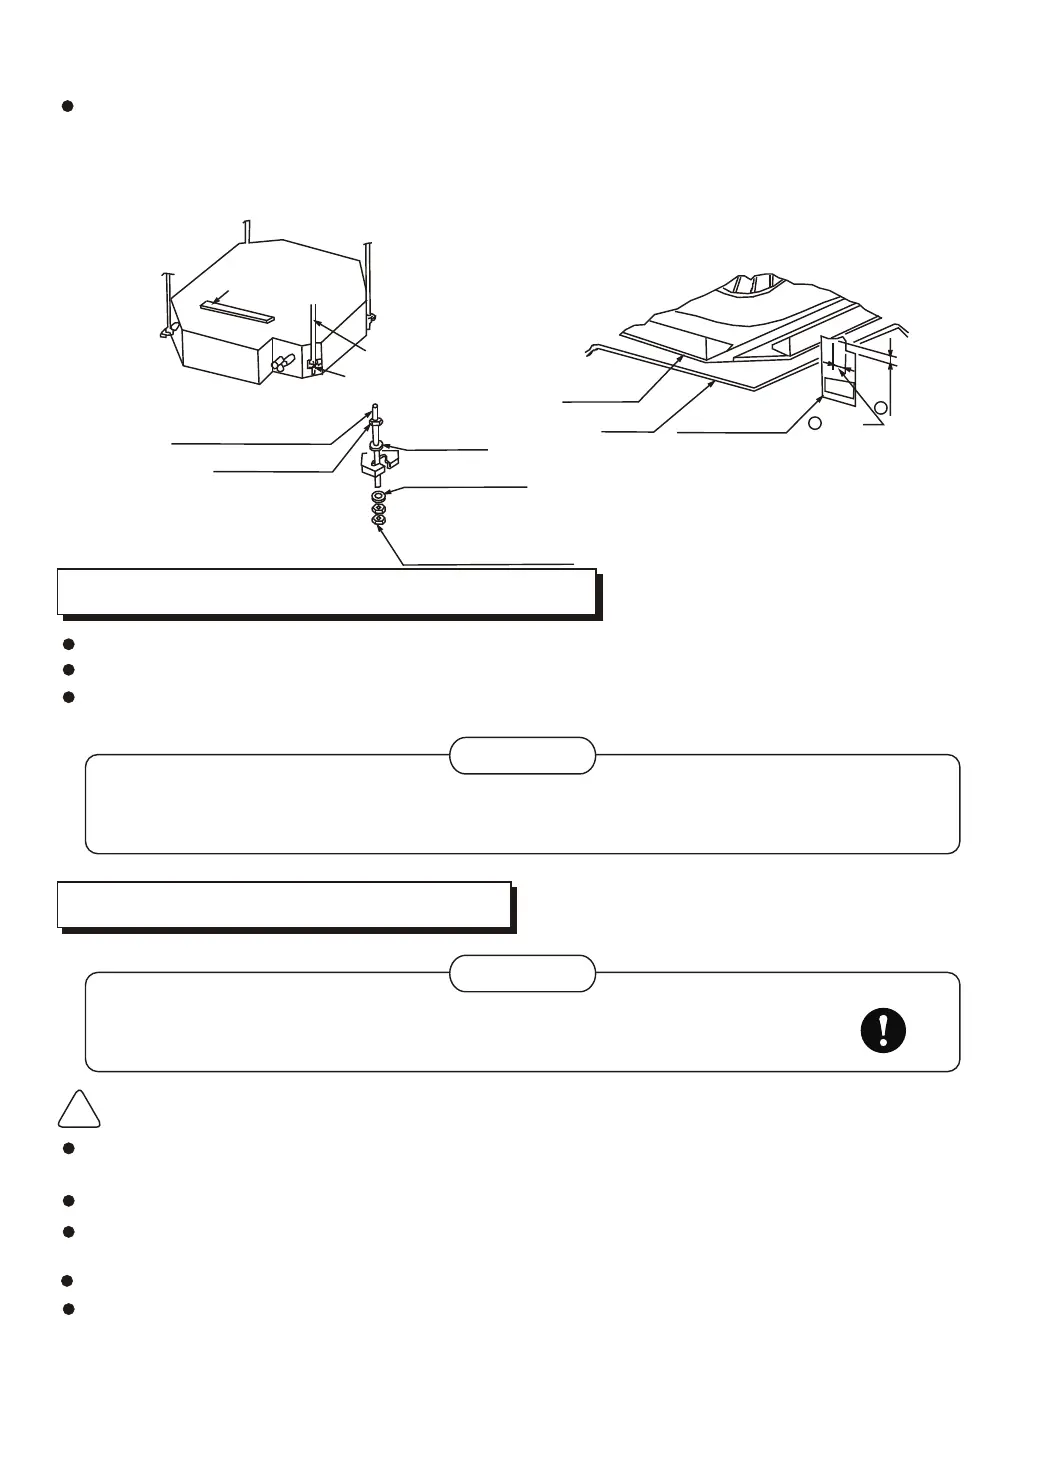
Tighten nut M10
Install the hanging bolt into T groove of the hanging tool. Overhang the indoor unit and ensure
it is level using a level indicator.
Level Indicator
Hanging Screw Bolt
Hanging Screw Bolt M10
Install it down the
installing-ear
Locking Nut M10
Hanging Ear
f10 Gasket
Indoor Unit
Ceiling
Installation Plate
2
30mm
1
43mm