followed, batteries may explode, catch re, or leak.
Improperly installed batteries void your Meade
warranty. Always remove the batteries if they are
not to be used for a long period of time.
1*
AutoStar Suite DVD.
1(
Right Ascension (R.A.) Setting Circle: See page 53
for detailed information.
2)
Flip-Mirror and Flip-Mirror Control Knobs: ETX
telescopes include an internal mirror. With the ip-
mirror control in the “up” position, as shown in Fig. 4,
20 light is diverted to the eyepiece. With the ip-mirror
control in the “down” position light proceeds straight
out the photo port for photography.
Note: The ip-mirror control is in the “up” position when
the control is vertical (perpendicular to the telescope
tube). To place the ip-mirror in the “down” position,
turn the control until it is horizontal.
2!
Photo Port: Attach any 35mm camera with a
removable lens to this port using an optional #64 T-
Adapter or attach the #932 Erecting Prism for correctly
oriented images through the eyepiece. See OPTIONAL
ACCESSORIES, page 19.
2@
Declination (Dec.) Setting Circle (on left fork arm):
See page 53 for detailed information.
2#
Viewnder Alignment Screws: Adjust these screws
to align the viewnder. See pages 8 and 14 for more
information.
2$
Dust Cap: Squeeze the two tabs on the sides of
the dust cap to unlatch the cover from the front lens of
the telescope.
2%
Bubble Level/Compass: Used to aide in setting the
telescope in the Home Position. See page 9. When
placed in the 90° eyepiece holder (pg. 13, Fig. 3, 4)
the bubble level compass can be used to level the
telescope and determine the direction of magnetic
North.
.
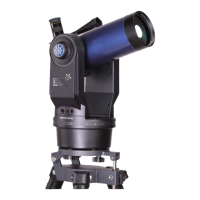
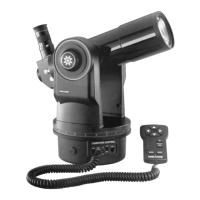
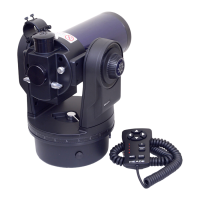
ETX90 KEY FEATURES
16