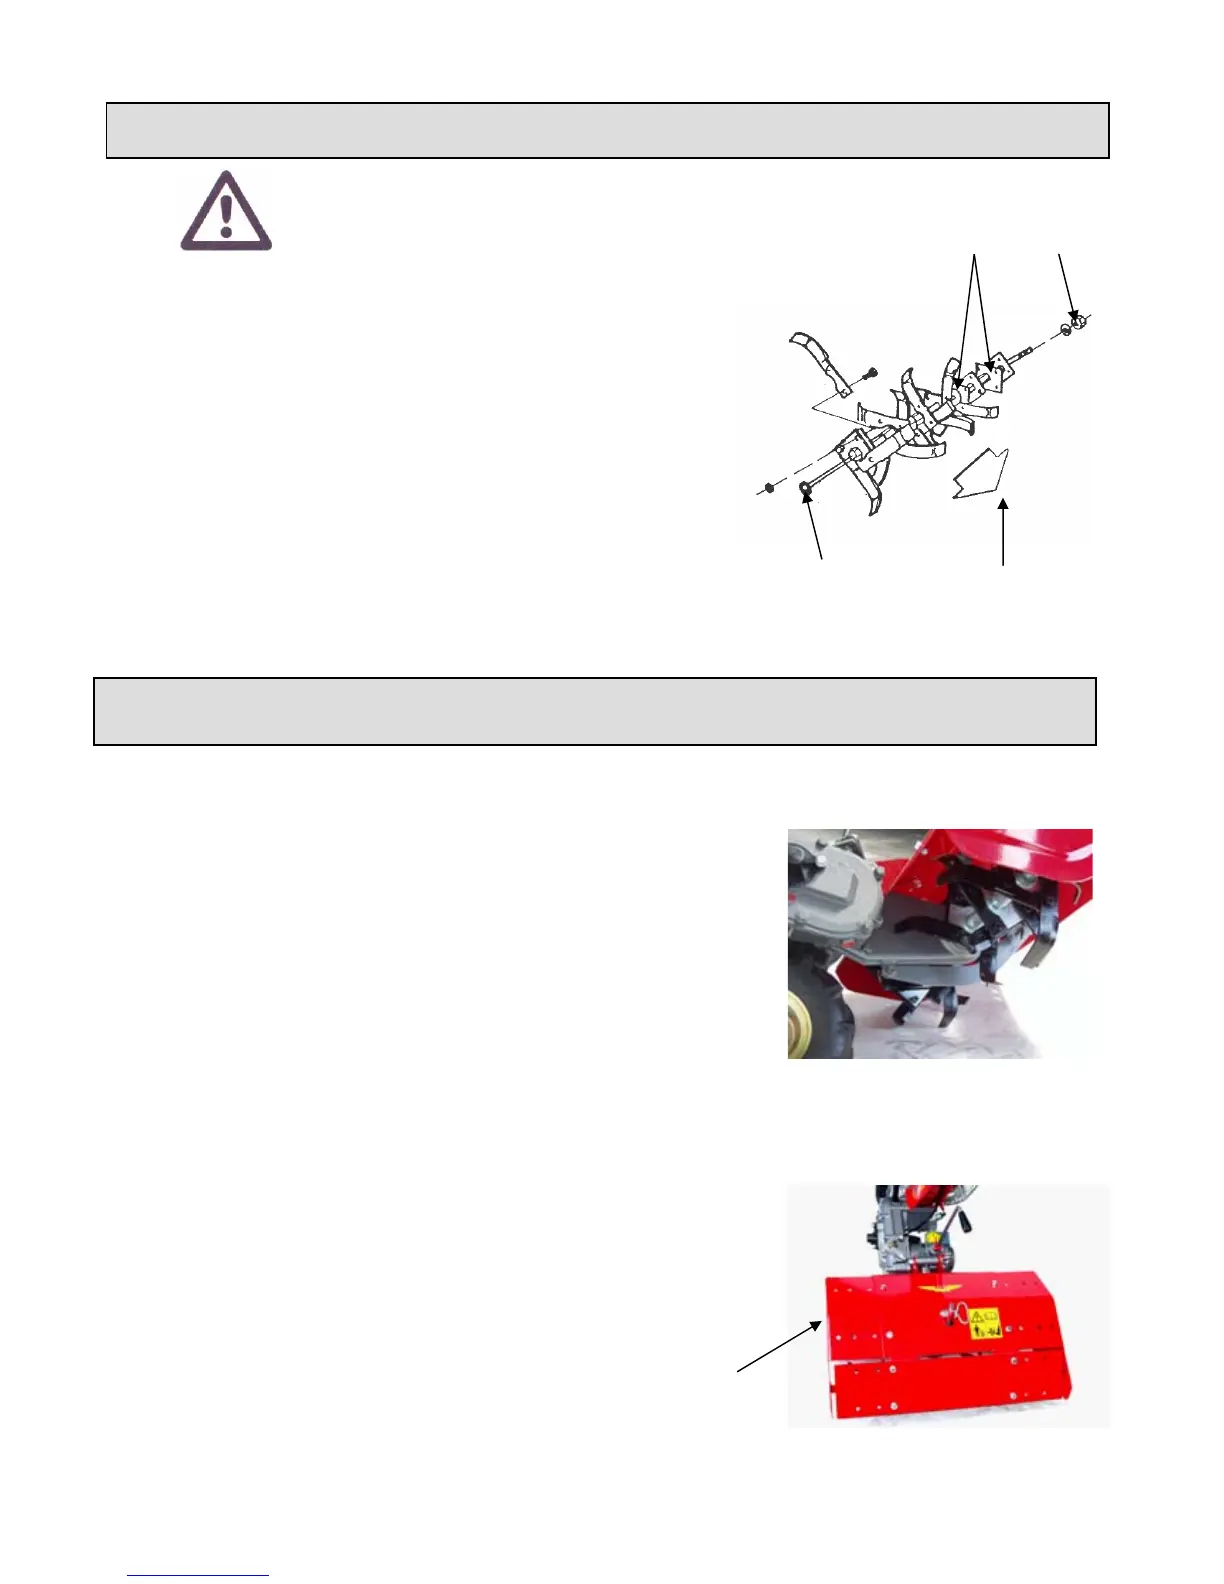
18 – ASSEMBLY and DISASSEMBLY
RUNNING
DIRECTION
3
2
1
Pic. 1
IMPORTANT!
The tool shaft has a hexagonal profile so that knives can be
quickly fitted.
Clean the tiller hubs and the tool shaft carefully lubricating it in
order to make assembly and disassembly easier.
-Fit tiller’s hubs “1”pic.1 into the tool holder shaft and fasten
them by the tie-pin “2” pic.1 and the NUT “3” pic. 1.
NB: The tiller tie-pin must be always fitted from the right side
of whom drives the machine avoiding in this way that the
fastening nut “3” may unscrewing. Verify it periodically if well
tightened.
-The cutting side of knives must be always faced towards the
forwarding direction. Verify periodically if knives are well
tightened.
18 / 1 – TILLER SET COMPONENTS
C
Pic. 2
BUSHING : mm. 53.
Unilateral LEFT KNIFE .
Unilateral RIGHT KNIFE .
Bilateral LEFT KNIFE .
Bilateral RIGHT KNIFE .
PIVOT with nut : cm. 14 - pic. 2
PIVOT with nut : cm. 31.5
PIVOT with nut : cm. 48
Adjustable HOOD : cm. 16-24 - pos.“C” pic.3
Adjustable HOOD : cm. 32-40-50 -pos.“C” pic.3
Complete tiller SET : knives /pivot/adjustable hood cm.16 - 24 .
Complete tiller SET : knives /pivot/adjustable hood cm.32 ,40,50
ACCESSORIES : ADJUSTABLE RIDGER with COUPLING.
Pic. 3
- 11 -


 To Next Page