page 12
The display will show ALARM OFF and SET.
Press the ENTER key to change ALARM OFF to ALARM ON.
Press the DOWN key to move the arrow cursor to SET and
press the ENTER key.
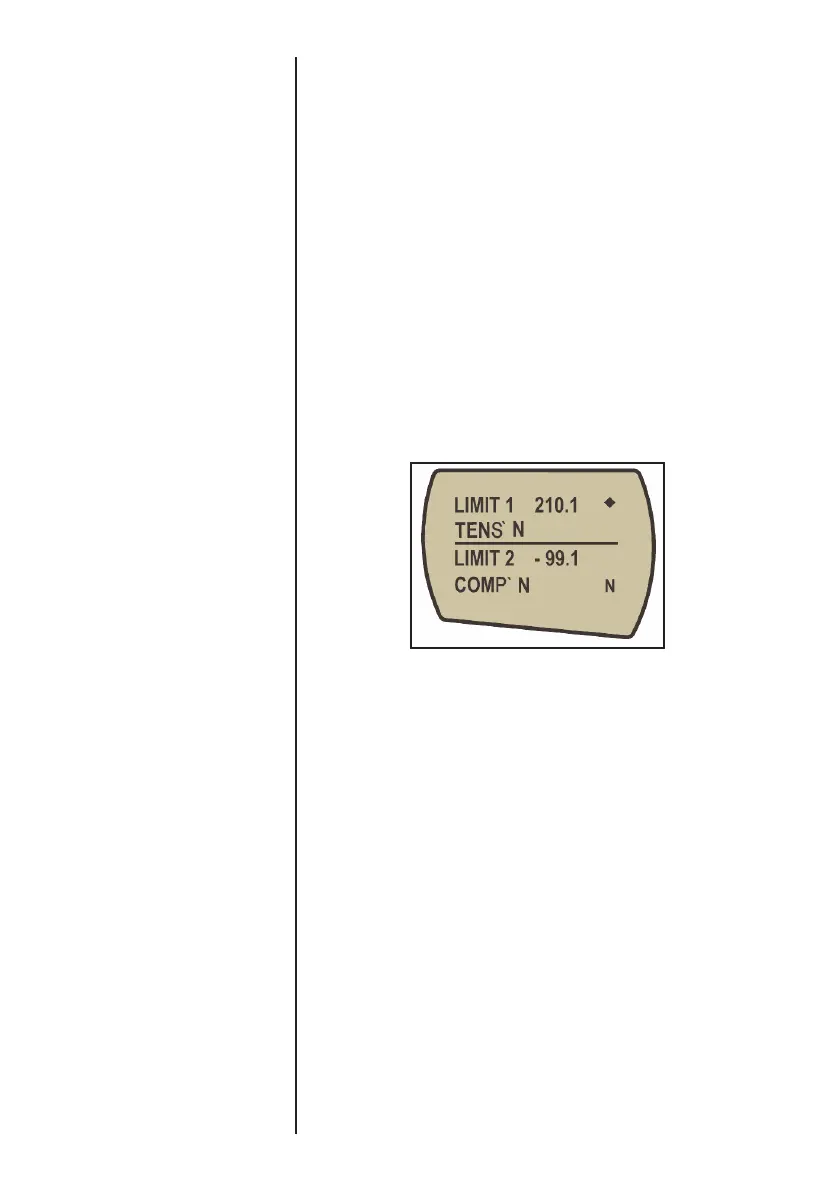
The display will now show the two limits LIMIT 1 (lower limit)
and LIMIT 2 (upper limit) plus the value they are set to and
whether they are in tension (TENS’N) or compression
(COMP’N). A diamond cursor will indicate which value is
selected. Use UP and DOWN keys to change the value,
press and hold to scroll values. When the correct value is
reached press the ENTER key to set LIMIT 1. Repeat
procedure for LIMIT 2 (see figure 6).
Note: The alarm limits are not active below 1% of the
capacity of the gauge.
The display shows AUDIBLE, LED and BOTH with the arrow
cursor indicating which feature is selected. This menu selects
how the PASS/FAIL status of a value will be indicated.
AUDIBLE - Only the audible alarm will be activated when
the value is a PASS/FAIL.
LED - The green and red LED’s will indicate the PASS
/FAIL status.
BOTH - Both the LED and the audible alarm will be
activated above.
Use the UP and DOWN keys to move the cursor and press
the ENTER key to select the desired feature.
The display shows OUT BAND and IN BAND. This menu
selects which values are to be considered.
ALARM sub-menu 1
ALARM sub-menu 2
Torque sensors will show
CW for clockwise and
CCW for counter-
clockwise
ALARM sub-menu 3
ALARM sub-menu 4
Fig. 6