EasyManua.ls Logo

Medela Lactina Series User Manual

Medela Lactina Series
2 pages
To Next Page IconTo Next Page
Page #1 background imageLoading...
Page #1 background image
Lactina
®
Electric Breastpump
Screw cylinder tightly
into pump connector.
Attach pump connector
to Lactina, and rotate
until tab is secure in slot.
Push piston into
pumping arm, and
rotate until snug in
clamp.
3
4
5
Make sure breastshield
and connector are
securely attached.
Screw containers into
connectors.
Insert clear ends of
tubing into openings
in connectors.
Insert other ends of
tubing into ports in
pump connector.
IF SINGLE PUMPING:
insert plug into
unused port.
7
Center breastshields
over your nipples and
start pumping.
12
8
9
10
2
Kit Parts
Pump
Connector
Vacuum
Regulator
Ring
Collection
Container
Membrane
Valve
Container
Stand
Lid
Tubing
Quickstart Instructions
For Double &
Single Pumping
See Medela’s instruction
booklet for detailed kit assembly,
cleaning and pumping time
information.
Slide piston into
cylinder.
Push assembled valve
& membrane onto
connector.
6
1
Cylinder
Rubber
Seal
Piston
PersonalFit
Connector
PersonalFit
Breastshield
Medela, Inc., P.O. Box 660
McHenry, IL 60051-0660
Phone: 800-435-8316 or 815-363-1166
Fax: 815-363-1246
Email: customer.service@medela.com
www.medela.com
PersonalFit is a trademark of Medela.
Medela and Lactina are registered trademarks of Medela, Inc.
1907234 B 0403 ©2003 Medela, Inc.
11
Set vacuum regulator
ring to “MIN.” Adjust for
comfort once pumping
begins.
LctnaQst E_S 1907234B-rev_LactinaQstENG_SPN1907234 B 3_03.qxd 5/18/11 8:11 AM Page 1
Question and Answer IconNeed help?

Do you have a question about the Medela Lactina Series and is the answer not in the manual?

Medela Lactina Series Specifications

General IconGeneral
TypeElectric
Power SourceAC adapter
Adjustable SuctionYes
Double PumpingYes
PhasesSingle-phase
Noise LevelModerate
UsageFrequent Use
CompatibilityMedela bottles
WarrantyVaries by region and retailer

Summary

Lactina Electric Breastpump Quickstart Instructions

Kit Parts Identification

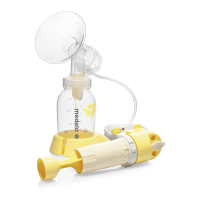
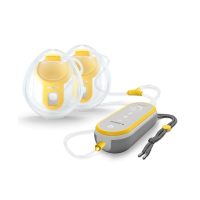
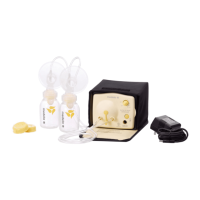
Diagram showing all components of the Lactina Electric Breastpump kit, including breastshield, connector, cylinder, and tubing.

Step 1: Piston Insertion

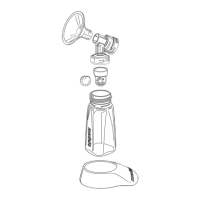
Instruction to slide the piston into the cylinder as the first step in assembly.

Step 2: Cylinder to Pump Connector

Instruction to screw the cylinder tightly into the pump connector.

Step 3: Pump Connector to Lactina

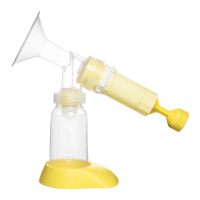
Instruction to attach the pump connector to the Lactina unit and secure it.

Step 4: Piston into Pumping Arm

Instruction to push the piston into the pumping arm and rotate until snug.

Step 5: Secure Breastshield and Connector

Instruction to ensure the breastshield and connector are securely attached.

Step 6: Valve and Membrane Assembly

Instruction to push the assembled valve and membrane onto the connector.

Step 7: Containers to Connectors

Instruction to screw the collection containers into the connectors.

Step 8: Tubing to Connectors

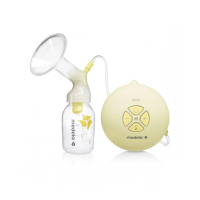
Instruction to insert the clear ends of the tubing into the openings in the connectors.

Step 9: Tubing to Pump Connector

Instruction to insert the other ends of the tubing into the ports of the pump connector.

Step 10: Single Pumping Configuration

Instruction for single pumping: insert plug into the unused port.

Step 11: Vacuum Regulator Adjustment

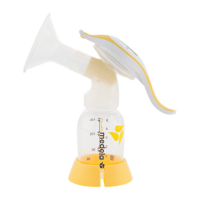
Instruction to set the vacuum regulator ring to 'MIN' and adjust for comfort.

Step 12: Breastshield Positioning and Pumping

Instruction to center breastshields over nipples and begin pumping.

Related product manuals