EN
34
The chuck is designed so that it can easily
be tightened or released with one hand.
NOTE:
The spindle locks automatically when the
chuck stops rotating.
2. Insert the accessory as far as it will go into
the chuck. Point the tool up a bit, so that
the accessory does not fall out.
3. Tighten the chuck sleeve clockwise so that
the accessory is clenched between the
chuck jaws.
NOTE:
Check that the accessory is straight, centred
and not skew. If the accessory is not properly
positioned it could y out when starting the
tool. Check that the chuck jaws rest on the
at surfaces of the accessory.
4. Tighten the chuck all the way. Grip the
chuck rmly and turn it clockwise.
POWER SWITCH
1. Press the power switch to start the tool.
The tool has variable speed:
– Press the power switch to increase
the speed.
– Release it a little to reduce the
speed.
2. Release the power switch to stop the tool.
ROTATION SWITCH
NOTE:
Only use the rotation switch when the tool
is stopped – the spindle must not rotate.
Otherwise the tool can be damaged.
• Use the rotation switch (1) to switch between
clockwise rotation and anticlockwise
rotation.
1. Place the battery charger on a level and
stable surface. Plug the charger into a
230 V power point.
2. Connect the battery to the charger so
that it clicks into place (gure 2). The red
LED on the charger goes on when correct
contact is made.
3. When the battery is fully charged, after
about one hour, the red LED goes o and
only the green LED stays on.
4. Unplug the charger from the power point
and remove the battery from the charger.
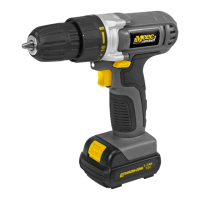
CONNECT BATTERY
1. Connect the battery to the battery socket
on the tool so that it clicks into place.
FIG. 3
REMOVE BATTERY
1. Press the battery lock and remove the
battery from the tool.
FIG. 4
REPLACING BITS/DRILLS
WARNING!
Never hold the chuck sleeve in one hand and
run the tool to tighten or release accessories
– risk of serious personal injury.
1. Chuck, front part
2. Chuck, back part
3. Chuck jaws
FIG. 5
1. Open the chuck by holding the chuck
sleeve in a rm grip and turning it
anticlockwise until the chuck jaws open
and the accessory can be inserted.