30
● The product must only be used for its intended purpose.
● Stop the product and remove the battery before it is left
unattended.
● Stop the product and remove the battery if the product
operates abnormally.
● Inspect the product before use. Make sure that all screws
are tightened and that moving parts do not jam.
● Do not operate the product in a place where objects can
get stuck and be thrown out by the product. Ejected
objects can cause serious personal injury and/or material
damage.
● Stop the product and make sure that all moving parts
have stopped before you put the product down.
● Do not attempt to stop the product with your hands.
● Always hold the product in its designated handles.
● Only operate the product in daylight.
● Make sure to keep your balance at all times.
● Do not run with the product.
● Make sure that the ventilation openings on the product
are free from debris.
● Do not use the product with metallic blades.
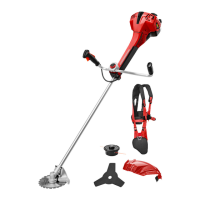
3 Assembly
Warning! Do not attach the battery until the product
is fully assembled.
3.1 To attach the trimmer guard and
distance wheel
Figure 2
1 Put the trimmer guard onto the motor unit and attach
it with the 2 screws.
2 Put the distance wheel onto the trimmer guard and
attach it with the 2 screws.
3.2 To attach the front handle
Figure 3
1 Remove the front handle screw.
2 Pull the ends of the handle apart lightly.
3 Put the handle onto the handle holder.
4 Attach the front handle screw.
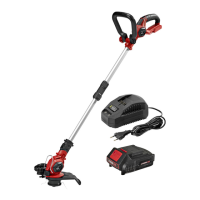
4 Operation
4.1 To replace the trimmer spool
Figure 4
1 Remove the battery from the product.
2 Push the locking tabs on the trimmer head and
remove it.
3 Remove the old trimmer spool.
4 Put the 2 trimmer lines of the new trimmer spool
through the 2 trimmer line outlets.
5 Put the trimmer spool inside the trimmer head.
Note! The side of the trimmer spool with arrows must be
visible when you have installed it inside the trimmer head.
6 Put the trimmer head back into the trimmer head slot.
Make sure that the trimmer head clicks into place.
4.2 To replace the trimmer blades
Figure 5
1 Remove the battery from the product.
2 Push the locking tabs on the trimmer head to remove
the trimmer head.
3 Push the 2 trimmer blades inwards to release them
from the locking pins.
4 Remove the trimmer blades from the trimmer head.
5 Open the ring on the rear handle (A) and take out 2
new trimmer blades.
6 Put the 2 trimmer blades onto the locking pins on the
trimmer head and pull them outwards to lock them in
place.
7 Put the trimmer head back into the trimmer head slot.
Make sure that the trimmer head locks into place.
 Loading...