Do you have a question about the Meinberg LANTIME M100 and is the answer not in the manual?
Set up SSH client (PuTTY) with serial port, speed, and framing for connection.
Log in to the LANTIME and access the Ethernet configuration menu for IP setup.
Note assigned IP/Netmask, close client, and start web interface for management.
Establish serial connection via SSH client and log in with default credentials.
Modify the network configuration file to set IP address and disable DHCP.
Save changes, reboot the LANTIME, and access the web interface via configured IP.
This document outlines the process for establishing a serial connection to a LANTIME NTP server, specifically addressing models without a display, and details the initial configuration steps for both V5 and V6 firmware versions. The primary function of this procedure is to enable users to check or assign an IP address to the LANTIME device, which is crucial for its subsequent network integration and management via a web interface.
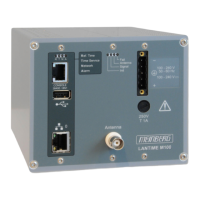
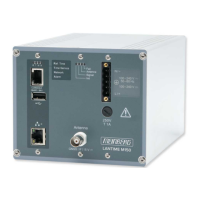
The LANTIME NTP server is designed to provide precise time synchronization. For models lacking a physical display, initial setup and troubleshooting require a direct serial connection from a PC. This connection allows access to the device's command-line interface (CLI) or configuration menu, enabling the user to configure network parameters such as the IP address and subnet mask. Once these parameters are set, the device can be connected to a network and managed remotely through its web-based interface. The serial connection acts as a foundational access method, essential for bringing the device online and resolving network-related issues that might prevent web interface access.
For LANTIME devices running V5 firmware, the serial connection process begins by opening an SSH client on a PC, such as PuTTY. The user must specify the serial port of the PC (e.g., COM3) and the correct connection values: a speed of 38400 Baud and framing of 8N1. After confirming these settings, the connection is established.
Upon successful connection, the user logs in using default credentials (username: root, password: timeserver). From the command line, typing setup grants access to the LANTIME Configuration window. Within this menu, the user navigates to the "Ethernet" section and then selects "Ethernet 0" to access the configuration for the primary network interface.
Here, the user can observe or configure the IPv4 settings. If the device is configured to obtain an IP address via DHCP, the assigned IP address and netmask will be displayed. It is critical to note these details, as they are required to access the device's web interface later. After noting the IP address, the user closes the configuration windows and exits the SSH client. The final step involves connecting the LANTIME to the network and accessing its web interface using the configured IP address in a web browser.
The physical setup for a serial connection involves either a NULL-MODEM cable or an USB to Serial Adapter. If an adapter is used, it may require a signal changer (TxD - RxD) and potentially a gender changer, depending on the adapter cable's connector type. This flexibility in connection methods ensures compatibility with various PC setups.
LANTIME devices with V6 firmware (LTOS6) have a slightly different approach as the traditional CLI Interface is no longer supported in the same way. The initial serial connection setup remains similar: open an SSH client like PuTTY, specify the serial port (e.g., COM3), and set the connection parameters to 38400 Baud and 8N1.
After establishing the connection, the user logs in with the default credentials (root / timeserver). Instead of entering a setup command, the user directly accesses the network configuration file using a text editor, specifically nano /etc/mbg/net.cfg. This command opens the configuration file where network parameters are defined.
Within this file, the user scrolls to the section labeled [VIRTUAL INTERFACE 0]. If DHCP is enabled, the IP address assigned by the DHCP server will be visible here. This IP address can then be used to establish a connection via the web interface. If a static IP address is desired, the user can configure the IPV4-ADDRESS and IPV4-NETMASK parameters directly within this file. Additionally, the DHCP client can be deactivated by setting DHCP-CLIENT=OFF.
Once the desired changes are made, the user saves the file by pressing CTRL + x, confirming with y, and pressing Enter. To ensure the new configuration is applied, the user must save the configuration using the saveconfig command and then reboot the system with the reboot command. Finally, the LANTIME is connected to the network, and its web interface is accessed via the newly configured IP address in a web browser.
Similar to V5 firmware, the physical connection for V6 firmware also utilizes either a NULL-MODEM cable or an USB to Serial Adapter, with the same considerations for signal and gender changers if an adapter is employed.
The serial connection serves as a critical maintenance feature, particularly for headless LANTIME units (those without a display). It provides a direct, out-of-band access method that is independent of the network configuration. This is invaluable for:
The ability to directly edit configuration files (as seen in V6 firmware) offers a powerful maintenance capability, allowing granular control over the device's settings. The saveconfig command ensures that any changes made are persistently stored, and the reboot command provides a clean way to apply these changes. These features collectively ensure that the LANTIME device can be reliably managed and maintained even in challenging network environments or during initial deployment.