9
three times.
•Thegrindergrindsthesetquantityofcoeedirectly
into the filter holder and switches o automatically
when it has ground the required quantity.
•Removethelterholderfromtheapplianceand
level the ground coee in the filter by shaking the
filter holder slightly.
•Insertthelterholderbackontotheupperappli-
ance holder Make sure that it clicks audibly into
place.
Note:
•Toensureproperfunctioningofthegrinder,donot
use caramelized coee beans.
•Donotpourgroundcoeeintothebeancontainer.
•Theappliancehasanoverloadsafetyfunction
of the grinder, which protects the grinder against
damage by foreign objects in the coee beans. If you
hear a loud chattering, unknown noise during the
grinding process, switch the appliance o and
clean the grinder as described in point 6.2.
3.3 Brewing
•Afterthegrinderswitcheso,thebrewingmodeis
activated. The BREW LED starts flashing quickly.
•Forperfectcoeewerecommendpre-brewingthe
coee. Briefly press the PRE-BREW button before
starting brewing to activate this setting for the next
coee preparation. The PRE-BREW button lights
up continuously and at the beginning of brewing the
water supply is briefly stopped after the coee has
been moistened. Pressing the button again deacti-
vates pre-brewing. The last setting is saved for the
next coee preparation.
•StartmakingcoeebybrieypressingtheBREW
button. The BREW button starts flashing slowly. If
the appliance beeps three times during this process,
there is no water in the water tank.
•Duringbrewing,thewaterisheatedandowsthrough
the rotating spout onto the ground coee . The ap-
pliance stores dierent brewing profiles depending
on the number of cups selected. The ground coee
is evenly moistened by dierent rotations for each
brewing profile.
•Itisalsopossibletomanuallycontrolthedirection
and time of rotation during brewing (see 3.6 Manual
extraction control)
•Theendofthebrewingprocessisindicatedacousti-
cally by a short signal tone. The BREW button now
lights up continuously, indicating the warm-keeping
phase.
•Thehotplatekeepsthecoeehotandthen
switches o automatically after 40 minutes to avoid
unnecessary power consumption. Of course you
can also switch o the device manually at any time
by pressing the BREW button for longer than 1 sec.
•Thedripstoppreventscoeedrippingwhenyou
remove the jug from the machine.
•Byremovingthelterholderthecoeeltercanbe
disposed of easily.
3.4 Using already ground coffee
•Ifyouwanttousealreadygroundcoffee,prepare
thefilterholderasdescribedunder3.1.
•Put6gpercupintothecoffeefilterandpushit
backontotheupperholder.
•Activatetheappliancewithalongpressonthe
BREWbutton.
amount of water can be seen on the water level
indicator on the tank .
•Placethelterholderinitspositiononthetop
right of the appliance housing under the spout
and start the appliance by briefly pressing the
BREW button. The BREW button will now flash
slowly. After the heater warms up briefly, water
flows from the spout into the filter holder.
•Anacousticsignalindicateswhenthewaterhas
flowed through completely. Empty the jug and
switch o the hot plate by pressing and holding
the BREW button for longer than 1 second. After
a short cooling time you can then use the appliance
to make coee for the first time.
3. Making coffee
3.1 Preparation
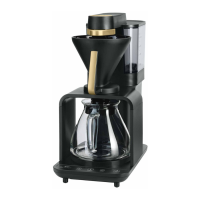
•Removethebeancontainerlidandllthebeancon-
tainer with whole roasted beans . Then replace
the lid. The full bean container can make eight cups
of coee two to three times.
•Fillthewatertank.Theremovabletankcanbelled
directly at the tap. Alternatively use the glass jug to
pour the water into the tank in the appliance. The
required amount of water can be seen on the water
level indicator on the tank.
•Removethelterholderhorizontallyfromits
holder and insert the coee filter . For good
flavour and the best fit in the filter holder, we
recommend using Melitta
®
coee filters.
•Placethelterholderwithcoeelterontheleft
of the housing recess under the grinder .
3.2 Grinding
•Activatethegrinderwithalongpressonthe
GRIND button. The LED indicator for the GRIND
button will start flashing rapidly.
•Settherequiredamountofcoeebybriey
pressing the cup selection button . Each time you
press the button, the corresponding LED display
changes to the next number of cups. Setting the
grinding time indirectly sets the grinder for the
required quantity of coee.
•Ensurethatthenumberofcupsyouselectmatches
the amount of water in the water tank. Please note
that all the water from the water tank is used to
make the coee. If the number of cups and the
amount of water do not match, this can lead to the
coee not being the way you want it.
•Thestrengthcanalsobevariedindividuallyforeach
number of cups. Briefly press the coee strength
button to change the corresponding LED display.
The display shows 1 for mild, 2 for ideal and 3 for
strong. The grind time is changed accordingly.
•Grindingisnotalwaysthesamefordierentcoees
with dierent roasts. If the grind quantity does
not meet your individual requirements in any of
the settings, a further fine adjustment of the grind
quantity is possible (see 3.5 fine adjustment of grind
quantity).
•Withthesliderontheuppergrinderhousingyou
can set the desired grind degree for the coee. The
slider has three settings for fine, medium and coarse .
Intermediate positions can also be selected.
•Aftersettingthis,startthegrindingprocessby
briefly pressing the GRIND button. The GRIND
button starts flashing slowly. If the bean container is
not inserted correctly, a short warning tone sounds
GB
 Loading...