First steps
14
GB
3 First steps
3.1 Unpacking the appliance
Remove the packaging material and the adhe-
sive strips from the appliance. Please keep the
original packaging.
3.2 Setting up the appliance
Set up the appliance in a dry room.
Set up the appliance on a stable, at and
dry surface. The surface may not be hot.
The appliance may not be placed in the
vicinity of sinks or the like.
Route the power cable so it does not lie
over edges or cannot be damaged by hot
surfaces or the hotplate.
Store the length of cable that you do not
need in the cable-winding facility in the
base of the appliance.
3.3 Connecting the appliance
Only connect the appliance to an easily acces-
sible, properly installed earthed mains socket.
After connecting, all lamps will illuminate
briey one after the other.
Full isolation from the mains is achieved by
disconnecting the mains plug.
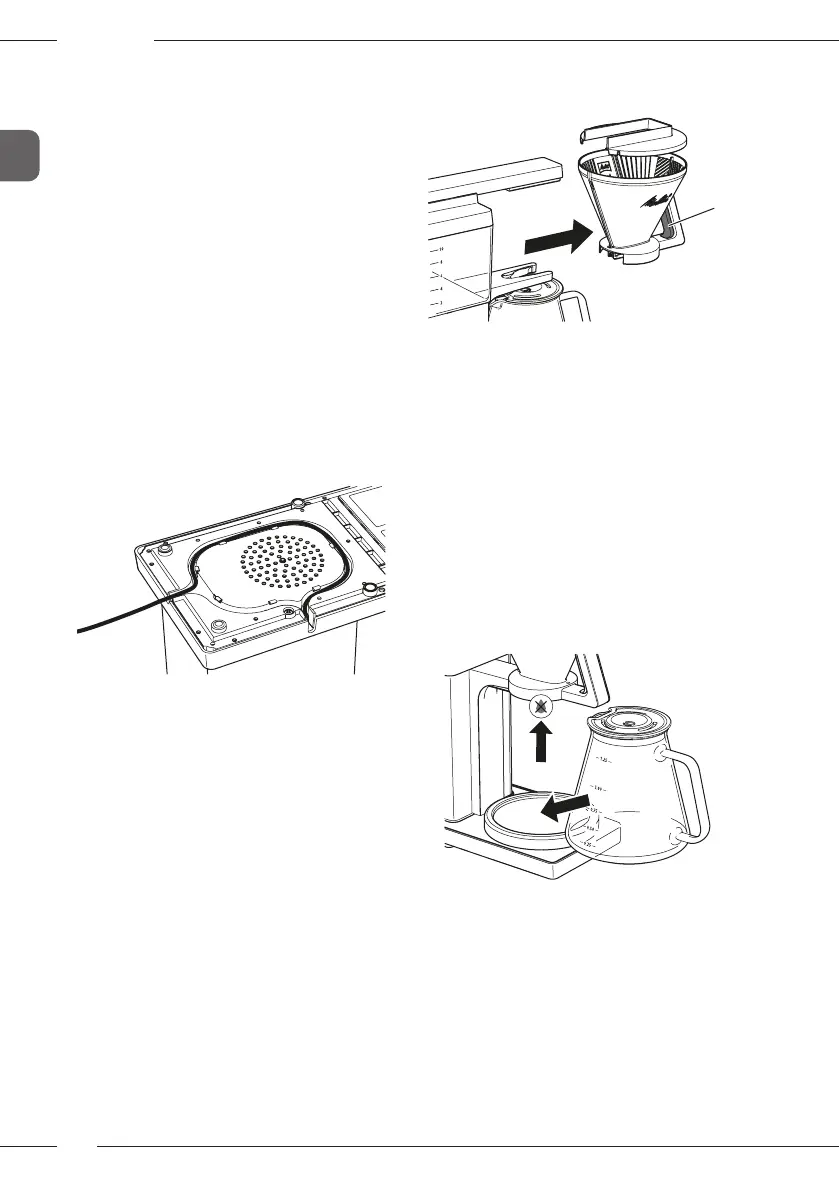
3.4 Removing lter
14
To remove the lter, press the lever (14) and
pull the lter by the lter handle out of the
appliance.
The lter must click in audibly upon inserting.
Place the lter lid on the lter.
3.5 Removing jug
Always hold the jug by the jug handle when
removing and inserting it.
Place the jug correctly on the hotplate so that
the jug lid pushes the drip stop up slightly. This
opens the drip stop and the contents of the
lter can ow into the jug. The drip stop stops
coffee dripping when you remove the jug.
3.6 Filling water tank
The markings on the water tank correspond
with the number of cups that you prepare
during a brewing process. The brewing pro-
cess will always use up all of the water in the
water tank. Therefore, ll only the quantity
of water that you require for the subsequent
brewing process. The lled quantity of water
 Loading...