Do you have a question about the Melnor AquaTimer 65036-AMZ and is the answer not in the manual?
Insert two AA alkaline batteries, do not use rechargeable batteries.
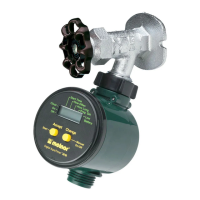
Attach timer to faucet and ensure water is left on for operation.
Avoid use below 40°F (4.5°C); store dry and protected from frost.
Address potential open valves during installation by turning off water and removing/reinserting batteries.
Periodically clean the timer to remove debris or sediments from water.
Protect timer from freezing temperatures by turning off water and storing indoors.
Use fresh alkaline batteries, avoid rechargeables, and remove batteries at season end.
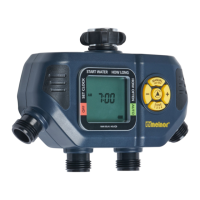
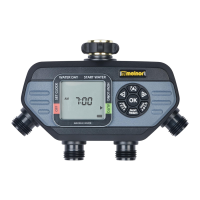
The Melnor AquaTimer 65036-AMZ is a four-zone electronic water timer designed for outdoor use, allowing users to automate watering across four distinct areas from a single faucet. This device simplifies garden and lawn maintenance by providing programmable watering schedules and various operational modes.
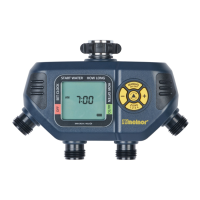
The core function of the AquaTimer is to control water flow to up to four different zones based on user-defined schedules. It operates by opening and closing internal valves at specified times and durations. The timer features a clear LCD screen and intuitive button controls for programming.
To begin, the user must set the current time. This involves touching any button to wake the timer, using the cursor button to navigate to "SET CLOCK," and then using the +/- buttons to adjust the hour and minute. Once the time is set, pressing the cursor button again moves to the "START WATER" setting.
This setting determines the first watering time of the day for a specific zone. With the arrow pointing to "START WATER," the user employs the +/- buttons to select the desired start time. All subsequent watering cycles for that day will be based on this initial setting. After selecting the time, the cursor button is pressed to proceed to the next setting. The screen will highlight Zone 1, indicating that programming for this zone should be completed first before moving to others.
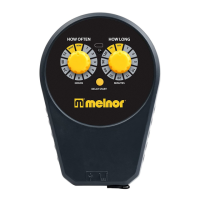
Here, the user defines the duration of each watering cycle. With the arrow pointing to "HOW LONG," the +/- buttons are used to set the watering length, which can range up to 360 minutes (6 hours). Pressing the cursor button confirms the duration and moves to the next setting.
This setting controls the frequency of watering. With the arrow pointing to "HOW OFTEN," the +/- buttons allow the user to choose how often watering occurs. Options range from "Every 1 Hour" to "Every 7 Days" (once per week). The cursor button is pressed to confirm and move on.
After completing the "START WATER," "HOW LONG," and "HOW OFTEN" settings for Zone 1, the user presses the zone button to return to "START WATER." They then press the zone button again to select Zone 2, and repeat the programming steps (4-6) for this new zone. This process is followed for all desired zones (up to four). Once all zones are programmed, the cursor button is pressed to enter "AUTO" mode.
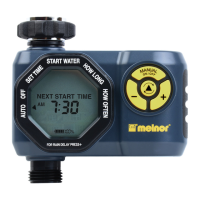
Once programmed, the timer enters "AUTO" mode. In this mode, the screen alternates between displaying the current time and the next scheduled watering cycle for each zone. If the next watering cycle is more than 24 hours away, the "NEXT START TIME" will be displayed in days rather than a specific time.
If rain is expected, the user can temporarily suspend the watering program for up to 7 days using the "RAIN DELAY" feature. To activate this, the arrow must be pointing to "AUTO." The user presses the zone button to select the delay period, which can be adjusted with the +/- buttons. During "RAIN DELAY" mode, the screen toggles between the current time and the remaining delay time. If the delay is longer than 12 hours, it will be shown in "DAYS." The watering program automatically resumes after the selected delay period ends.
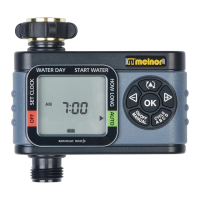
To stop watering for an extended period, the user can activate "OFF" mode by pressing the zone button until the arrow points to "OFF." In this mode, the timer will not water automatically, and the screen will display "OFF" in large letters. To resume automatic watering, the user presses the zone button until the arrow points to "AUTO," and the program will begin at the next available start time. This feature stops watering for all zones simultaneously.
For immediate watering or using a hose, the user can activate "MANUAL" mode by pressing the manual watering button. The +/- buttons are then used to select the desired zone and the length of time to water. After a few seconds, the selected valve will open and automatically close once the set time is reached. To exit manual watering, the manual watering button is pressed again.
To completely erase all settings and return the timer to its original state, the user presses and holds the zone button for 7 seconds. The screen will display "RESET," indicating that all programming has been lost.
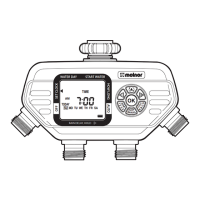
The timer requires two AA alkaline batteries (rechargeable batteries are not recommended). The battery holder is removed from the back of the Timer Control Unit, batteries are inserted as indicated, and the holder is securely replaced. The battery indicator on the screen will show when batteries need replacing.
The timer is attached to an outside faucet, and the water is slowly turned on. The water must remain on while the timer is attached for it to operate. The timer can be programmed either before or after attachment.
If water continuously runs through the valves during installation due to shaking during transportation, the user should turn off the water, remove the batteries (waiting for the screen to go blank), and then reinsert them. This will not erase existing schedules. Then, the water is turned back on. If the problem persists, the user should turn off the water and use the "Manual" feature to open and close each valve three times.
Periodic cleaning is recommended to prevent debris or sediment buildup. The user should turn off the water, remove the timer from the faucet, and check the filter washer. If debris is present, the filter washer should be removed and cleaned. To flush out built-up sediments, the user can activate "MANUAL" mode, open all valves, and spray water through each valve and the faucet connection.
To prevent damage from freezing temperatures, the timer should be removed from the faucet at the end of the season or when frost is forecast. The water should be turned off, and the timer removed. The batteries should also be removed, and the timer stored indoors, away from freezing temperatures.
Users should use fresh alkaline batteries and avoid rechargeable ones. Batteries should be removed at the end of the season before storing. Batteries typically last about one season, but more frequent watering schedules can cause them to drain faster.
| Brand | Melnor |
|---|---|
| Model | 65036-AMZ |
| Product Type | Water Timer |
| Type | Digital |
| Watering Cycles | Up to 4 per day |
| Power Source | Battery |
| Operating Pressure | 20-100 PSI |
| Weather Resistant | Yes |
| Material | Plastic |
| Battery Type | 2 AA |
| Inlet Connection | 3/4 inch |
| Outlet Connection | 3/4 inch |