Do you have a question about the Melnor HydroLogic 65076-AMZ and is the answer not in the manual?
Explains the two-zone capability and programming via a planning table.
Details on inserting AA batteries and attaching the timer to a faucet.
Guide to setting the 12-hour/24-hour clock and current day of the week.
Instructions for selecting specific days or an interval for watering.
Procedure to set up to four independent watering start times per zone.
Guide to setting the length of each watering cycle, up to 360 minutes.
Steps to program watering schedules for the second zone.
Final step to activate the programmed watering schedule.
How to temporarily suspend watering for up to 7 days due to rain.
Instructions to stop watering indefinitely until manually reactivated.
Guide for on-demand watering for tasks like car washing or filling buckets.
Procedure to erase all settings and return to factory defaults.
Advice on valve operation, cleaning, seasonal storage, and battery life.
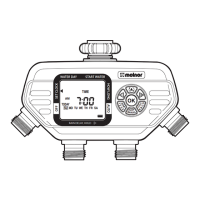
This document describes the Melnor HydroLogic 65076-AMZ Advanced Two-Zone Electronic Water Timer, a device designed to automate garden watering.
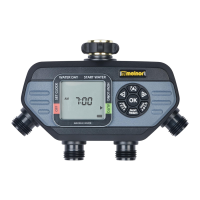
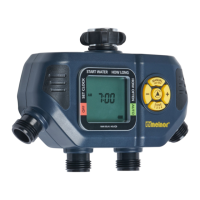
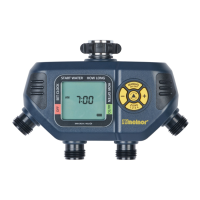
The Melnor HydroLogic 65076-AMZ is a two-zone electronic water timer that allows users to program watering schedules for two different areas from a single faucet. Each zone can be programmed with up to four distinct start times. The timer operates by controlling the flow of water to each zone based on user-defined settings for watering days, start times, and duration. It features a clear display and a touchpad for easy navigation and programming. The device is intended for outdoor use and helps conserve water by enabling precise scheduling.
The timer supports two independent zones, allowing for customized watering schedules for different parts of a garden or lawn. A planning table is provided to help organize complex watering schedules.
The timer requires two AA alkaline batteries (rechargeable batteries are not recommended). The battery holder is located at the back of the Timer Control Unit. It's important to ensure the battery holder is firmly and securely placed. The timer should not be used when air temperature is below 40°F (4.5°C) and should be stored in a dry, frost-protected place when not in use. Batteries should be replaced when the indicator shows low power.
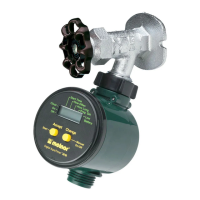
The timer attaches to an outside faucet. The water must remain on while the timer is attached for it to operate. Programming can be done either before or after attaching it to the faucet.
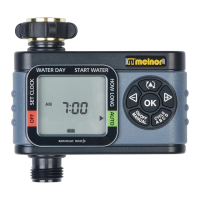
The default time setting is 12-hour mode (AM/PM). To switch between 12-hour and 24-hour modes, hold the OK button for 5 seconds. Changing the time mode will erase all existing programs. Before setting watering times, the current time and day of the week must be set. When batteries are first installed, an arrow on the screen will point to CLOCK. If not, the user should press the button until CLOCK is indicated. The current day is set by using the +/- buttons and confirming with the OK button. The time is set similarly using the +/- buttons and OK. After setting the clock, press the button to move to WATER DAY.
With the arrow pointing to WATER DAY, users can select specific days of the week or an interval period for watering. Days are selected using the +/- buttons and confirmed with the OK button, indicated by a square around the selected day. For interval watering, navigate past the days of the week and set the desired interval (e.g., EVERY 1 DAY to EVERY 7 DAY(s)). Zone 1 is highlighted by default, and users should program Zone 1 before moving to Zone 2.
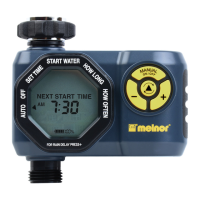
Up to four independent start times (CYCLE A, B, C, D) can be set for each zone. With the arrow pointing to START WATER, CYCLE A is highlighted. Use the +/- buttons to select the first watering time. To set additional start times, press the button to move to the next cycle (B, C, D) and repeat the process. After setting all desired start times, press the button to move to HOW LONG. Holding the +/- buttons allows for faster adjustment of settings.
With the arrow pointing to HOW LONG, use the +/- buttons to select the duration of each watering cycle, up to 360 minutes (6 hours). After setting the duration for a cycle, press the button to move to the next cycle. This process is repeated until HOW LONG has been set for all desired cycles. Cycle length cannot overlap the next START WATER time. Watering cycles can only be selected if a start time has been set in the previous step.
After setting WATER DAY, START WATER, and HOW LONG for Zone 1, press the button back to WATER DAY. Then, press the button to select Zone 2 and repeat steps 4-6. Once all desired zones are set, press the button to enter AUTO mode.
In AUTO Mode, the timer will run the programmed watering schedule. The screen display will alternate between showing the current time and the next watering cycle for each zone.
This feature allows temporary suspension of the watering program for up to 7 days. With the arrow pointing to AUTO, hold the button until "DELAY" appears. Use the +/- buttons to set the duration of the delay, then press OK. The delay can be reduced or deactivated. During RAIN DELAY, all other functions, including MANUAL WATERING and OFF, are on hold. To cancel, set DELAY to "0". The screen will alternate between the current time and the remaining delay time.
To stop watering indefinitely, press the button until the arrow points to OFF. The screen will display "OFF," and the timer will not water. To resume automatic watering, press the button until the arrow points to AUTO. The program will resume at the next scheduled START WATER time. This feature stops watering for both zones.
To use a hose or other watering tool, press the MANUAL button. Then, use the button to select the desired zone. Use the button to select the desired watering duration. After a few seconds, the valve will open and then automatically close when the selected time is reached. This mode can also be used to flush out sediments by activating MANUAL mode and spraying water through the valves and faucet connection.
If valves are open due to transportation, water may run continuously. To resolve this, turn off the water, remove batteries, wait for the screen to go blank, then reinsert batteries. Removing batteries will not erase existing schedules. Turn the water back on. If the problem persists, turn off the water and use the Manual feature to open and close the valves 3 times.
Periodically clean the timer to prevent debris or sediments from building up. Turn off the water, remove the timer from the faucet, and check the filter washer. If debris is present, remove and clean it with water.
Freezing temperatures can damage the timer. At the end of the season or when frost is expected, turn off the water, remove the timer from the faucet, and remove the batteries. Store the timer indoors, away from freezing temperatures.
To completely erase all settings and return to factory defaults, press and hold the OK button for 7 seconds until "RESET" appears. Press and hold the OK button a second time to change the clock format. All programming will be lost after a reset. After resetting, the time setting (12-hour or 24-hour) may need to be reconfigured.
Use fresh alkaline batteries. Do not use rechargeable batteries. Remove batteries at the end of the season before storing. Batteries typically last about one season; more frequent watering times can drain batteries faster.
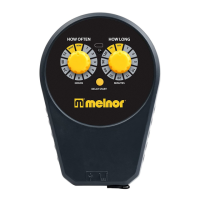
The timer can be connected to a Melnor HydroLogic Soil Moisture Sensor to prevent overwatering and conserve water. The sensor monitors soil moisture and suspends watering cycles when it's raining or the ground is already wet. The dial can be adjusted to maintain optimal moisture levels for healthy lawns and gardens.
| Material | Plastic |
|---|---|
| Number of Programs | 4 |
| Watering Duration | 1 minute to 6 hours |
| Battery Life | Up to 6 months |
| Weather Resistance | Yes |
| Product Type | Water Timer |
| Watering Frequency | Every 6 hours to once per week |
| Battery Type | 2 AA batteries |
| Inlet Connection | Standard 3/4 inch hose thread |
| Outlet Connection | Standard 3/4 inch hose thread |