Installation
4. Before passing the power cable through the
hole, insert the supplied grommet to cover
the metal edges of the drill hole.
6. After confirming the correct POSITIVE (+) and
NEGATIVE (-) wires, turn off the vehicle and
disconnect the NEGATIVE (-) from the vehi-
cules’ battery.
7. The camera can be wired directly to the re-
verse light by simply stripping the insulators
of both cables and twist the camera’s wire
around the exposed reverse light wires.
Wrap the wires with the appropriate electrical
tape.
This can be also done by using the supplied
quick-splice connectors.
8. When the installation is complete, re-attach
the battery’s NEGATIVE cable. Your rear-view
camera is ready for use.
CONTACT YOUR VEHICLE’S MANUFACTURER IF YOU
NEED HELP IN LOCATING THE REVERSE LIGHT CIRCUIT
OR A SPECIFIC WIRING DIAGRAM.
5. You will need to locate the WHITE vehicle’s
reverse lights This can be easily identified by
the following:
- With the parking brake engaged, turn your
vehicle ignition key to “ON” but DO NOT
start the vehicle.
- Shift into Reverse “R” position.
- Look for the WHITE lights.
Once you have locate the WHITE lights, you
will need to connect the camera power cable
to the reverse light circuit by gaining access
to the rear of the vehicle’s tail light.
- The reverse light socket usually has 2 wires
connected to it. The BLACK wire is usually
the NEGATIVE (-) and the colored wire
is usually the POSITIVE (+).
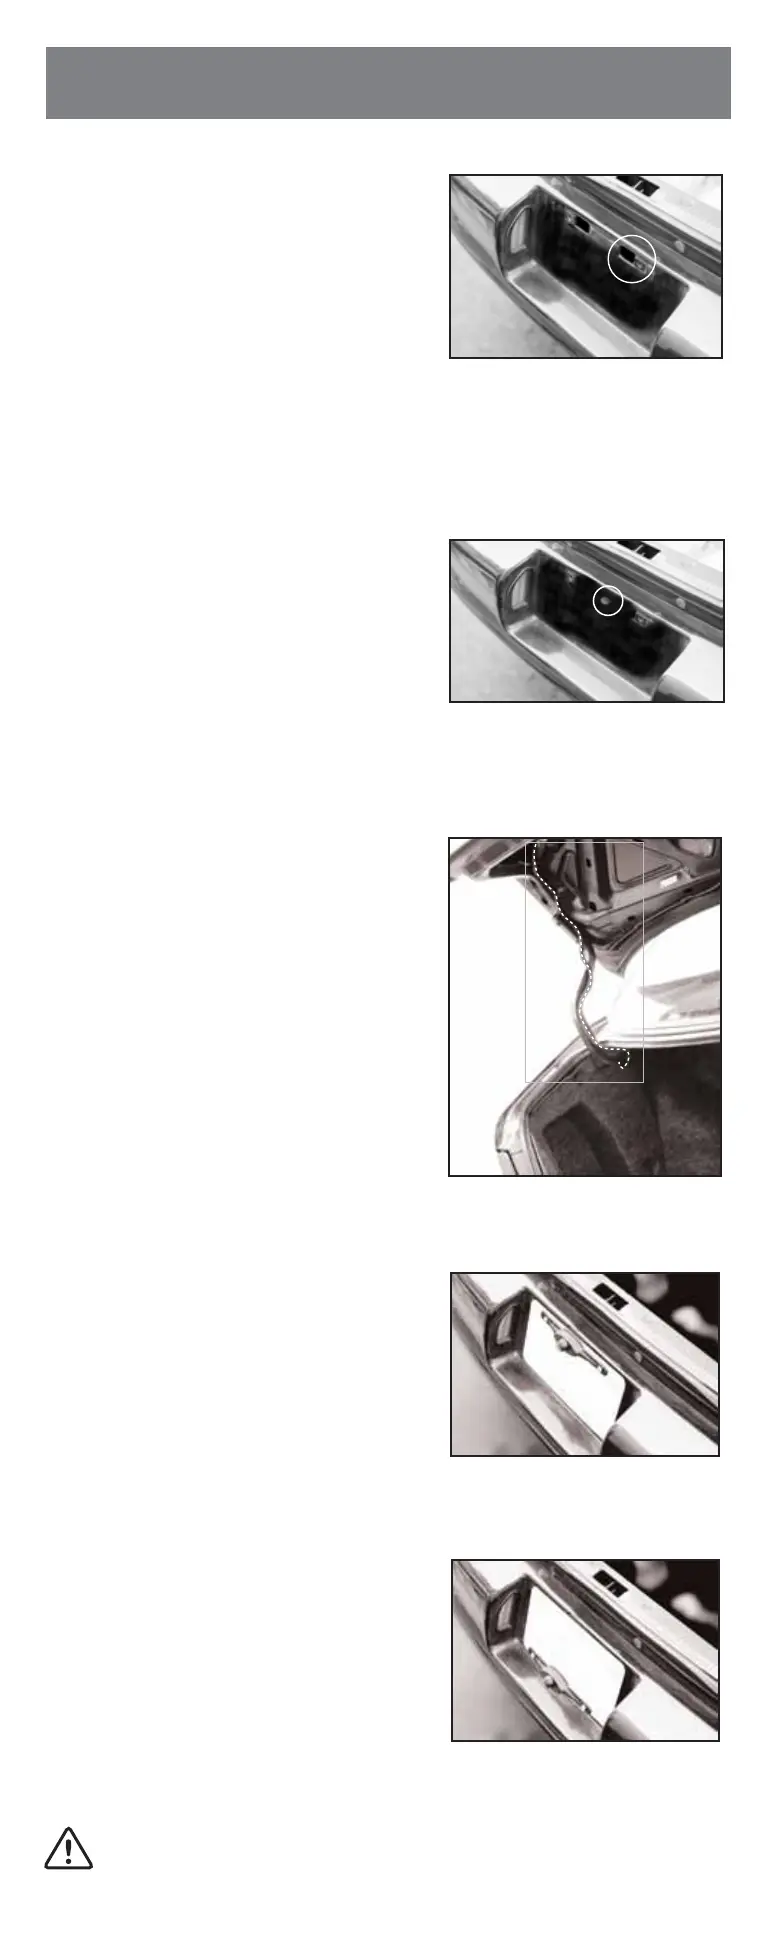
Fig.2
Existing Opening for Access
Fig.3
Drilled Access Opening
Fig.5
Camera Mounted on Top of License Plate
Fig.6
Camera Mounted on Bottom of License Plate
Fig.4
Camera Cable Routing on Hinge
MAKE SURE YOU USE A TRAINED PROFESSIONAL FOR CONNECTING
WIRES IF YOU ARE NOT KNOWLEDGEABLE OF ELECTRICAL PRACTICES.
 Loading...