Installation & Testing
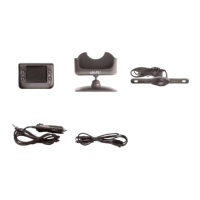
Wireless rear-view camera
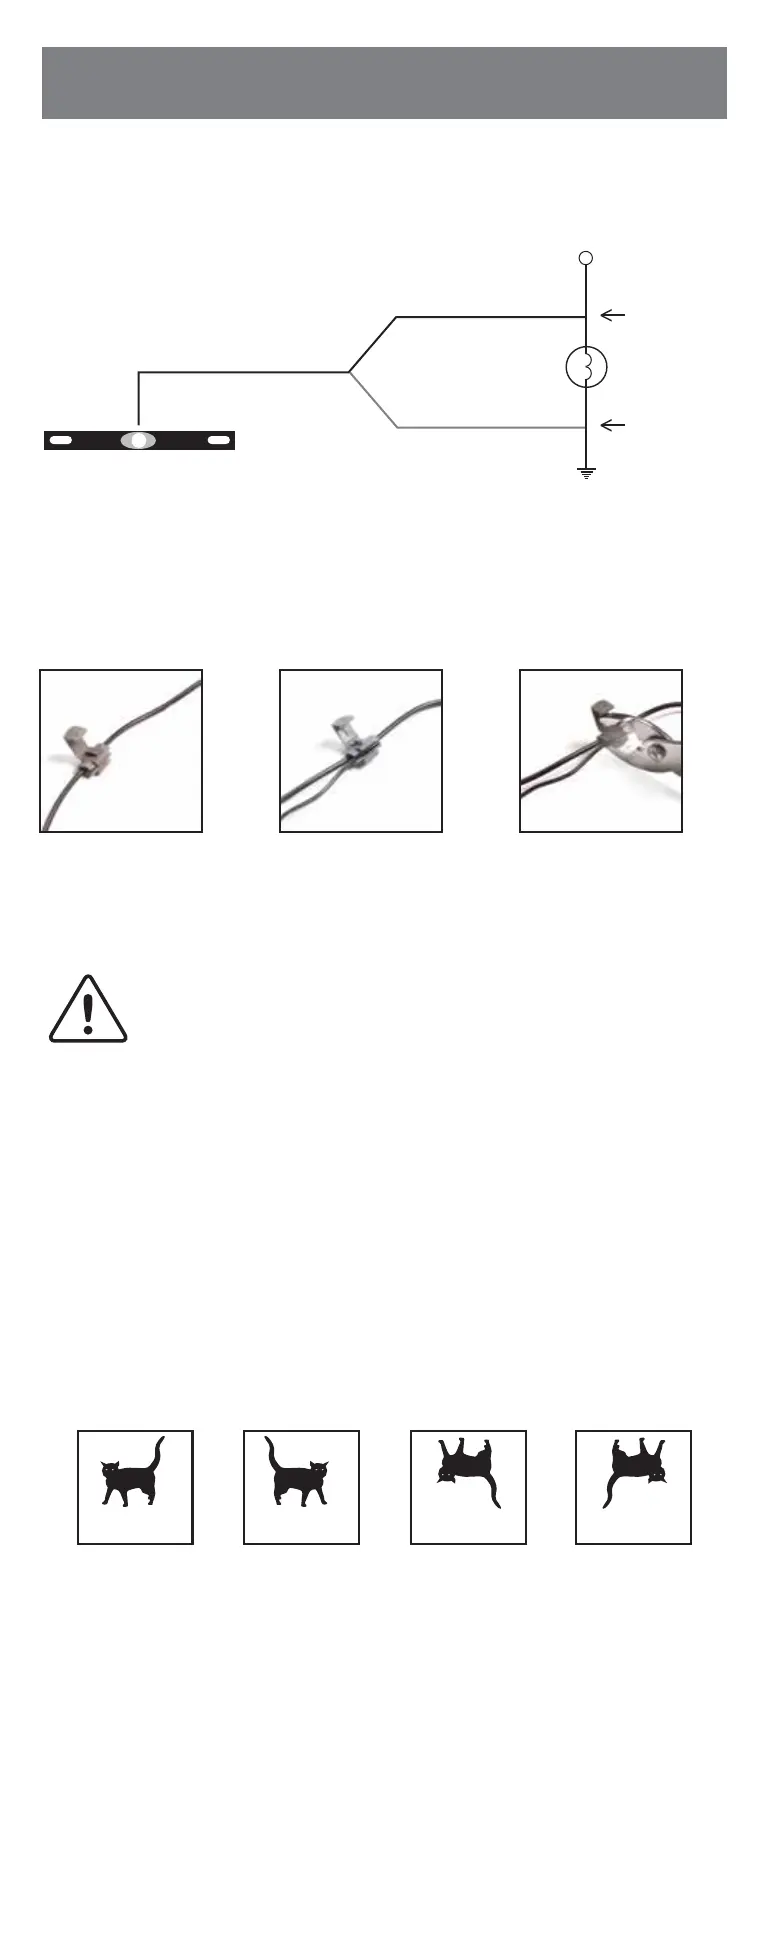
+12V DC positive
Revese light bulb
Quick-splice
connector
Quick-splice
connector
-12V DC negative
(GROUND)
COLORED
Camera wire harness
BLACK
• QUICK-SPLICE WIRING INSTRUCTIONS
• CAMERA WIRING DIAGRAM
There are four different views for the monitor, each time the button is pressed the
image will change.
These different views allow you to mount the camera and/or monitor either right side
up or upside down and still display the image correctly on the monitor. The image
displayed should match your rear view mirror.
After testing the unit and you are satisfied with the route you have chosen for the
cabling, you must permanently install it. Fully tighten the license plate bolts. Route
all wires behind interior panels or under carpeting so they are hidden. Use supplied
cable ties to neatly gather any excess wire.
1. Re-attach the vehicle’s negative battery cable.
2. Turn the ignition key to the accessory position, do not start the vehicle.
3. Engage the parking brake, then put the shifter in the reverse position.
4. Turn the monitor ON by pressing the ON/OFF button on the monitor.
5. Look at the monitor, if the image does not match your rear view mirror press the
Image Orientation button on the monitor to correct the image.
• TESTING THE SYSTEM
Normal
image
Mirror
image
Normal image
upside down
Mirror image
upside down
Insert the existing
wire to be tapped
Insert the wire
to be
attached
Crimp tap with pliers,
then close lock
+
•
•
This device, as well as all other wireless devices, may be subject
to interference. Interference may be caused by cell phones, Bluetooth
headsets, Wi-Fi routers, power lines and other various electrical
equipment, etc.