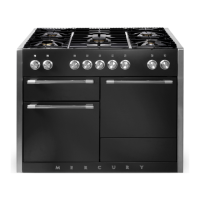
INSTALLATION
Check the appliance is electrically safe when you have nished.
26
Checking the Parts:
Flue Flue Vent
Fitting the Flue
1. Remove the four screws from the grill ue opening (Fig.
9.1).
2. Present the removable ue up to grill ue opening.
Make sure that the bottom ange of the removable ue
ts inside the xed ue, secure in place with the four
screws (Fig. 9.1 and Fig. 9.2).
3. Once the ue is tted, using the two screws supplied,
secure the bottom of the ue (Fig. 9.2).
Fitting the Flue Vent
1. Loosen the three screws in the back of the hotplate (Fig.
9.3).
2. Fit the ue vent over the screws and slide down (Fig.
9.3). Tighten the screws to secure.
n
Before tting the side panels, it is recommended
that the required height of the cooker is set. This will
simplify the Side Panels tting procedure.
Setting the height
You are recommended to use a spirit level on the hotplate to
check the cooker is level.
The front feet and rear rollers can be adjusted to level the
cooker (Fig. 9.4).
1. To adjust the height of the rear of the cooker, t a
13 mm spanner or socket wrench onto the hexagonal
adjusting nut.
2. Rotate the nut – clockwise to raise – counter-clockwise
to lower. Make sure to lower BOTH REAR ROLLERS.
3. To set the front turn the feet bases to raise or lower.
9. Fitting the Flue, Flue Vent and Side Panels
Fig. 9.1
Fig. 9.2
Flue
Fig. 9.3
Fig. 9.4

 Loading...