WARNING – SERVICING TO BE CARRIED OUT ONLY BY AN AUTHORISED PERSON
Disconnect from electricity and gas before servicing. Check appliance is safe when you have nished.
35
ArtNo.0102-0011 - Screwing
the control valve bypass screw
Note: When retting the hotplate, take care not to damage or
displace the ame safety probes (Fig. 11.4).
Ret each of the burner bases; make sure to reconnect the
ignition leads and slide the insulating sleeves in place. Ret
the brass venturis.
Tap Adjustment
It may be possible to adjust the bypass screw by simply
removing the control knobs (Fig. 11.5). If however you
are unable to access the bypass screw using a suitable
screwdriver, you will need to remove the control panel, please
refer to section ‘Removing the Control Panel’ .
Remove the service panel above the control taps.
Turn the bypass screw on each control clockwise to the stop
(Fig. 11.6).
Repeat for all burner control taps.
Ret the service panel and then ret the control panel.
Reassembling to Liquid Propane
Gas
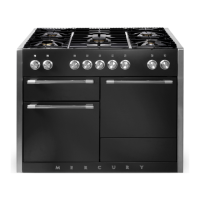
Centre Burner
IMPORTANT: If you are converting to LP Gas the large ring in
the conversion kit MUST be tted to the centre burner.
Fit the large ring (if required). Screw in the hexagon headed
venturi but to make tting the outer burners easier do not
fully tighten yet (Fig. 11.7).
Outer Burners
Screw in the hexagon headed venturis (Fig. 11.8) but to
make tting the other burners easier do not fully tighten yet.
Reassemble all the burners with the venturi tubes and evenly
tighten.
Ret the burner heads, making sure they are reassembled in
the correct way on the burner bodies (Fig. 11.9).
Ret the pan supports.
Stick on Label
Stick the appropriate label on to the data badge to indicate
the gas the appliance is now set for.
Pressure Testing
The gas pressure can be measured at the pressure test point
on the gas connection block.
Connect the pressure gauge. Turn on and light one of the
hotplate burners.
See the data badge for test pressures.
Turn o the burners and remove the pressure gauge.
n
Check the appliance is gas sound.
n
Check the operation of all the burners.
Base of cooktop burnerBottom of burner head
ArtNo.0102-0011 - Screwing
the control valve bypass screw
Fig. 11.5
Fig. 11.6
Fig. 11.7 Fig. 11.8
Fig. 11.9

 Loading...