NOTE: Flushing is needed only for salty, brackish, mineral‑laden or polluted
water applications. Flushing is recommended after each outing.
NOTICE
Flushing the engine with the boat in the water can cause seawater to flow
into the engine, resulting in engine damage. Close the seacock before
flushing the engine. Keep the seacock closed until starting the engine.
1. Drain the seawater section of the cooling system.
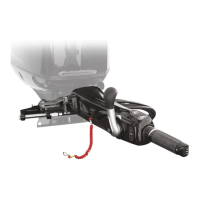
2. If flushing the cooling system with the boat in the water:
a. Raise sterndrive unit to trailer position.
b. Install the appropriate flushing attachment over the water inlet holes in
the gear housing.
c. Lower sterndrive unit to full down/in position.
!
WARNING
Rotating propellers can cause serious injury or death. Never operate the
boat out of the water with a propeller installed. Before installing or removing
a propeller, place the drive unit in neutral and engage the lanyard stop
switch to prevent the engine from starting. Place a block of wood between
the propeller blade and the anti‑ventilation plate.
3. If flushing the cooling system with the boat out of the water:
a. Lower sterndrive unit to full down/in position.
b. Remove propeller.
c. Install the appropriate flushing attachment over the water inlet holes in
the gear housing.
4. Connect a hose between the flushing attachment and the water source.
5. With the sterndrive unit in normal operating position, partially open the
water source (about 1/2 maximum).
6. Place the remote control in the neutral idle speed position and start the
engine.
NOTICE
Operating the engine out of the water at high speeds creates suction, which
can collapse the water supply hose and overheat the engine. Do not
operate the engine above 1400 RPM out of the water and without sufficient
cooling water supply.
7. Operate the engine at idle speed, in neutral, for about 10 minutes or until
the discharge is clear.
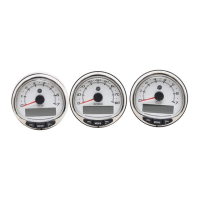
8. Observe the water temperature gauge to ensure that the engine is
operating in the normal range.
9. Stop the engine.
MAINTENANCE
72 eng
 Loading...