RIGHT HAND NON-RATCHETING
Page 6A-38 90-855347R1 JANUARY 1999
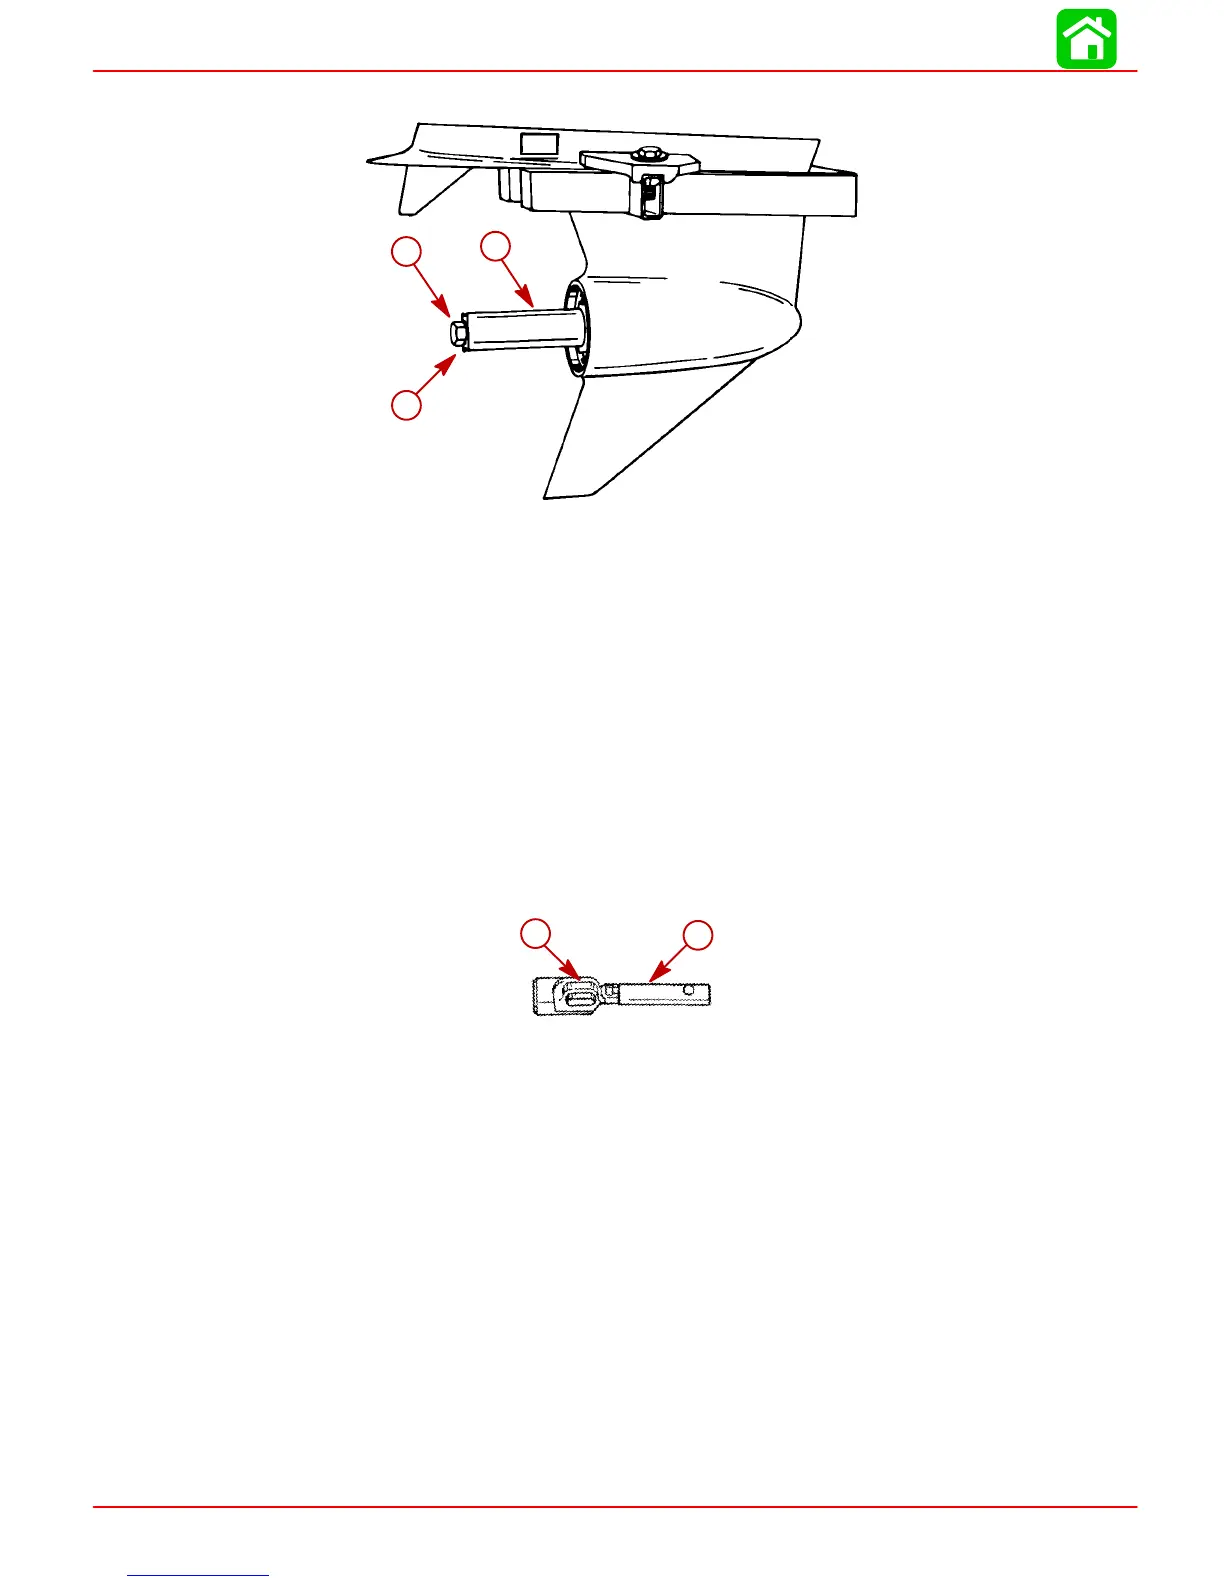
5. Secure pipe against carrier with propeller nut and tab washer.
51866
a
b
c
a-Pipe [6 in. x 1.5 in. (152.5 mm x 38.0 mm)]
b-Propeller Nut
c-Tab Washer
6. Torque propeller nut to 45 lb. in. (5 Nm).
7. Gently rock driveshaft. Dial indicator should show backlash of 0.030 in.-0.050 in.
(0.762 mm- 01.27 mm).
If backlash is not as indicated, gear case is not properly assembled or parts are excessive-
ly worn and must be replaced before returning gear case to service.
Clutch Actuator Rod
REASSEMBLY
1. Place a small amount of Quicksilver 2-4-C w/Teflon Lubricant on actuator rod and
install cam follower.
a
b
a-Actuator Rod
b-Cam Follower
Shift Shaft Bushing
REASSEMBLY
1. Position shift shaft bushing on a press with threaded side down.
2. Apply Loctite 271 to outside diameter of oil seal.
3. Press oil seal into shift shaft bushing with lip of seal up.
4. Wipe any excess Loctite from oil seal and bushing.
5. Place rubber washer against oil seal.
6. Install O-ring over threads and up against shoulder of bushing.
7. Lubricate O-ring and oil seal with Quicksilver 2-4-C w/Teflon Marine Lubricant.

 Loading...


