MAINTENANCE
78
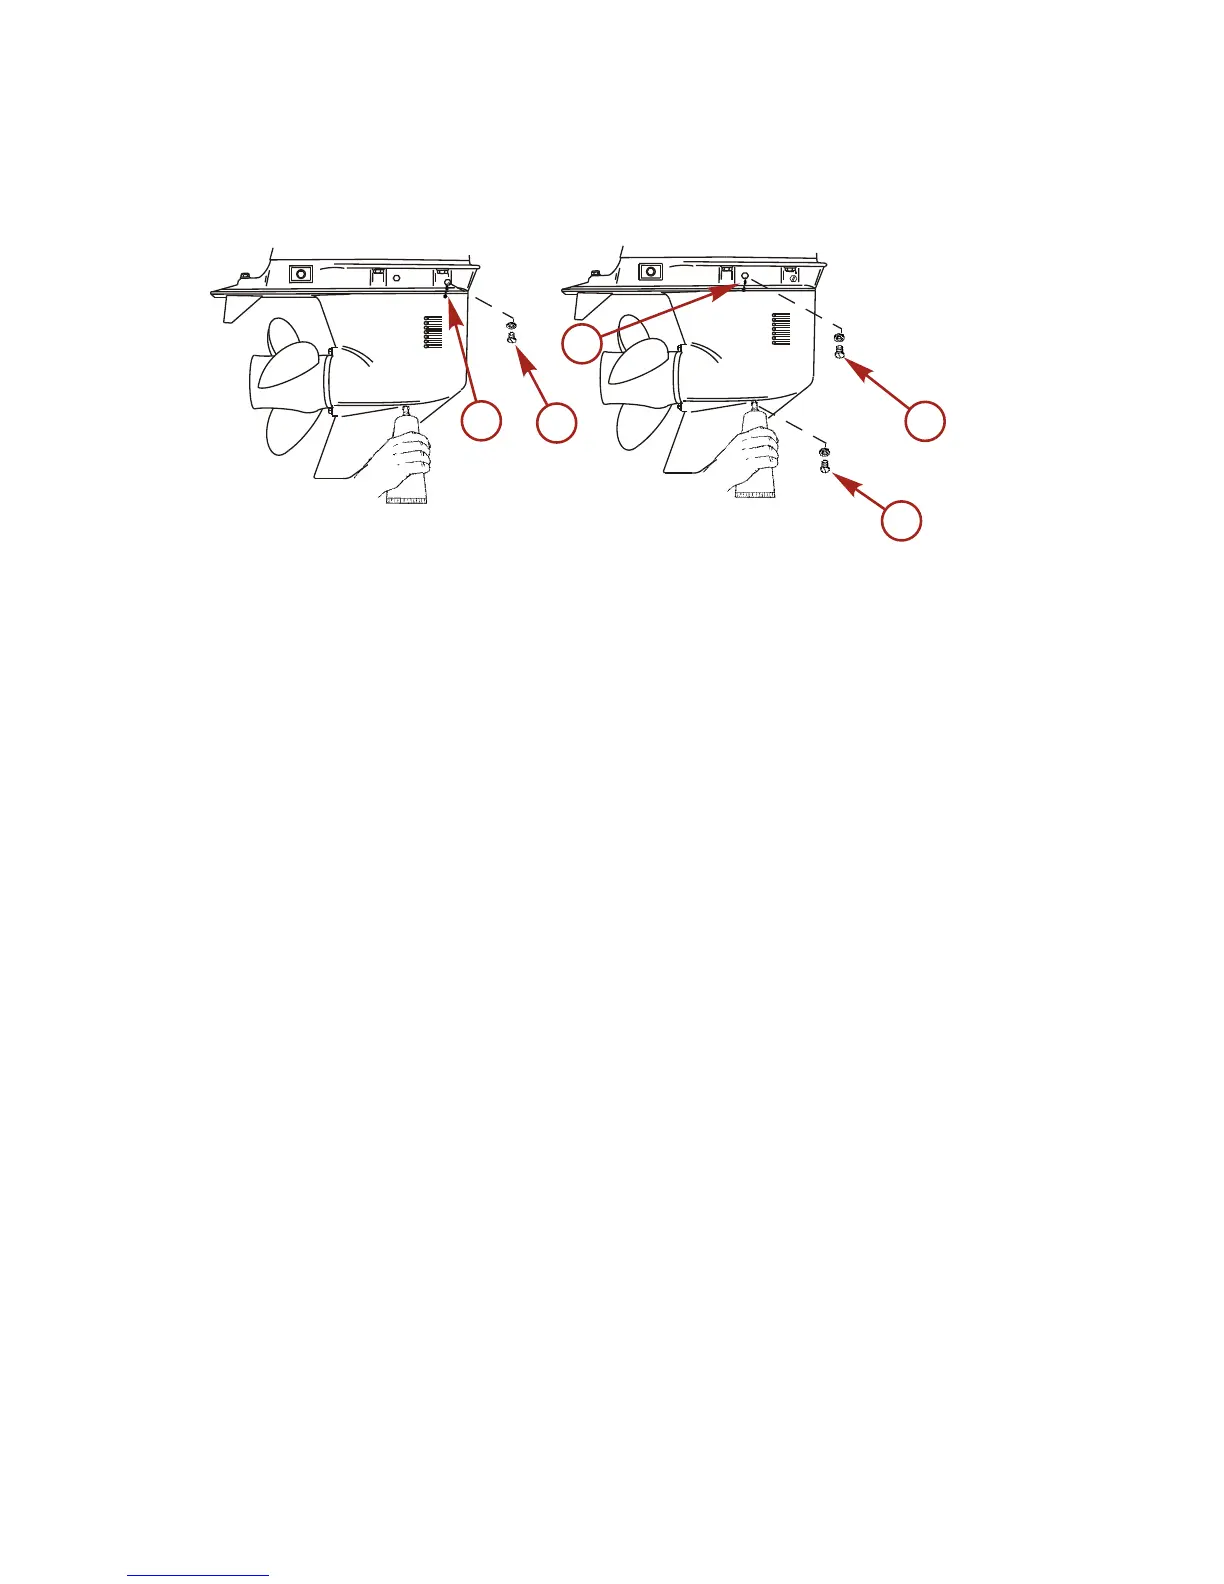
3. Remove fill/drain plug. Place lubricant tube into the fill/drain
plug hole and add lubricant until it appears at the front vent
hole. At this time install the front vent plug and sealing washer.
a - Front vent plug
b - Front vent hole
c - Rear vent hole
d - Rear vent plug
e - Fill/drain plug
4. Continue adding lubricant until it appears at the rear vent hole.
5. Stop adding lubricant. Install the rear vent plug and sealing
washer before removing lubricant tube.
6. Remove lubricant tube and reinstall cleaned fill/drain plug and
sealing washer.
SUBMERGED OUTBOARD
A submerged outboard will require service within a few hours by
an authorized dealer once the outboard is recovered from the
water. This immediate attention by a servicing dealer is necessary
once the engine is exposed to the atmosphere to minimize internal
corrosion damage to the engine.