68 Meru Access Point Installation Guide © 2010 Meru Networks, Inc.
Check AP1000 LEDs
AP1000 Beta Test
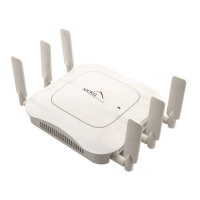
The AP1000 has two LEDs, Status and LAN, as shown in Figure 44. If you want to change the appearance
of the LEDS, follow these steps:
1. From the controller, click Configuration > Devices > AP, and then select the AP.
2. Select one of these settings for the LED Mode setting:
— Normal: LEDs are as described below
— Node ID: Not supported in release 4.1
— Blink: Sets all LEDs flashing; this is useful to locate an AP
— Dark: Turns off all LEDs
3. Click OK.
LED Color State:
Status
(left LED)
off
AP is off - either there is no power or the LEDs are
set to Off on the controller. Check the LED setting
on the controller by clicking Configuration >
Devices > AP, selecting the AP and then checking
the setting for LED Mode.
cyan AP is booting stage 1.
green blinking AP is booting stage 2.
green/white alternating AP is discovering the controller.
green/blue alternating
AP is downloading a configuration from the
controller.
slow blue blinking AP is online and enabled.
rapid blue blinking
AP is online and enabled and there is activity on
one or both radios.
red/yellow alternating
Some AP failure occurred; check the controller for
more details about the alarm by clicking Monitor
> Alarms > Pending Alarms.
blue/yellow alternating
AP is online and enabled and one or both radios
are either scanning or an admin has taken the
radio(s) down.
LAN
(right LED)
green LAN link is up.
green blinking LAN link is up and some activity is taking place.
red Link has either failed or has been brought down.
alternating green/orange Link is experiencing receive errors.
15
 Loading...