Owner’s Manual
SAFETY PRECAUTIONS:
• Readtheseinstructions.
• Keeptheseinstructions.
• Heedallwarnings.
• Followallinstructions.
• Donotusethisapparatusnearwater.
• Cleanonlywithdrycloth.
• Be sure use only properly rated power adaptors or
universalpowersupplies(pedalboardpowersupplies)
withappropriateattentionpaidtopropervoltage,am-
perageandgroundschemes.Impropervoltage/amper-
agebeingprovidedtothepedalmaycausepoortone,
inconsistentperformance,damagetotheunit,orallof
the above. Proper voltage, amperage and grounding
specsaresuppliedattheendofthismanual.
• REPLACE THE BOTTOM LID after battery replace-
ment before the unit is used. Some electronic parts
inside are staticsensitive andcanbe damaged from
evenasmallstaticchargefromcontactwithcarpetor
otherconductivesurfaces.DONOTSETAPOWERED
UNIT“CONTROLSUP”ON A METAL(or any) SUR-
FACEWITHTHEBOTTOMREMOVED!
CongratulationsonyourchoiceofMESA/Boogieandwel-
come to the MESAFamily!The same passionforexcel-
lence,commitmenttoqualityanddedication to customer
satisfactionispresentineachandeveryproductwemake
inourone-and-onlyshopinPetaluma,California,U.S.A.
Rest assured thatthe very samepeoplethat hand-build
thenestampliersin the worldbuiltyourpedal andyou
haveaccess to thesame resources for help thatall our
customersdo.Callonusanytimeandenjoy!
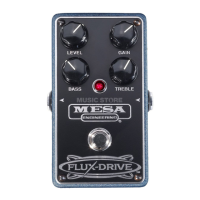
FLUX-DRIVE™
The FLUX-DRIVE offers a gain range that is similar to
Mesa’sGRIDSLAMMER™-inthatit’sstillanoverdrive–
butit’sanOverdrivethatgoesfartherupthegain-scale.It
alsooffersthemorecompleteToneshaping networkwith
individualTREBLE and BASS controls.Thisarchitecture
makes the FLUX-DRIVE a more complete preamp that
has versatilitybeyondthat of the moreclassicOverdrive
pedals.
Setting the FLUX-DRIVE’s GAIN control low, a region
of subtle soft-clip threshold sounds are revealed. This
smoothlytransitionstoa more aggressive,harmonic-rich
middlezonethat’sgreatforClassicRockrhythmorCrunch.
AttheupperendoftheGAINcontrolrealsaturationbegins.
Theattackenvelopegetsrounderandmorecompressed
creating a thick, harmonically rich landscape to solo in.
Thisregioniswaitingtopropelyourguitartotheforefront
ofaheaviermixandfreeyouup…soyourleadworkcan
beinspiredandmemorable.
FEATURES & CONTROLS
IN:
This¼”phonojackistheInstrumentInputforthe
device.PlugtheOutputofyourguitarintothisjackwitha
shieldedcableofgoodquality.Thejackisaswitchingtype
jackandthecircuitisturnedon whenacableisinserted.
Whenthecircuitisactivatedbyinsertingacable,theinter-
nalbatteryisbeingusedtopowerit–sobesuretounplug
thecablefromtheINPUTwhenit’snotinuse.
NOTE: The internal battery is switched to an “ON” state
(drawing voltage) by a switching element in the INPUT jack.
To prolong battery life, disconnect the cable from the ¼”
INPUT jack whenever the unit is not in use.
NOTE: If you wish to leave the INPUT connected perma-
nently – as in a pedal board scenario – it is advisable to
power the unit with an external 9V power supply. When an
external (plug-in) AC 9-volt power supply is used to power
the unit, the DC jack on the pedal automatically disconnects
the battery to avoid battery wear and preserve its useful life.
If you are going to use external AC power either for long
periods or permanently in a pedal board set-up, remove the
internal battery to prevent (forgotten) battery corrosion.
OUT:
This1/4”phonojackistheOUTPUTforthedevice.
ConnecttheOUTPUTtotheInputofyouramplier(orthe
INPUTofthenextdeviceinline)withashielded cableof
goodqualityandoftheshortestlengthpossible.
NOTE: A Word on Cables… Always use shielded instru-
ment cables of the best quality and shortest length possible
when connecting these types of devices. This will minimize
degradation of your sound, particularly high frequency
roll-off, due to the added capacitance in longer lengths of
cable. We recommend no more than 18-20 feet total (Input
and Output combined) between your instrument and the
termination at the INPUT of the amplifier. If you must use
longer cable lengths, you might consider the use of a Buffer
or Line Driver to keep the tonal integrity intact. While these
change the sound slightly, it will usually be preferable to top
end roll-off. And yes – those little 4” interconnects count
too, so count them in your cable length.
LEVEL:
Thisisthemasteroutputlevelanditcontrolsthe
amountof signalprovidedtothehostamplier. Itcanbe
usedeithertobalancelevelstocompensateforhighGAIN
settings- so that no jumpin level occurs when switched
outofBYPASS. AnotherapplicationishigherLEVEL set-
tingstopurposefullysendahottersignaltothehost amp
and“slam”theinputstageforincreasedclip,driveorgain.
GAIN:
Thiscontroldeterminestheamountofgain(over-
drive)inthesignalpath.
Setlow(8:00–10:30)itproducesarangeofsubtleover-
drive that’s soft andfurry, yet featuring the classic mid-
punchassociated withthesetypesofcircuits.Thisrange
isgreat forpushed andclip-thresholdrhythmsoundsand
toaddaslightbumpforBluessolosounds.
The middlerange (10:30– 1:30) offers themost useful
regionofgainthatbeginstosaturatebutstillretainsady-
namicpunchthat keepsnotesexpressiveandtight.This
works well for both Rhythm and Solo workacross many
stylesofmusic.
The highrange ofthe GAIN control (1:30 – 5:30) is all
about smooth saturation. This regionis mostsuited for
single note soloingwithits softer attackandmore liquid
response. It also has someapplications forbig crunch
chording,butisnotasharmonicallycomplexinthetopend
assomepedalsthatarededicatedtohighergainstyles.
BASS:
ThiscontrolworksintandemwiththeTREBLE
controltoadjustlowfrequencies. Set low(7:30–12:00)
thesoundwillbeskinny,tightandpercussive.Thehigher
range (12:00 – 5:30) introduces rich, full low end that
rounds out thesound andadds low-end thump. Heavier
pickattackwithhigherBASSsettingsmayproduceaslow-
er,lessarticulatefeelasyou“dragaround”theextralows.
TREBLE:
This control adjusts the amount of high fre-
quenciespresentinthemixand–unlikedeviceswithjusta
TONEcontrol-allowsyoutonetunethehighfrequencies
separatelyfromthelowfrequencies.TheTREBLEcontrol
makesuphalfofamorecomprehensivetonecontrolcircuit
thatoffersgreaterexibilityovertheentirefrequencyspec-
trum.Setlow(7:30–12:00)thesoundwillbedarker,more
rounded and seemingly compressed. The upper range
oftheTREBLE (12:00 – 5:30) brings in the cut, bite and
moreopentop-endtocreatea sound that is bright, tight
andaggressive.
AC POWER:
Thisstandard femaleDC Receptacle on
thepedalistheExternalPowerSupplyJackanditaccepts
themaleplugfromastandard9-Volt“wall-wart”ACpower
supply.Wheninstallingyourunitintoapedalboardutilizing
auniversalpowersupply(multi-outputpedalboardpower