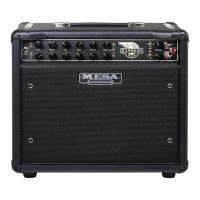
• FOOTSWITCH! To use the MESA Footswitch to access your Modes, the LEAD DRIVE’s Mode Select pull
switch must be pushed in/in the Rhythm position. Pulling the LEAD DRIVE control OUT defeats the Footswitch.
The Red LED on the Footswitch will be dark/o when the Rhythm mode is active and come on/illuminate
when the LEAD Mode is selected.
To engage the Lead Mode when the Footswitch is not connected or is unavailable, pull the LEAD DRIVE
control’s pull switch out. This pull switch provides easy access to the Lead Mode for recording sessions
when you might have the Head in the Control Room and Cabinets in another Tracking Room, or any time
you don’t have the Footswitch connected or handy.
• Travel Safe! Along with using the provided Slipcover and securing it in place with the Handle Flap, as
well as securing the amp itself and preventing it from sliding around in your vehicle and hitting something
or something doing the same to it, always remember to push all the Pull Pot switches back in before
transporting your amplifier. This simple precautionary habit can save you frustration and downtime should
one of the pots accidentally left in the pulled position get bumped against something in transport and
sheared o. When you’re done playing, try to get in the habit of using the palm and fingers flat against all
pots and gently pushing them in before putting on the Slipcover.
• Respect Your Ride! Much like a race car, your new amplifier is a high-performance vehicle capable of gain
and volume beyond what traditional amplifiers can deliver. The message here is that there is far more
available than you will likely ever need, so applying wisdom in your application is warranted.
Just like with a race car, it is unwise to jump in and slam the accelerator down to the floor…you would likely
run into trouble fast! The same concept applies to the gain (VOLUME 1 and LEAD DRIVE) and level (MASTER
and LEAD MASTER) control(s) here in your amplifier.
Extremely high settings of the controls, especially in combination, make you more prone to experiencing
microphonic tube annoyances such as ringing, squealing, rattling, or other forms of tube noise. This can
be avoided by more sensible settings of the controls.
Thankfully, we’ve had decades navigating these upper realms of performance, and your new amp benefits
from that experience. Still, as you will hear many times throughout this manual, you don’t need to set the
controls in their highest range to achieve great performance, and in fact, ignoring that practice may lead
to tonal compromises or annoyances that can otherwise be easily avoided.
• Power Integrity and Protection! Important! Never alter your Power Cable! Be sure to connect all three
terminals of your Power Cable, including the Ground! Failure to do so, and/or modifying your Power Cable
in any way – including using a 3-2 Ground Lift Adapter – may void your Warranty and increase the risk of
Electric Shock. Always connect your amplifier to a 3-pin Grounded AC Wall Receptacle with the proper AC
Line Voltage present (117 Volts US/Domestic).
• Protect Your Tone! It’s always a good idea to use a high-quality Shielded Instrument Cable of a reasonable
length – say no more than 15-18 feet – for your instrument to amplifier connection …unless you plan on using
a Buer. This will ensure the best sound and prevent loss of top end due to increased cable capacitance
which can rob your instrument signal of its integrity.
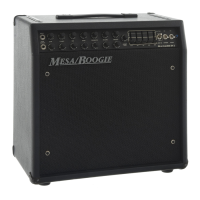
• Reverb/EQ Footswitch (Included) Located underneath your amplifier on the bottom side of its Chassis near
the Center you will find a stereo female ¼” jack for connecting the included Reverb/EQ Footswitch. When
connected via its supplied stereo cable, this Footswitch allows remote control of the Reverb and Graphic
EQ features on the fly
• Eects; Front or Rear? Depends on the Gear! Eects and processors are most often best suited for use
in one of two dierent places in your signal chain: 1) Between your guitar and your amplifier’s Input, or 2)
near the end of your (preamp’s) signal path in the amplifier’s Eects Loop.
PAGE 5