26
meteo – SP89 Manual
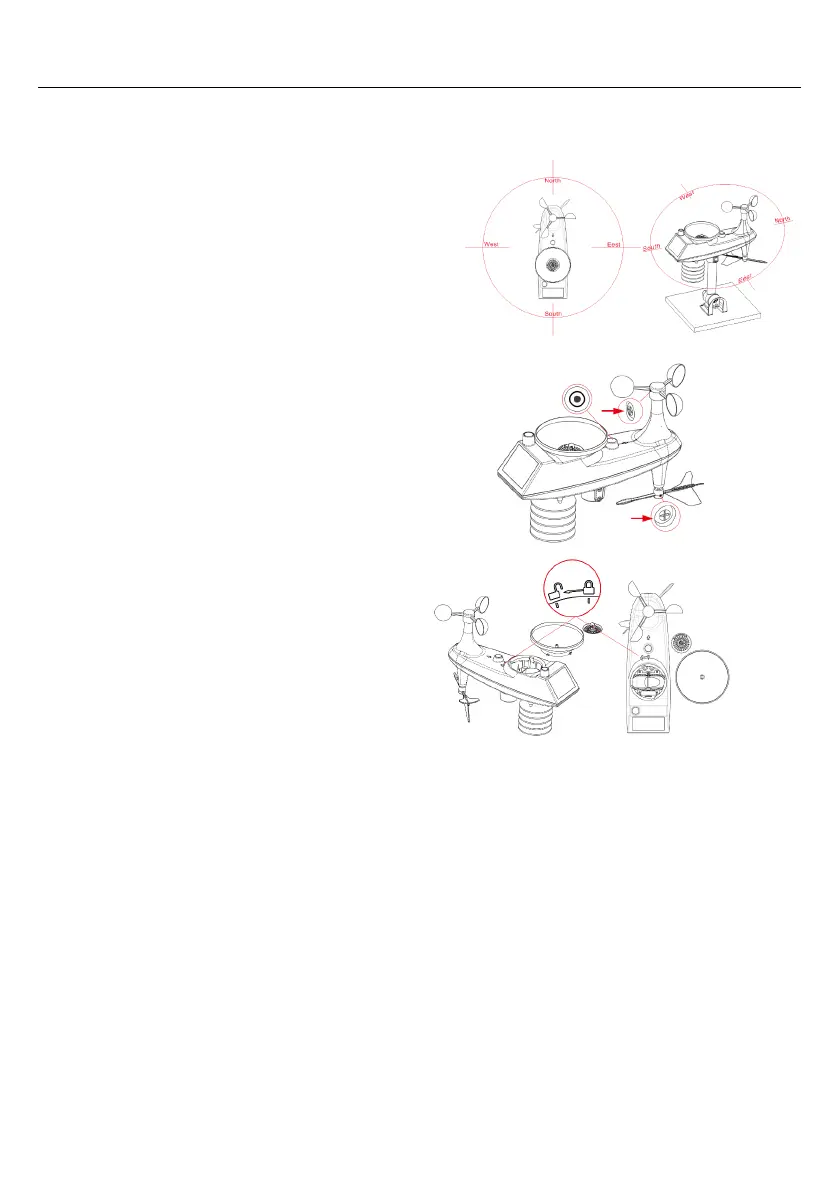
The base of the sensor is screwed to the platform and
the support frame.
Tighten the large nut that secures
the support rod to the base
When installing, adjust the sensor body so that the
solar panel faces south, otherwise the wind direction
will be wrong. Note the “N” North Embossed Mark on
the top of the sensor (requires a compass for
proofreading, and the “N” North Emboss mark is
identical to the “N” of the compass).
When installing the sensor, use the top bubble level to
ensure the sensor level, otherwise the accuracy of the
rainfall reading will be affected.
After completing the above two steps, lock the two
hexagon socket screws on the side of the sensor body.
When installing, the fixing screws of the wind cup and
the wind direction cursor should be tightened and
tightened.
The rainforest structure of the sensor needs to be
cleaned regularly (recommended cycle 1-3 months,
depending on the frequency of rain):
1. Remove the rainwater funnel (turn the rain sand
funnel according to the direction of rotation
shown).
2. Gently remove debris or insects from the rain
sensor.
3. Remove debris from the rainwater funnel itself,
especially debris from the funnel drain.
4. Remove the debris from the drain.
5. Reinstall the rainwater bucket.
6. Note: Do not apply oil to the rain sensor.
Note: Make sure the wireless sensor is installed within 100 meters of the weather station (empty, unobstructed).
According to the thickness of the obstacle between the wireless sensor and the weather station, the distance
should be shortened as much as possible (the distance after the wireless signal penetrates the obstacle will be
shortened), otherwise the data transmission may be disturbed.