Do you have a question about the Metra Electronics 95-5820 and is the answer not in the manual?
Details key features of the installation kit, including double DIN radio provision and stacked ISO mount units.
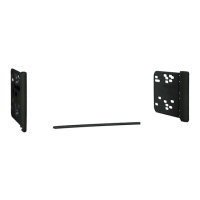
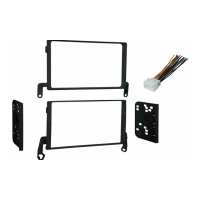
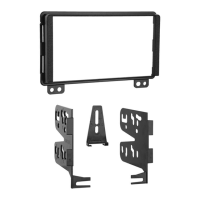
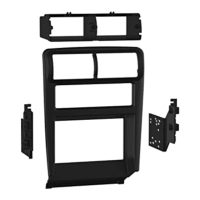
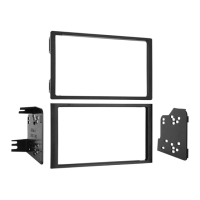
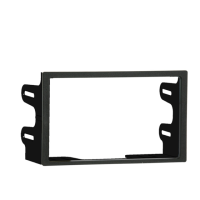
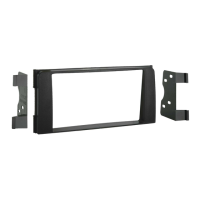
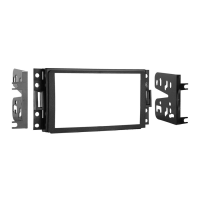
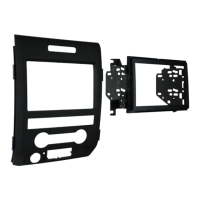
Lists and illustrates the included parts such as radio housing, brackets, trim panel, and panel clips.
Notes that wiring harnesses and antenna adapters are sold separately and directs users to the website for specific interfaces.
Specifies necessary tools for installation, including cutting tool, screwdrivers, socket wrench, Torx driver, and panel removal tool.
Instructions for safely disconnecting the battery and removing dashboard panels, including switch panel, trim panel, and side panels with A/C vents.
Details on removing the hazard/airbag switch assembly, cigarette lighter socket, and factory climate control from the radio trim panel.
Instructions for removing the factory radio by unscrewing it from the trim panel, preparatory to kit installation.
Guides the user on clipping the hazard/airbag switch, cigarette lighter socket, and climate control into the new radio housing.
Instructs on attaching the U-style panel clips to the radio housing in the correct locations for dashboard reassembly.
Details how to slide and secure side brackets onto the Double DIN trim plate, aligning holes and ensuring correct orientation.
Instructions for sliding the Double DIN or stacked ISO mount units into the bracket/radio housing and securing them with provided screws.
Guides on cutting off half of the top two mounting legs with their attached brackets for proper fitment.
Explains how to make wiring connections using the EIA color code chart, recommending strip, splice, solder, and tape methods.
Instructs to reconnect the negative battery terminal and test the installed unit for proper operation.
Details reassembling the radio and dash components in reverse order of disassembly, using the new radio housing.
| Brand | Metra Electronics |
|---|---|
| Model | 95-5820 |
| Category | Automobile Accessories |
| Language | English |