EasyManua.ls Logo

Metra Electronics 95-7323 User Manual

Default Icon
8 pages
To Next Page IconTo Next Page
Page #1 background imageLoading...
Page #1 background image
METRA. THE WORLD’S BEST KITS.™
© COPYRIGHT 2004-2011 METRA ELECTRONICS CORPORATION
APPLICATIONS
1-800-221-0932
metraonline.com
INSTALLATION INSTRUCTIONS FOR PART 95-7323
WIRING & ANTENNA CONNECTIONS (Sold Separately)
Wiring Harness:
• 70-1004 Hyundai/Kia harness 2004-up
Antenna Adapter:
• Not Required
Hyundai Entourage 2007-2008
Kia Sedona 2006-up
95-7323
• Double DIN radio provision
• Stacked ISO units provision
Panel Removal Tool Phillips Screwdriver • Small Flat Blade Screwdriver
A B
A) • Double DIN Trim Plate B) • Double DIN Brackets
TOOLS REQUIRED
KIT FEATURES
KIT COMPONENTS
Question and Answer IconNeed help?

Do you have a question about the Metra Electronics 95-7323 and is the answer not in the manual?

Metra Electronics 95-7323 Specifications

General IconGeneral
BrandMetra Electronics
Model95-7323
CategoryAutomobile Accessories
LanguageEnglish

Summary

KIT FEATURES

KIT COMPONENTS

WIRING & ANTENNA CONNECTIONS

Wiring Harness

Specifies the required wiring harness part number 70-1004 for Hyundai/Kia vehicles.

Antenna Adapter

States that an antenna adapter is not required for this installation.

TOOLS REQUIRED

Dash Disassembly

Panel surrounding shifter

Unclip and remove the panel surrounding the gear shifter.

Bottom radio panel screws

Remove two Phillips screws from the bottom corners of the radio panel.

Main radio panel removal

Unclip and remove the entire dash panel containing the radio, clock, and vents.

Radio securing screws

Remove four Phillips screws that secure the radio unit in place.

Radio disconnection

Unplug and remove the existing radio from the dash.

Double DIN radio provision

Wiring & testing

Locate factory wiring harness, connect adapter, and test the unit for proper operation.

Bracket/trim plate assembly

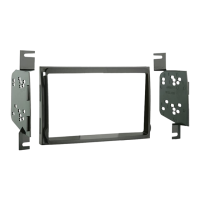
Snap Double DIN brackets to the inside edge of the Double DIN trim plate.

Radio installation

Slide the Double DIN radio into the assembly and secure with provided screws.

Dash reassembly

Reassemble the vehicle's dash in reverse order of disassembly.

Stacked ISO units head provision

Wiring & testing

Locate factory wiring harness, connect adapter, and test the unit for proper operation.

Bracket/trim plate assembly

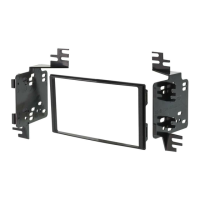
Snap Double DIN brackets to the inside edge of the trim plate.

Unit installation

Slide stacked ISO units into the assembly and secure with provided screws.

Dash reassembly

Reassemble the vehicle's dash in reverse order of disassembly.

Related product manuals