Do you have a question about the Metra Electronics 95-7329 and is the answer not in the manual?
Unclip and remove the panel surrounding the vehicle's shifter.
Remove Phillips head screws securing the radio trim panel, then unplug and remove it.
Remove Phillips screws securing the radio, then unplug and remove the radio unit.
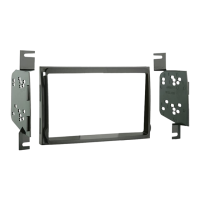
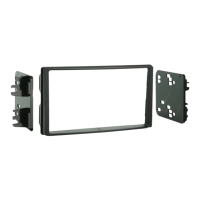
Snap the Double DIN brackets onto the inside edge of the Double DIN trim plate.
Slide the Double DIN radio into the bracket/trim plate assembly and secure it.
Locate factory wiring, connect mating adapter, reconnect battery, and test unit.
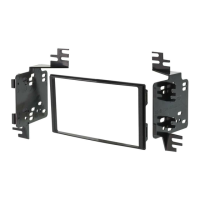
Snap the Double DIN brackets onto the inside edge of the Double DIN trim plate.
Slide the stacked ISO units into the bracket/radio housing assembly and secure them.
Locate factory wiring, connect mating adapter, reconnect battery, and test unit.
| Brand | Metra Electronics |
|---|---|
| Model | 95-7329 |
| Category | Automobile Accessories |
| Language | English |