EasyManua.ls Logo

Metra Electronics 95-7332 User Manual

Default Icon
8 pages
To Next Page IconTo Next Page
Page #1 background imageLoading...
Page #1 background image
INSTALLATION INSTRUCTIONS FOR PART 95-7332
95-7332
KIT FEATURES
Double DIN Radio Provision
Stacked ISO Mount Units Provision
A) Double DIN Trim Plate B) Double DIN Brackets
Wiring &
Antenna Connections (sold separ
ately)
70-1004 - Hyundai 2006-up / Kia2004-up Harness
70-7303 - Hyundai / Kia Harness 2009
40-KI11 - Kia Antenna Adapter 2007-up
KIT COMPONENTS
A
Small Flat Blade Screwdriver/ Panel Removal Tool
Phillips Screwdriver
1-800-221-0932
© COPYRIGHT 2010 METRA ELECTRONICS CORPORATION
www.metraonline.com
TOOLS REQUIRED:
APPLICATIONS
Hyundai Elantra
(Radio Delete Models)
2007-2010
B
Question and Answer IconNeed help?

Do you have a question about the Metra Electronics 95-7332 and is the answer not in the manual?

Metra Electronics 95-7332 Specifications

General IconGeneral
BrandMetra Electronics
Model95-7332
CategoryAutomobile Accessories
LanguageEnglish

Summary

Hyundai Elantra Installation Overview

Applications

Specifies the vehicle models and years for which the installation kit is designed.

Kit Features

Highlights the main capabilities and provisions of the installation kit.

Kit Components

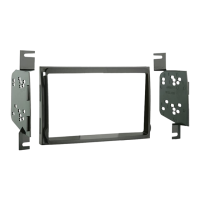
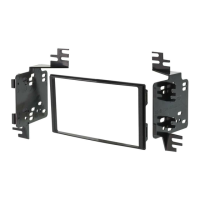
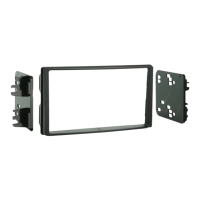
Lists the physical parts included in the installation kit for assembly.

Required Wiring and Antenna Connections

Details necessary wiring harnesses and antenna adapters sold separately.

Tools Required for Installation

Lists the essential tools needed to perform the installation.

Dash Disassembly Procedure

Disconnect Battery Terminal

Disconnect the negative battery terminal to prevent accidental short circuits.

Remove Radio Panel Assembly

Unclip the panel surrounding the radio, including a/c vents and hazard switch, then unplug.

Remove Blank Plate

Remove four Phillips screws securing the blank plate covering the radio cavity.

Kit Assembly and Unit Mounting

Attach Mounting Brackets

Snap the Double DIN brackets to the inside edge of the Double DIN trim plate.

Mount Radio or ISO Units

Slide the Double DIN or stacked ISO mount unit(s) into the bracket/trim plate assembly.

Final Assembly and Wiring

Wiring Connections

Make wiring connections using the EIA color code chart and unit instructions.

Test Unit Operation

Reconnect the negative battery terminal and test the unit for proper operation.

Reassemble Dash

Reassemble radio and dash assemblies in reverse order of disassembly.

Related product manuals