EasyManua.ls Logo

Metra Electronics 99-3411 User Manual

Default Icon
2 pages
To Next Page IconTo Next Page
Page #1 background imageLoading...
Page #1 background image
KIT COMPONENTS
Spacer
Equalizer
Dummy
Plate
KIT FEATURES
Shaft and
DIN unit
provisions
Equalizer
provisions
Radio Housing
99-3411
INSTALLATION
INSTRUCTIONS
APPLICATIONS
CAR PAGE
CHEVROLET
Metro 1998-01.........................................................1-2
GEO
Metro 1995-97.........................................................1-2
SUZUKI
Swift 1995-01..........................................................1-2
TOOLS REQUIRED
Cutting tool
Phillips screwdriver
Adjustable wrench
1-800-221-0932 www.metraonline.com
© COPYRIGHT 2001 METRA ELECTRONICS CORPORATION
rev. 71202
Question and Answer IconNeed help?

Do you have a question about the Metra Electronics 99-3411 and is the answer not in the manual?

Metra Electronics 99-3411 Specifications

General IconGeneral
ColorBlack
MaterialPlastic
Installation TypeDash Kit
DIN ProvisionYes
ISO ProvisionYes
Double DIN ProvisionNo
FunctionRadio Installation

Summary

Kit Features

Shaft and DIN Unit Provisions

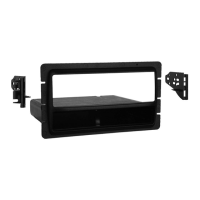
Describes provisions for shaft and DIN units in the installation kit.

Equalizer Provisions

Describes provisions for installing an equalizer in the installation kit.

Applications

Chevrolet Metro 1998-01

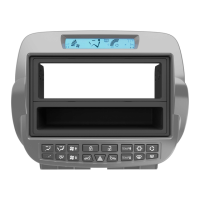
Details for installing the kit in a Chevrolet Metro from 1998 to 2001.

Geo Metro 1995-97

Details for installing the kit in a Geo Metro from 1995 to 1997.

Suzuki Swift 1995-01

Details for installing the kit in a Suzuki Swift from 1995 to 2001.

Installation Steps

Disconnect Battery and Remove Factory Unit

Steps to disconnect the battery and remove the factory head unit.

Prepare Radio Housing

Steps for preparing the radio housing with or without an equalizer.

Install Aftermarket Head Unit

Instructions for installing 2-shaft or DIN head units into the kit.

Wire Connections

Guide for locating and connecting the factory wiring harness.

Final Assembly and Testing

Steps for reconnecting the battery and mounting the new unit.

Related product manuals